Crazy Quilt Photo Frame

Crazy Quilt Photo Frame

Once I wanted to make a photo frame for a friend. There are so many ways to do this, but then I got an idea I still find great ;-))


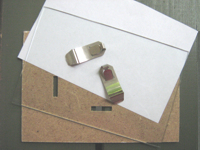
Crazy Quilt Photo Frame I used a simple glass frame as seen on the second photo that I already had at home and glued a kind of Paper Crazy Quilt with two windows for the photos onto the glass.
I used flower photos from an ad as paper and the only embroidery stitches I used where the zigzag stitches, because I wanted it to be simple.


Links:
Here at unikatissima:
Paper Crazy Quilt

Bargello

Bargello

While working with polymer clay I found a tutorial on how-to make items with a Bargello-look.

Then I made a little research to know what Bargello is (links see below):
It seems, that the first ‘Bargello craft’ was embroidery, but then the quilters worked Bargello-looking quilts, the polymer clay people made those items with a Bargello-look and the stampers and cardmaking people use this technique on paper. And I made my Bargello digitally as you can see on the picture ;-)
What a versatile technique ;-)


Links:
Embroidery:
Wikipedia: English entry for ‘Bargello’

Defining Bargello

How-to make Bargello needlework:
Bargello Work
Bargello needlepoint

Quilting:
How To Make Bargello Quilt

Polymer Clay:
Tutorial on how-to make items with a Bargello-look
Bargello Swap
Tutorial on how to make a Bargello pattern as cane and as sheet

Stamped Paper:
Bargello (English) (with explaining pictures)

Letter stencils

Letter stencils

Rosie showed her beautiful carved stamps and mentioned that she wants to carve letters too.
I prefer to use letter stencils, because I can use them in such a flexible way.
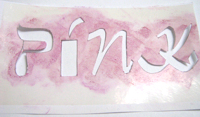
On the first photo you see a page from an artist book of mine yet to be finished. It has the theme ‘Colour’ and I stenciled the word ‘Pink’. On the other photo beneath you can see the stencil.

This is how I did it:
You’ll need:

  • Plain paper
  • Different fonts on your computer
  • Clear tape
  • Sharp knife, like an Xacto knife

What to do:

  1. Print the word you’re interested in in the requested size on paper.
    Note: You can use just one font, but I found different fonts for every letter more appealing.
    Note: Best are big fonts because they are easier to cut out.
  2. Put some clear tape on the print.
  3. Cut the letters carefully.
    Note: The tape makes the paper sturdier, so that the cutting is a little easier.
  4. Stencil your word wherever you want (paper, cardboard, fabric, glass, wood etc.).
    Note: I painted with a marker on the clear tape round the letters and smeared them with my fingers onto the paper.

Letter stencils The tape makes the paper not only sturdy, but also quite waterproof, so that you can use it several times with nearly every kind of colours. If necessary you can put tape on both sides of the paper prior to the cutting.

You can find a similar tutorial on instructables.com for making your own freezer paper and your own freezer paper stencil. I guess it is better for making bigger stencils, but I haven’t tried it.


Links:
Rosie’s carved stamps

Eraser Stamps Tutorials
Photo Stamps Tutorial

My Artist Book

Freezer paper and stencil tutorial

Flower Pounding

Flower Pounding

One day I found a tutorial on flower pounding. It sounded strange to me and I was really surprised what people do to innocent flowers ;-) (we have already seen that people stitch flowers).
Anyhow, the results are stunning!
As you can see on the photo, mine aren’t: I pounded on tissue paper in place of fabric and did something wrong. But this experience showed me that I’m not the woman to wallop little flowers ;-))


Links:
Flower Pounding
Inspiration: Google image results for ‘Flower Pounding’

Here at unikatissima:
Stitched Flowers

Stamped Appliqués

Stamped Appliques

Many of us have lots of beautiful stamps (some are self-carved, even from photos). Many have stamped not only on paper but also on fabric.
Nevertheless the idea of making stamped appliqués stroke me.


The tutorial is in German, but that is what she does in short:

  1. Stamp on fabric, best on smooth fabric on a rigid board.
  2. Heat set the colour by ironing the stamped fabric.
  3. To stabilize use iron-on backing or sew a zig-zag around.
  4. Cut the stamp close to it’s rim with good scissors (it’s called ‘narrow edged’ I think).

Great, isn’t it?


Links:
Making Appliqués with Stamps (German)

Here at unikatissima:
Eraser Stamps
Photo Stamps

Photo Stamps

Photo Stamps

I already presented links on eraser carving, but perhaps you want to go a step further and make stamps from your own photos?
I found a tutorial on how to prepare your photos for carving stamps.
The preparation of the photos is similar to the tutorial on making your own digital stamps (and while we’re at it why not making stencils from your own photos? ;-))
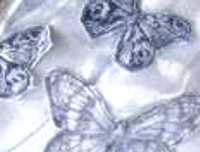
On the picture you see a stamp template I made from a photo from a magazine.
Not yet cut, first I must find a big eraser ;-)


Links:
Prepping Photos for Carving
Carving 101

art-e-zine: a cornucopia for artists
Make your own digital stamps
Stencil Art

Here at unikatissima:
Eraser Stamps

Folded Spirals

Folded Spirals

As I saw this tutorial on how to make vellum spirals I was amazed: such beautiful paper spirals and so easy to make!
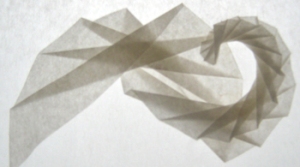
On the photo you see my spiral with changing directions.
It looks so frail against the light.

The tutorial is in German, but there are explaining pictures (you must look at the PDF file!).
What you have to do is basically:

  • Take a piece of vellum paper (I used some sandwich paper).
  • Cut a triangle from the vellum paper.
  • Cut a narrow, right-angled triangle from cardboard (best look at the explaining pictures).
  • Lay the cardboard triangle on the vellum paper triangle as described by the explaining pictures and fold the paper along the cardboard triangle. Then turn the vellum paper triangle and fold the paper again.
  • Continue as long as you like/as possible.

They suggest that you begin to experiment then:

  • try broader or narrower triangles for the paper
  • try broader or narrower triangles for the cardboard
  • use a narrow cardboard triangle for left folds and a broad for right folds
  • divide in halves every second fold after having finished etc.

I had a lot of fun and I hope so will you :-)

I intend to use those spirals in the future on cards, tags, in altered books and so forth.
I’d love to know about your experiments with folded spirals.


Links:
Tutorial on how to fold paper spirals:
(Download the PDF file)

Plaster Photo Holder

Plaster Photo Holder

I saw this Tealight Photo Holder. I found the idea stunning, but I didn’t like the look of it: for me it looks like a cut-open tealight ;-)
But then an idea stroke: How easy to make this from plaster!
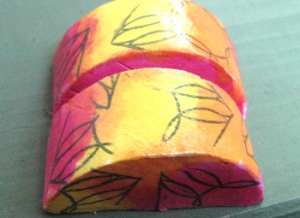
On the photo you see my plaster photo holder in action ;-)


And here is how I did it:

Plaster Photo Holder
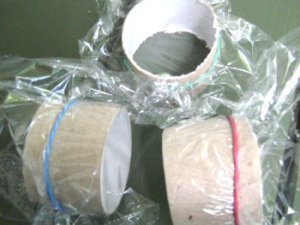
img 1: Take a toilet paper tube and cut in rings about 4-5 cm height (appr. 1.5 – 2 inches). I did this with the sharp knife on the photo.


Plaster Photo Holder
img 2: Wrap foil around, but let one side open. Fix the foil with elastic.


Plaster Photo Holder
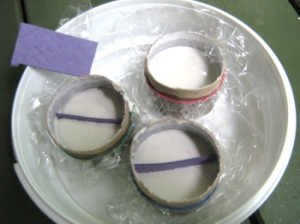
img 3: Fill the forms with plaster to a height of about 2,5 cm (about 1 inch). When full, insert a previously cut piece of cardboard as separator.

Let harden (about an hour).


Plaster Photo Holder
img 4: When the plaster went hard, but everything is still wet, tear apart the cardboard tube and break the ‘plaster coin’ where the separator cardboard stuck.


Plaster Photo Holder Plaster Photo Holder
img 5: Rub the cardboard rests away.
If your photoholder piece is uneven, now is the moment to fix it: Simply scratch away what you don’t like with the back of an old knife.

img 6: You can embellish them in so many ways.
I painted them immediately with watercolours, but you can also wait until thoroughly dry.


Plaster Photo Holder
img 7: When dried I stamped them and varnished them with medium gel.
Have fun!


Links:
Tealight Photo Holder
via Photojojo

Pendant-to-be-embellished

Pendant to be embellished
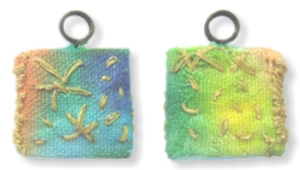
One day I wanted to have a pendant-to-be-embellished and decided to create it myself.
On the photo you see both sides of a charm of about 1,5 cm (appr. 0.6 inches) which I embellished with self-dyed fabric and some metallic yarn embroidery.
The embellishment isn’t quite what I dreamed of, but the core pendant worked well.

This is how I did it:
You need:

  • some cardboard (the thickness of the middle piece must be about the same as the wire)
  • some wire
  • glue

Pendant to be embellished img 1: Cut 3 equal pieces of your cardboard.


Pendant to be embellished img 2: Wrap the wire round a dowel to form the eye. Then turn a couple of times to form the peg and then form a bigger eye which will be hidden in the pendant.
Note: I prefer the hidden part of the wire to be an eye because then the wire can’t be dragged out by accident.


Pendant to be embellished img 3: Take the cardboard piece which will sit in the middle and trace your hanger.


Pendant to be embellished img 4: Cut out the place you will need for the hanger.


Pendant to be embellished img 5: Glue the hanger and the middle cardboard pieces onto one outer cardboard piece.
Note: I glue on also the cardboard piece in the eye to prevent having a hollow.
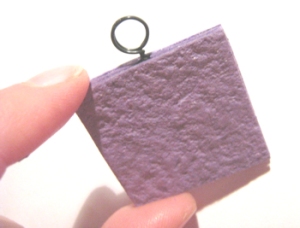
 

Pendant to be embellished img 6: Glue the other outer cardboard piece onto. Your pendant-to-be-embellished is finished and you may begin with the embellishments.


Pendant to be embellished Pendant to be embellished
img 7 & 8: This is a solution for a 2-eyed pendant.


There are so many ways to embellish your self-made pendant (mini collages, painted, beaded, stamped etc), I’d love to see them.
Please feel free to comment here to show your trinkets.

Have fun!