Homemade Paint Recipes

unikatissima Homemade Paint Recipes

Via one of my most preferred check-this-out blogs art for housewives I found a website with homemade paint recipes.
I liked best that they are made with stuff from household and tempera paint or food colouring.

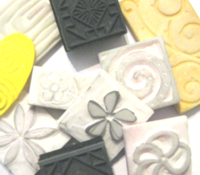
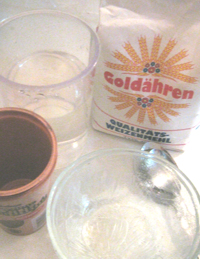
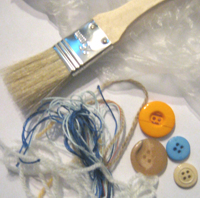
On the photo you see some of the ingredients I already gathered, but unfortunately I don’t have no tempera paint nor food colouring at home.
Still to purchase :)


Links:
Homemade Paint Recipes
via art for housewives

Collograph Printing

unikatissima Collograph Printing

Once again I found a tutorial about something I really want to try once: Collograph Printing.

I think it could be fun: to glue stuff onto cardboard, to ink it and to press a sheet of paper onto.
The paragraph where they wrote, that you can use moistened watercolour paper and get some embossed paper was most interesting to me.

I will ;-))


Links:
Collograph Printing

Stash scarf

unikatissima Stash Scarf
Once I found a great blog entry where somebody showed how she’s working her stash and scrap yarns into a scarf. Unfortunately I don’t find the entry back ;-(

In principle she sorted her stash according to colours (her example was made in blues) and from each yarn she crocheted a long row, every row even in another crochet stitch.
I hope that the photos are a help.


unikatissima Stash Scarf 
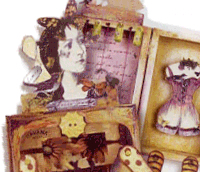
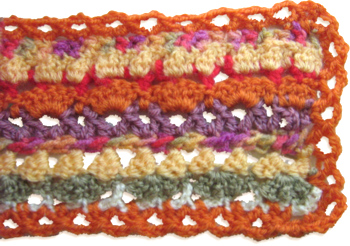
I found the result so stunning that I made a birthday gift for a good friend from it ;-)

By the way, this can surely be done in knitting, too!?


Pattern Paper

unikatissima Pattern Paper

I found a tutorial on how to make cute, fast, self-made packages. They are self painted, respectively self stamped boxes like the recycled card pillow box I presented some time ago.
Concerning the stamping I even found an instruction on how to mass produce greeting cards (it is no real mass production, but she’s making a good many beautiful greeting cards ;-))

I had no reason yet to make this, but it is not soo long until Christmas ;-))
On the photo I already arranged my (for a good deal self carved) stamps ;-)


Links:
Decorating Boxes for Special Occasions
Pattern Paper & Mass Produced Cards

At unikatissima:
Recycled Card Pillow Box
Eraser Stamps

Paper pen decoration

unikatissima Pen Decoration

I found a blog entry with a very cute idea: a really nice paper decoration for pens.
She offers an image that you can download and print, then you cut the decorations out and glue them onto your pens.

The blog is in French and these are the relevant points:
Click onto the image to download the PDF file with the right mouse button.
Print the pictures onto fine paper.
Cut out the images and glue onto ypur pens.
Hint: Cut the white picture with the cherry blossoms inside of the green frame.
When sharpening the pen cut first a piece of the paper away with a sharp knife and then sharpen the pen carefully.


Links:
Paper pen decoration (French)

Colorful Raggedy Scrap Scarf

craftster Raggedy Scarf

I found at craftster (again! ;-)) something beautiful: the colorful raggedy scrap scarf.

I imagine that some big self-made knitting needles could be used?!

I guess that I’ll have to purchase a lot of jumble sale fabric and old t-shirts, because I don’t have much fabric scraps ;-)
To-do-list again ;-))


Links:
At craftster:
Colorful Raggedy Scrap Scarf
Chopstick/dowel knitting needle tutorial

How to cut down a t-shirt
How to cut fabric strips from old t-shirts

Here at unikatissima:
Self-made Crochet Hooks And Knitting Needles

Plastic Straw Lantern

Plastic Straw Lantern from Ironed Straws

A long time ago I found a tutorial on how to make a lantern from plastic straws. I even tried it and it worked fine. But I gave the lanterns away without taking any photos ;-(

The instruction is in German with illustrating photos.


Here is a translation:
Material:

  • Plastic drinking straws
  • Parchment paper
  • Iron
  • An old wooden tray
  • Scissors
  • Double-sided tape
  • Tealight

That’s what you have to do:

  • Lay the parchment paper on your working space, perhaps lay even the old wooden tray underneath.
  • Lay the plastic straws neatly on the parchment paper and lay another layer of parchment paper on it.
  • Iron on highest setting, but without steam over the parchment paper on the plastic straws. The straws will melt.
  • If everything became flat, let the plastic cool down. You can hear that they cool because there is a cracking noise.
  • Carefully release the straws from the parchment paper.
  • Cut the ‘mat’ with the scissors in the form you want.
  • Fix the ends with the tape and put a tealight into.

What I learned when testing it:

  • Best iron in an well ventilated area, because there are (toxic?) vapours.
  • The ironed straws are very, very hot, so make sure to let them cool down thoroughly.
  • Never iron plastic directly, but put always some parchment paper between iron and plastic to protect the iron.
  • Make the lantern big enough, so that it can’t inflame from being to near the flame of the tealight.


Links:
Plastic Straw Lantern (German)
votive

Fried Marbles

craftster Fried Marbles.jpg

Once I found a tutorial on how to make fried/baked marbles: don’t they look great?
I couldn’t make them yet, but I have put them on my to-do-list.

For the wire work she did in the tutorial you can find inspiration and tutorials at WigJig University Jewelry Making Designs as I did for the Tealight Wire Spiral some days ago.


Links:
At craftster.org: Best way to make fried marbles+a suncatcher… kind of.

WigJig University Jewelry Making Designs

Here at unikatissima: Tealight Wire Spiral