Crazy Quilt Photo Frame

Crazy Quilt Photo Frame

Once I wanted to make a photo frame for a friend. There are so many ways to do this, but then I got an idea I still find great ;-))


Crazy Quilt Photo Frame 
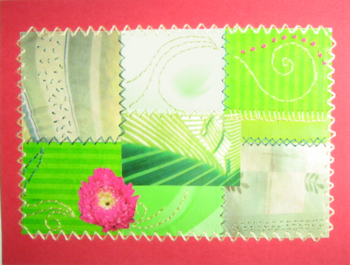
I used a simple glass frame as seen on the second photo that I already had at home and glued a kind of Paper Crazy Quilt with two windows for the photos onto the glass.
I used flower photos from an ad as paper and the only embroidery stitches I used where the zigzag stitches, because I wanted it to be simple.


Links:
Here at unikatissima:
Paper Crazy Quilt

Bargello

Bargello

While working with polymer clay I found a tutorial on how-to make items with a Bargello-look.

Then I made a little research to know what Bargello is (links see below):
It seems, that the first ‘Bargello craft’ was embroidery, but then the quilters worked Bargello-looking quilts, the polymer clay people made those items with a Bargello-look and the stampers and cardmaking people use this technique on paper. And I made my Bargello digitally as you can see on the picture ;-)
What a versatile technique ;-)


Links:
Embroidery:
Wikipedia: English entry for ‘Bargello’

Defining Bargello

How-to make Bargello needlework:
Bargello Work
Bargello needlepoint

Quilting:
How To Make Bargello Quilt

Polymer Clay:
Tutorial on how-to make items with a Bargello-look
Bargello Swap
Tutorial on how to make a Bargello pattern as cane and as sheet

Stamped Paper:
Bargello (English) (with explaining pictures)

Flexagons

Flexagon Flexagon Flexagon Flexagon

Flexagons a quite interesting things: a kind of card with four sides, and you can flip from one side to the other, back and forth.
But to better understand what Flexagons are, how they work and how you can make one for yourself take a look at the Flexagon page.
On the photos you see the four pages of my first (and up until now last) flexagon. (Click on thumbnails to see the photos.)
It doesn’t work so well, because it is to bulky:
I made them from cardboard to make them lasting longer, glued then cotton on to the cardboard, because I thought that fabric would bend better if you flip them over and over and then glued on the pieces of my hand-embroidered and tape-transfered collages on the appropriate places.
Next time I will see to it that they get slender.
But anyhow: I love my flexagon ;-))


Links:
Flexagons

And if you want to embroider your collages:
English Embroidery Stitch DiagramsDeutsche Stickstichbeschreibungen
(see also Paper Crazy Quilt)

If you want to know more about image transfers
Easy Photo Transfers (different techniques)
Image Transfer
Packing Tape Image Transfers
(see also Artist Book)

Here at unikatissima:
Paper Crazy Quilt
Artist Book

Bead Picots

Bead Picots

Bead picots are a beautiful way to give you work a neat border.
I was therefore glad to find this tutorial on how to make bead picots tutorial on how to make bead picots.
On the photo you see a freeform bead embroidered pin I made; I worked the bead picots all around the pin.
I also made once a little book (given away without taking a photo ;-(), where I used the bead picots to border the paper pages – it look great, too.
Next time I’ll make an Artist Book, I will use bead picots on the paper, as well as on the next crochet purse I will make (but no one knows when this will be ;-)), perhaps even the next greeting card I’ll create and who knows what ideas I’ll get by then ;-)


Links:
Bead Picot Instructions
The original site doesn’t exist any more and is now available through webarchive: Bead Picot Instructions

Here at unikatissima:
Freeform Bead Embroidery
Artist Book

Organic Stripes

Organic Stripes

Note: the Random Stripe Generator doesn’t exist any more, but you can find two new links in my entry Random Stripes Generator.

While knitting or crocheting you sometimes want to stripe your workpiece. I find it difficult to design organic looking stripes.
Math can help here (although I’m not a very mathematical woman ;-)): At Fuzzy Galore you can find an article about the Fibonacci sequence which sounds perhaps difficult, but is quite easy.

And those who don’t want to figure out their stripes themselves can use the Random Stripe Generator. (I just tried the generator, but it didn’t work properly. Hopefully it will ‘recover’.)
(It did work properly, but I didn’t know how to use it ;-)
My problem was, that I entered a stripe width and thought, that this was the max. width.
But for the stripe width selection, it requires that you specify exactly which widths you want. So if you want widths of 1, 2, 3, 4, or 5 rows, you need to select all five of those check boxes, rather than just the box next to ‘5’.
Try it and you will get wonderfully striped patterns. :)))


Links:
Article about the Fibonacci sequence
Random Stripe Generator

Here at unikatissima:
Random Stripes Generator

Freeform Embroidery

Freeform Embroidery - Freeform Sticken

On the photo you see my idea of Freeform Embroidery which was highly inspired by ‘Rock Pool’ and ‘Laying It On The Line’.

I used a piece of old (but clean! ;-)) bedsheet as base. First I laid some worsted and funky yarns on it which I fixed with couching stitches (at the top of the photo). Then I stitched some french knots (light yellow on the photo). Below is my first attempt at ply-split braiding which I fixed with some couching stitches too.

It is one of my many UFOs (‘unfinished objects’), but one day I will come back to it ;-)


Links:
Inspirations: ‘Rock Pool’ / ‘Laying It On The Line’

English Embroidery Stitch Diagrams
Deutsche Stickstichbeschreibungen

Couching stitches (English)
Couching stitches (German)

French knots (English)
French knots (German)

Ply-split Braiding: a (very) short description and resources
PDF Ply-split tutorials by Peter Collingwood (scroll down)

Paper Crazy Quilt

Paper Crazy Quilt

I love Crazy Quilts, because it is a kind of Freeform work, but I don’t like sewing. So I began to make my quilts on and with paper.
On the photo you see a card I made with this technique.
I didn’t only embroider the seams but I also used some fancy stitches like French Knots e.g. (the red dots on the photo) onto the surfaces.

To make your own Paper Crazy Quilt, find matching papers and cut them into pieces. On the photo I used rectangles, but the typical Crazy Quilt distribution is also beautiful (here you can find some lovely blocks here you can find some lovely blocks).
Glue the collage on thin paper and then begin embroidering (carefully!) as if it was a real Crazy Quilt (here is an online class for Crazy Quilts).
To finish you glue or embroider your Paper Crazy Quilt on cardboard.


Links:
Crazy Quilt blocks
Tutorial moved to: Crazy Quilt blocks

Online class for Crazy Quilts

English Embroidery Stitch Diagrams
Deutsche Stickstichbeschreibungen

French knots (Knötchenstiche) (English)
French knots (Knötchenstiche) (German)

Stitched Flowers

Stitched Flowers

While I was browsing through the projects of STITCH I found Precious Petals. They ‘glue’ the flowers on fabric and then embellish with decorative stitching.
A stunning idea which is still on my to-so list.


Links:

STITCH project: wonderful projects around stitching (how surprising ;-))


Embroidery Crust

Surface Embroidery

The title is far from perfect ;-)
Better look at the original instruction on how to encrust calico with embroidery.
On the photo you see my first (and only) attempt at doing it, but I didn’t get far with it and created (another! ;-)) UFO (unfinished object).
But the real thing is soo beautiful!


Links:
Stitch with the Embroiderers’ Guild – A magazine for creative stitchers
Online projects from the Embroiderers’ Guild

Encrusting Calico