Faux Papyrus

Faux Papyrus

As I saw the title ‘Papyrus’ in connection with ‘crafting’ (English for ‘bricolage’) I was instantly interested.
And the technique is easy and convincing.
The tutorial is in French, but there are very good illustrating photos.


And this is, what you have to do:
Materials:

  • gauze or cheesecloth
  • wallpaper paste
  • some coffee for colouring
  • a soft brush
  • a sheet of plastic foil
  • some water

Prepare the wallpaper paste with some cold coffee, not to liquid and not to solid.
Put the gauze on the sheet of plastic foil and coat them with the paste.
Let dry on a flat surface.
Check the photos in the tutorial to better understand what to do.

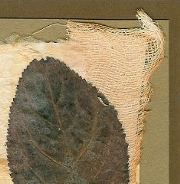
I used my piece of Faux Papyus on a card with a leaf and some other background papers.


Links:
Tutorial on how to make Faux Papyrus

Fractal Art

Fractal Art

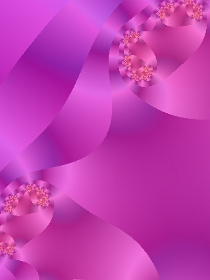
Once I saw some fractals in internet and – as always;-)) – I wanted to create something like this too.
Some researching resulted in finding the Fractal Explorer, a freeware fractal generator.
I created many fractals and everyone was absolutely beautiful.
As I saw them on my screen I was delighted. I then let them be printed as photos in 20 x 30 cm (about 51 x 76 inches) and was thrilled. And in the end, when they were glued to 40 x 60 cm watercolor paper (about 102 x 152 inches) I stood in awe.
Really! :-))

If you like to see my fractals take a look at art (Simply click on the thumbnails to get a (German) description. If you want to enlarge them further, click then on the image.)


Links:
Wikipedia: English entry for ‘fractal’

Fractal Explorer: a freeware fractal generator

Result of Google image search for ‘fractal’

Coloured Yarns

Coloured Yarns

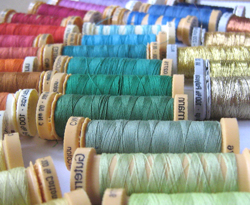
I like to work little pieces where not much yarn is required and I like to use a different colour and colour shade with each piece.
Unfortunately I can’t afford to always buy the shades I like: on the one hand it is too expensive and on the other hand I don’t have enough place for such a big stash.
Therefore I like to work with four to six sewing yarns in similar shades and – if I am in the mood – one or two metallic sewing yarns. They don’t take so much place and I can get much more subtle shades by combining them then I ever could buy.
I put the chosen yarn in a dessert bowl, so that they don’t roll away and begin crocheting.
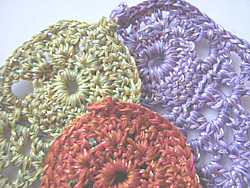
Coloured Yarns I worked the Crochet Chamsas I presented yesterday with this ‘technique’.


Links:
Here at unikatissima:
Crochet Chamsa

Starburst Card

Starburst Card

I love many of the string art patterns, but I would never make them, because I find them on the other side quite old fashioned.
Although the I thought that I could use the pattern to create a card.
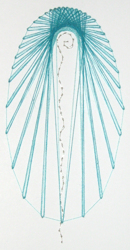
I pricked the holes of the Starburst pattern Starburst pattern (template here template here) from The Art of Thread Design The Art of Thread Design into my cardboard and measured the length of thread. About 8m (about 26 feet ;-)). Then I started to weave the thread through the holes. I hadn’t finished the first two stitches when my thread became a firm knot. Totally entangled. Absolutely un-detangable.

Therefore I had to try something else with new thread.
I thought (what I should have done beforehand ;-)) that in string art they use pegs (nails) to fix the thread at the predefined points. Then I realised that I could have a kind of pegs too: if I weave the thread over and under the holes (from hole 1 to hole 2, 2 to 3, 3 to 4 etc) and back, I get a coloured frame where the holes are, I get pegs, because one thread goes from the front side to the back side and vice verso (see picture).

Starburst Card-Thread weaving
Click to enlarge

Now I could wrap the thread around my self-made pegs just in the same way they are doing it in string art around the nails.

I enjoyed working on the Starburst pattern, but at one end it is very narrow and I only could use two layers in place of three.


Links:
The Art of Thread Design

Starburst pattern instructions
Starburst pattern template

The original site doesn’t exist any more and is now available through webarchive:
The Art of Thread Design

Starburst pattern instructions
Starburst pattern template
Translations of Crochet Terms

Translations of Crochet Terms

To read foreign-language crochet instructions one needs translations of the relevant terms.
I found a site with translations in several languages:
Crochet Terms in Six Languages (English, Spanish, Italian, French, German, Polish).
Happy crocheting! :-))


Links:
Crochet Terms in Six Languages (English, Spanish, Italian, French, German, Polish)

Crocheted buttons

Crocheted buttons

I find it often difficult to find the right buttons for my needlework. At Univers du crochet d’art I eventually found an instruction on how to crochet (and embroider) buttons. It is written in French, but the tutorial is illustrated so that I could easily understand what to do.
On the photo you see my self-made button, it is worked in crochet and then embellished with embroidery.

Addendum of June 23, 2010: The Univers du crochet d’art moved and I didn’t find the instruction there and nowhere else in internet.
But there are many instructions for crocheted buttons, you simply have to choose another one ;-)


Links:
Univers du crochet d’art: A french website on crochet
Page moved to: A french website on crochet

Crocheted buttons (French) (with explaining pictures)
The link doesn’t work anymore, try the Google search result for ‘crochet button’

Extract Dye From Plants

Extract Dye From Plants

At eHow you can find a lot of instructions on how to extract dyes from plants or parts of plants and so forth.
One instruction is e.g. ‘How to Extract Dye From Leaves and Grass’.
I tried some of them with different results, some worked better then others.
But unfortunately I didn’t record what I did, so if I needed some dye today I had to start from scratch.
That way everything stays interesting for me ;-)))


Links:
eHow: A website with how-tos galore
How to Extract Dye From Leaves and Grass
Search results for ‘extract dye’ at eHow

Self-made Lamp

Self-made Lamp

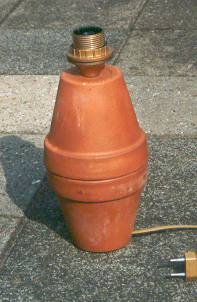
This isn’t a real instruction but more of an inspiration. At Atelier Verena you can follow a class about recycling. At her website, Atelier Verena describes how to make your own recycled lamp (last item on page): glue two terracotta pots together, wrap them with fabric, use some fabric stiffener and paint it with acrylic colour.
I haven’t done it yet, but I think that you also can wrap the glued pots with paper mache or plaster of paris and do some kind of collage or decoupage or glueing interesting tissues an it and so forth.


Links:
Self-made Lamp (last item on page)

Designing a Celtic Knot

Designing a Celtic Knot

No, this is no April Fool’s joke ;-)
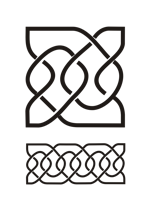
With this instruction you can construct your very own Celtic knot, a pattern I used to find too complicated to design of my own.
The image shows a Celtic knot I created some time ago, but I still like it.
I have nearly forgotten about this technique, but now that I rediscovered it, I have several ideas how to use it more often.


Links:
Designing a Celtic Knot
The original site doesn’t exist any more and is now only available through webarchive: Designing a Celtic Knot (Constructing a Celtic Knot)