Fabric Necklace with Polymer Clay Clasp

etsy ljeans Fabric Necklace with Polymer Clay Clasp

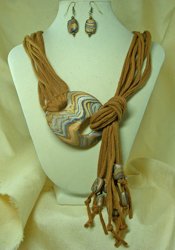
The fabric necklace with polymer clay clasp makes me think of the t-shirt necklace :)


Links:
Fabric Necklace with Polymer Clay Clasp (TShirt Necklace with Polymer Clay Clasp and Matching Earrings)
=> not a tutorial

Here at unikatissima:
Fabric Necklace with Beads

Fabric Necklace

EverythingEtsy Fabric Necklace

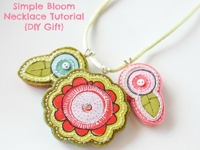
This fabric necklace is made with so-called ‘fabric scrapbook stickers’, that seem to be fabric elements that you can tape into scrapbooks.
However, I am sure that you can also cobble together yourself such a cute necklace :)


Links:
Fabric Necklace (Simple Bloom Necklace Tutorial {DIY Gift})
via: Scrapbook Fabric and Felt Sticker Necklace Tutorial

Fabric and Wire Bracelets

Missficklemedia Fabric and Wire Bracelets

I find these bracelets from old saris really beautiful!
In the same way you can easily make matching earrings, pins, beads etc. :)


Links:
Fabric and Wire Bracelets (Recycled Sari Silk and Gemstone Jewelry)

Here at unikatissima:
Entries with the tag ‘earring’
Entries with the tag ‘pin’
Entries with the tag ‘bead’

Plastic Bag Beads

The NewNew Plastic Bag Beads

I presented already some entries to the subject plastic bags, but none made beads from.
The basic material is a ‘fabric’ from plastic, they’re making beads from just as paper beads.
I like this combination ;-)


Links:
Plastic Bag Beads (How-To: Turn Bags into Beads)

Here at unikatissima:
Fabric from Plastic Bags
Entries containing the words ‘plastic’ and ‘bead’

Bead Intertwists

creadoo Perlenschlingen-Bead Intertwists

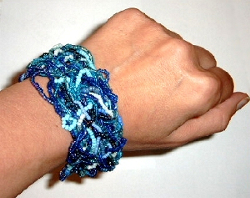
During my ‘beading time’ I wrote a (German) tutorial for bead intertwists as on the photo.


Here is the English translation:
Material:
for the bracelet:

  • selection of beads (here: various seed beads)
  • colour matching thread
  • needle

additional items:

  • pins
  • styrofoam or cork board
 

What to do:
unikatissima Bead Intertwists - Material
First make a selection of beads and place them at your disposal.

Tip: Uniform colouring connects visually; different forms, sizes and transparency makes it more vibrant.

In this example I used eleven different sorts of blue seed beads, some transparent, some with silver lining and some opaque.
More variety in sizes brings more vitality. The border between vitality and disquietness is to your liking.


unikatissima Bead Intertwists - step 1
Thread beads and make a frame of approximately the right size.

Connect the bead strings from time to time to the borders of the frame.


unikatissima Bead Intertwists - step 2
Weave more bead strings into the frame, connect them from time to time to other strings.

Tip: On the photo the inner bead strings are sometimes multi coloured.
During the work I found out, that this isn’t necessary and that one coloured strings mostly look better.


unikatissima Bead Intertwists - step 3
Continue to weave in bead strings: long strings, short strings, lengthwise, crosswise, over and under.

Tip: When the ‘fabric’ gets tighter it’s easier to work in the bead strings in sections.

On the photo I append about half a dozen white beads to a white string.

Pay attention to make a ‘fabric’ of consistent denseness.


unikatissima Bead Intertwists - step 4
When everything is finished attach any closure, e.g. a bead loop and a colour matching button.

I didn’t make any closure, because the item on the photo wasn’t meant to be a bracelet.


Notes:

  • If the bead strings are carefully woven the ‘fabric’ keeps quite good its form.
  • I used simple cotton thread for the example and wove in the ends with some glue. I could do it this way, because the item was intended to be glued onto a sturdy surface and there would be no strains to the threads.
  • At the beginning it can be difficult to keep the form. The styrofoam or cork board can be of great help when pinning the item to the board.

Have fun!


Links:
Bead Intertwists (Perlenschlingen) (German)
Kumihimo Beads

Kumihimo Beads - Kumihimo Perlen

This Thursday’s 2nd challenge Beaded Beauties gave me the opportunity to do something I wanted to do for a long time: making Kumihimo beads.
Kumihimo is a Japanese technique to braid beautiful cords, but then: what do I do with the cord? It’s way too beautiful (and too labour-intensive! ;-)) to be used as a shoelace for instance.
I thought that it would make wonderful beads, but usually the braids are finished by wrapping some string around the braid and such beads would be much too long.


Kumihimo Beads - Kumihimo Perlen Therefore I figured out how to make my own Kumihimo beads.
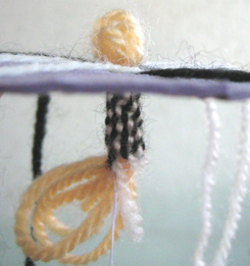
The technique is far from perfect and I hope that you will try it and give suggestions to enhance the technique.

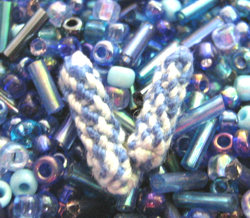
On the first two photos you see Kumihimo beads I made, the blue ones with cotton thread and the black and white ones with acrylic yarn.
All beads were made with 4 light and 4 dark coloured yarns, but I changed the initial positions on my cardboard Kumihimo disk.
You see at the surrounding seed beads how tiny my Kumihimo beads are.


Kumihimo Beads - Kumihimo Perlen What to do:
Make your Kumihimo cord. I worked about 20 rounds.
When finished, pull all threads into the bead.

And that’s where the problem lies:
If you make the Kumihimo cord ‘the normal way’ you won’t have enough place into the bead to pull all 16 threads in (8 threads at each side of the bead).
I tried different techniques to ‘reserve’ a place for the thick bunch of threads. The best one I found was making a bundle of 8 threads of the same gauge and using it as ‘filler’, that means, working around them (see third photo).


Kumihimo Beads - Kumihimo Perlen The Kumihimo beads are from fabric and can be stitched however you want. On this photo I surrounded my Kumihimo bead by seed beads and made a kind of Freeform Peyote Pendant.


Links:
This Thursday’s 2nd challenge Beaded Beauties

unikatissima’s Kumihimo How-to
unikatissima’s Freeform Peyote How-to


Paper Beads

Paper Beads

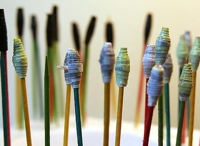
I always loved paper beads, but never knew what to do with them. Then one day I created an artist book (more to follow in a later entry) and – eureka! – I found a use for those paper beads: I wanted to use them on the fibers embellishing the spine of my book (see photo). For those beads I used an advertisement flyer from a furniture dealer with lots of sofas in matching colours. They just had the right size for the beads ;-)
To make the beads I used those instructions on how to make paper and fabric beads.
It can also be used to make the fabric beads I mentioned before.
Later on I found an entry at craftster: A bowl made out of paper beads! I stood there in awe!
But I think that I never will make such a bowl – it’s all a question of having or not having patience ;-)


Links:
Instructions on how to make paper and fabric beads

craftster.org: A website with sooo many craft ideas, inspirations and tutorials
A bowl made out of paper beads

Here at unikatissima:
Making Fabric Beads