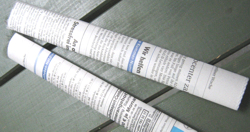
Folded Paper Strips of Equal Width

Folded Paper Strips of Equal Width

Sometimes you need folded paper strips of the same width, when weaving paper baskets e.g., making a magazine purse or perhaps when making accordion folds.
Making those strips can be a time-consuming and frustrating experience – but it can be very fast and easy as well: Once I read somewhere (unfortunately I don’t remember where exactly) that you only have to roll your paper sheet over a dowel and then flat the paper roll.
Easy peasy, isn’t it? ;-)
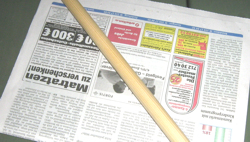
 

Folded Paper Strips of Equal Width You need your sheet of paper and a dowel.
I used here one of my giant knitting needles.
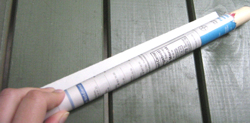
 

Folded Paper Strips of Equal Width Roll your sheet of paper on the dowel.


Folded Paper Strips of Equal Width Pull the dowel out of the roll and flatten the paper roll.
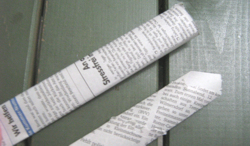
 

Folded Paper Strips of Equal Width This way you get paper strips which are of the same width over the whole length.
Once I made a bowl like these magazine bowls. I preferred the ends of my paper strips to be thinner then the center, so that everything is about the same width everywhere.
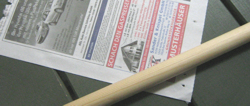
 

Folded Paper Strips of Equal Width Roll your sheet of paper diagonally on the dowel.


Folded Paper Strips of Equal Width The paper roll gets longer, but the ends are thinner than the center.
You can now overlap the strips and create a strong bowl.


Links:
Paper woven basket
At craftster.org:
Magazine purse
Magazine bowls

Google image search result for ‘magazine bowl’

Tetrapak Coin Purse

Tetrapak Coin Purse

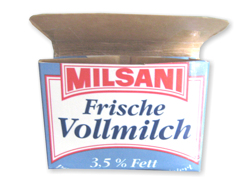
We’re drinking much apple juice and milk – and they come in tetrapaks. We must have ‘produced’ tons of it!
Therefore I love the idea of recycling at least on of them into an coin purse.


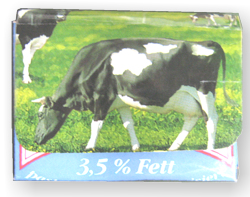
Tetrapak Coin Purse On the photo you see my first attempt (still without button): it’s such a nice idea :)

Links:
Tetrapak Coin Purse


Kirigami Flower

Kirigami Flower

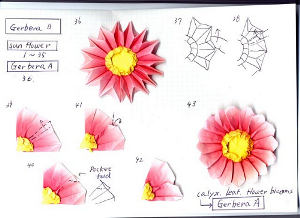
While browsing Origami links I found a tutorial on how to cut Kirigami flowers, a technique we used when we were children for cutting snowflakes.
I hadn’t realized that this technique is so widely usable and brings so beautiful results.
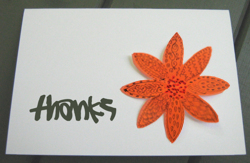
On the photo you see a flower I cut in very short time for a greeting card and suddenly I felt the urge to doodle on it ;-)
Every petal looks different now.
The photo is bad, but I hope that you can see what I am talking about.


Links:
Kirigami Flower

unikatissima’s entry about Zentangles

Folded Spirals

Folded Spirals

As I saw this tutorial on how to make vellum spirals I was amazed: such beautiful paper spirals and so easy to make!
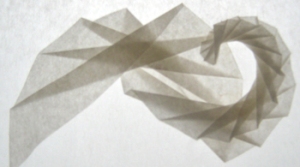
On the photo you see my spiral with changing directions.
It looks so frail against the light.

The tutorial is in German, but there are explaining pictures (you must look at the PDF file!).
What you have to do is basically:

  • Take a piece of vellum paper (I used some sandwich paper).
  • Cut a triangle from the vellum paper.
  • Cut a narrow, right-angled triangle from cardboard (best look at the explaining pictures).
  • Lay the cardboard triangle on the vellum paper triangle as described by the explaining pictures and fold the paper along the cardboard triangle. Then turn the vellum paper triangle and fold the paper again.
  • Continue as long as you like/as possible.

They suggest that you begin to experiment then:

  • try broader or narrower triangles for the paper
  • try broader or narrower triangles for the cardboard
  • use a narrow cardboard triangle for left folds and a broad for right folds
  • divide in halves every second fold after having finished etc.

I had a lot of fun and I hope so will you :-)

I intend to use those spirals in the future on cards, tags, in altered books and so forth.
I’d love to know about your experiments with folded spirals.


Links:
Tutorial on how to fold paper spirals:
(Download the PDF file)

Flexagons

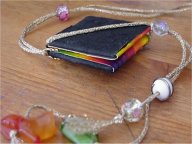
Flexagon Flexagon Flexagon Flexagon

Flexagons a quite interesting things: a kind of card with four sides, and you can flip from one side to the other, back and forth.
But to better understand what Flexagons are, how they work and how you can make one for yourself take a look at the Flexagon page.
On the photos you see the four pages of my first (and up until now last) flexagon. (Click on thumbnails to see the photos.)
It doesn’t work so well, because it is to bulky:
I made them from cardboard to make them lasting longer, glued then cotton on to the cardboard, because I thought that fabric would bend better if you flip them over and over and then glued on the pieces of my hand-embroidered and tape-transfered collages on the appropriate places.
Next time I will see to it that they get slender.
But anyhow: I love my flexagon ;-))


Links:
Flexagons

And if you want to embroider your collages:
English Embroidery Stitch DiagramsDeutsche Stickstichbeschreibungen
(see also Paper Crazy Quilt)

If you want to know more about image transfers
Easy Photo Transfers (different techniques)
Image Transfer
Packing Tape Image Transfers
(see also Artist Book)

Here at unikatissima:
Paper Crazy Quilt
Artist Book

Fractal Pop Up

Fractal Pop Up

I already cut different pop ups, and I find this one quite elegant.
I haven’t done it yet, but I surely will one day.

(If you like the fractal repeats, take a look at the previous mentioned Fractal Art.)


Links:
Fractal Cut

Wikipedia: English entry for ‘fractal’Deutscher Eintrag für ‘Fraktal’

Here at unikatissima:
Fractal Art

Paper folded bracelet

Paper folded bracelet

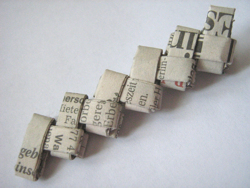
Of course you don’t see the bracelet on the photo, but my first and only attempt to make such a bracelet.
Better look at the photos in the tutorial on how to make a Starburst wrapper bracelet at craftster.org.
After I’ve finished the little piece on the photo I had enough – it’s such a fiddly work ;-)
If you like this technique, try the tutorial on how to make a wrapper purse!


Links:
craftster.org: A website with sooo many craft ideas, inspirations and tutorials
Starburst Wrapper Bracelet
Chip Wrapper Purse Instructions

Folded Roses

Folded Roses

Working with paper is always fun to me. Therefore I check everything that shows me how to fold, glue or colour papers.
This time it was an instruction on folding roses instruction on folding roses I took delight in. They look nearly real!


Links:
ParchCraft Australia: a website with lots of project ideas, instructions and patterns
Folded Roses
Tutorial moved to: Folded Roses
Note: If you can’t open it, try the webarchive version