Polymer Clay Faux Ivory

Polymer Clay Faux Ivory

One of the beautiful applications of polymer clay is the imitation of precious materials. Therefore I loved the tutorial on how to make faux ivory.
On the photo you see a pendant with faux ivory I made quite a time ago and I still like the combination of this matte shining black and the pale ivory.


Links:
Polymer Clay Faux Ivory

Custom Card Box

Custom Card Box

As mentioned before you sometimes need a little box.
I found instructions on how-to fold a custom card box which can easily be used as little gift box.
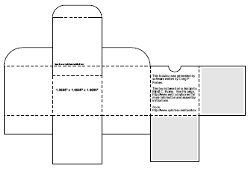
And best of all there is Craig Forbes’ Tuckbox Generator where you can fill in the sizes you want and get a PDF file with your special custom template.


Links:
Custom Card Box
Craig Forbes’ Tuckbox Generator

unikatissima’s entry:
Recycled Card Pillow Box

Hiragimi

Hiragimi

Once I found a tutorial on Hiragimi braid, but not only can’t I find it back, while googling for ‘Hiragimi’ I dind’t find anything.
Strange!
But at the tutorial the diagrams weren’t so good, so I sketched the diagrams again for myself.
And so you can download them now from here ;-))

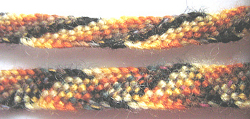
Hiragimi braid is similar to Kumihimo braid, but the braid won’t be round but flat (see photo).
When making my braid I found it most difficult to get the tension right, I always pulled more to one side than the other so that the braid became curved ;-)


Links:
unikatissima’s Hiragimi (PDF, ~460 KB)
The PDF includes a template for a cardboard disk respectively card (at the end of the file) and a description for braiding the pattern that you can see on the photo

unikatissima’s entries:
Kumihimo
Kumihimo Beads
Kumihimo Edo Yatsu

Clothespin bobbins

Nature Paper

Nature Paper

Once I found a tutorial on how to make paper from vegetables, but I don’t find back the tutorial (it was at ARD-Buffet, but it seems to be too long ago).
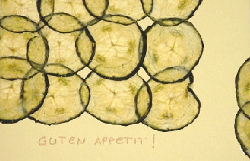
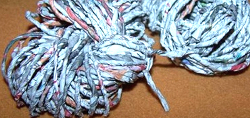
On the photo you see a card made with cucumber paper for a friend for the end of fast.

How to make cucumber paper:

  1. Cut the cucumber in slices of about 0,5 cm / 0,2 inches.
  2. Put the slices between two layers of tissue paper.
    They must overlap to form a sheet of paper!
  3. Put everything into the microwave and put several plates as weight onto your paper-to-be.
  4. Heat at a high temperature for about 1 minute.
    (Note: Please be careful when using the microwave!)
  5. After 1 minute the tissue paper is wet, you have to change it. Also air the cucumber paper a little bit.

Repeat steps 2 – 5 until the tissue paper stays nearly dry.
Lay between new sheets of tissue paper and between several layers of old newspapers and put some weight on it.
About once a day you must replace the moist tissue paper and newspapers by dry ones.
After 2 – 3 days your cucumber paper is ready for use.

Cucumber seems to be one of the easiest vegetables to be used for paper. You can also use other vegetables, but I haven’t tried them and can’t say, how thick the slices must be and how long it takes.
The paper is real paper: You can write on it, you can cut it and so forth.

Cardboard Weave II

Cardboard Weave II

While surfing I found mini or hand-held looms (see links below), which I find very interesting, because 1st I don’t have much place at home and 2nd I know that I don’t weave, I just try it once in a while ;-))
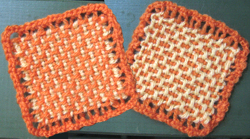
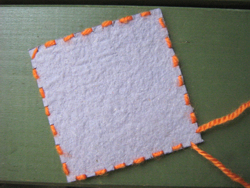
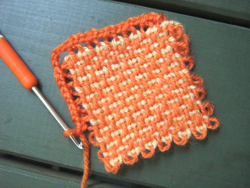
On the photo you see the front and back side of my little woven patch.


Cardboard Weave II I would never actually buy a loom, therefore I made me one from – guess… – yes: cardboard! ;-)
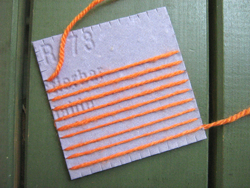
On the photo you see me threading the loom in one direction.


Cardboard Weave II
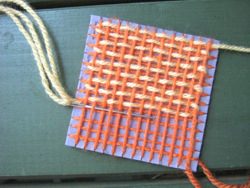
Then I thread my cardboard loom in the other direction.


Cardboard Weave II That’s the way my cardboard loom looks at the back side.


Cardboard Weave II Now I’m weaving in one direction.


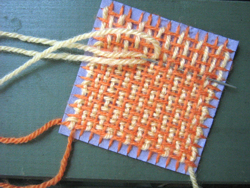
Cardboard Weave II And here I’m weaving in the other direction.


Cardboard Weave II After having finished with weaving I crochet an edging to neaten the edge.

The first photo shows back and front side of the finished little piece.


Links:
At Weavettes:
How to weave on a mini loom (English) (via knitting-and.com)

The original site doesn’t exist any more and is now available through webarchive:
At Weavettes:
How to weave on a mini loom (English) (via knitting-and.com)

At eLoomaNation: Big Ideas from Little Looms:
Get ideas what to do with your patches

Get basic woman measurement charts for clothing patterns at the website of Jessica Tromp just as for the Clothes From Crocheted Medaillons

Peyote Bangles

Peyote Bangles

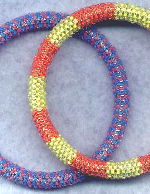
As I saw the tutorial on how to make Peyote Bangles tutorial on how to make Peyote Bangles I bookmarked it immediately.
It seems to be so easy (although this technique seems only to work with slender bangles) – just the right technique for me ;-))
There is another tutorial for stripes bangles tutorial for stripes bangles – looks also great.


Links:
Peyote Bangles
Striped Peyote Bangles

The original site doesn’t exist any more and is now available through webarchive:
Peyote Bangles
Striped Peyote Bangles

Folded Paper Strips of Equal Width

Folded Paper Strips of Equal Width

Sometimes you need folded paper strips of the same width, when weaving paper baskets e.g., making a magazine purse or perhaps when making accordion folds.
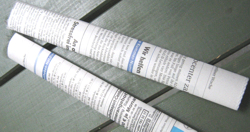
Making those strips can be a time-consuming and frustrating experience – but it can be very fast and easy as well: Once I read somewhere (unfortunately I don’t remember where exactly) that you only have to roll your paper sheet over a dowel and then flat the paper roll.
Easy peasy, isn’t it? ;-)
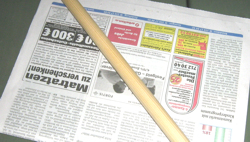
 

Folded Paper Strips of Equal Width You need your sheet of paper and a dowel.
I used here one of my giant knitting needles.
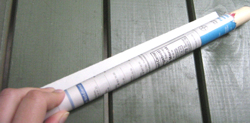
 

Folded Paper Strips of Equal Width Roll your sheet of paper on the dowel.


Folded Paper Strips of Equal Width Pull the dowel out of the roll and flatten the paper roll.
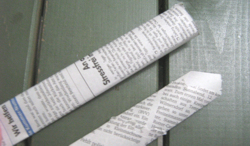
 

Folded Paper Strips of Equal Width This way you get paper strips which are of the same width over the whole length.
Once I made a bowl like these magazine bowls. I preferred the ends of my paper strips to be thinner then the center, so that everything is about the same width everywhere.
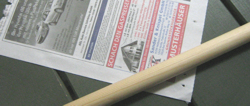
 

Folded Paper Strips of Equal Width Roll your sheet of paper diagonally on the dowel.


Folded Paper Strips of Equal Width The paper roll gets longer, but the ends are thinner than the center.
You can now overlap the strips and create a strong bowl.


Links:
Paper woven basket

At craftster.org:
Magazine purse
Magazine bowls

Google image search result for ‘magazine bowl’

Paperweaving Plus

Paperweaving Plus

Although I like it, I always considered paper weaving a bit dull. Then I saw Paperweaving Plus (scroll down until ‘Paperweaving Plus’) and found the results fascinating.
I liked especially the not-only-paper-weave which I have to try as soon as possible.


Links:
Paperweaving Plus (scroll down until ‘Paperweaving Plus’)

Weave paper stripes into a sheet of paper (English) (With explaining pictuers)

If you also think, that paper weaving is a little dull, take a look at the flickr results for ‘paper weaving’

Crazy Daisies II

Crazy Daisies Scarf

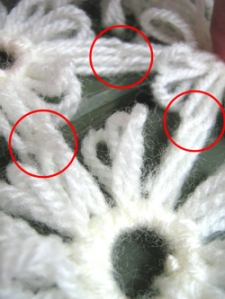
I continued to play around with the Crazy Daisies. It is so much fun and I’m working on a Crazy Daisy Scarf. On the photo you see my scarf.


Crazy Daisies II One thing I found out is that I love the little flowers much more without any edging. Therefore I’m joining them while working.
I’m measuring the yarn and wind the daisy. In doing so I’m pulling the thread immediately through the loops of the previous daisies using a blunt tapestry needle.
It takes a little longer, but this way I don’t have to assemble later and avoid the problem of hiding the ends.


Crazy Daisies II The other thing I played around with is another cardboard loom. In my first Crazy Daisy entry I used a cardboard version of the ice-cream-lid-loom.
Later I found other daisy looms and created my cardboard version of it. It works very well.


Crazy Daisies II
My cardboard loom consists of 2 cardboard disks. I taped them together and put 12 pins between both disks. I can then wind a daisy and when finished I pull the pins out. For the next daisy I put the pins back in my cardboard loom.
Note: I found out, that the disks must be very tightly taped, otherwise the pins fall out.
I always use the same pin holes and this way the tape won’t be damaged. I used my well taped cardboard loom over and over and don’t have any problems with the pins.
This way I can make my loom on the spur of the moment in the shape and size I need at the moment. I also tried a square one and the square daisies looked also nice.


Links:
unikatissima’s Crazy Daisies