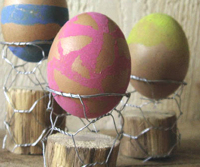
Soon will be Easter and I found the tutorial on how to make rustic egg cups (very rustic as I find) suitable ;-)
Links:
Rustic Egg Cups (coquetiers déco) (French)
…compilation of tutorials
Soon will be Easter and I found the tutorial on how to make rustic egg cups (very rustic as I find) suitable ;-)
Links:
Rustic Egg Cups (coquetiers déco) (French)
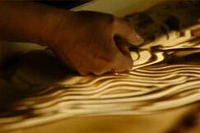
Ok, the video ‘You’ve got a friend 2009’ is no tutorial, but so beautiful that I really wanted to present it.
And who knows, perhaps it is an inspiration to somebody?
I’ve only seen the video ‘You’ve got a friend 2009’ until now, the others will follow.
I want to relish them.
Links:
Painting with sand at SandFantasy, i.e. the video ‘You’ve got a friend 2009’
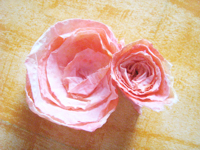
I found an instruction for a nice paper flower and thought that this should work with self-coloured paper, too.
It did ;-)
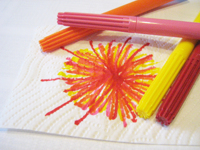 First I painted on a sheet of toilet paper with some markers.
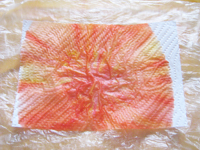 I dropped water on my ‘painting’, but it was a little too much water and everything swam.
In order not to get everything dirty I have put it luckily on an old little plastic bag.
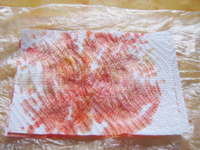 Therefore I put another sheet of toilet paper onto the first, the water and the dye dispersed on both.
I blow-dried everything to dry it faster ;-)
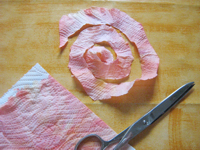 I cut my papers by guess and by gosh, that is to say without a pre-sketched spiral and my scissors were quite blunt.
That may be the reason why my little ‘roses’ look so beautiful ;-)
Links:
Paper Flower – the tutorial works backwards, you must always click the previous picture to get the next step
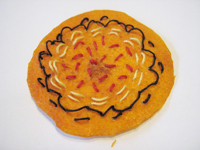
This time it’s no ‘real’ instruction but an inspiration: Embellished Grapefruits Embellished Grapefruits. (Click there for the actual pieces on the thumbnails and see e.g. Two Pods Two Pods.)
Because I’m always impatient I preferred to use a piece from an orange – grapefruits are so big ;-)
While working I had a lot of fun.
I like the embroidery of orange peels nearly as much as embroidery on paper. The most uncommon thing I had to do was to give my needle a wash ;-))
 After the embroidery I put the orange peel between several layers of tissue paper in an old telephon book and let it dry ‘flat’.
Actually I had hoped that I can coat it with medium gel afterwards and wear as a pendant, but I don’t really like the ‘flat version’ of my orange peel.
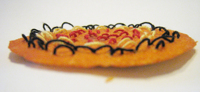 I find worst that the threads now stand up now like croquet wickets, I really don’t like this.
At the next opportunity I will see if I can make it better.
If it works I will perhaps embroider beads on, that should be interesting, perhaps Paisleys or simply Freeform.
Links:
Grapefruit – click there for the actual pieces on the thumbnails and see e.g. Two Pods
The original site doesn’t exist any more and is now available through webarchive:
Grapefruit – click there for the actual pieces on the thumbnails and see e.g. Two Pods
Embroidery stitch descriptions (English)
Embroidery stitch descriptions (German)
Here at unikatissima:
Paper Crazy Quilt
Freeform Bead Embroidery
Bead embroidered Paisleys

I’ve seen several paper maché objects, but jars looking like stumps are still something special to me.
Something especially cute ;-))
I’m not totally sure that I should make them myself ;-), but I liked them so much that I wanted to present them here.
Furthermore I didn’t know this paper maché preparation, I really like to give a try some day.
Links:
Papier-mâché Faux Bois
via One Pretty Thing
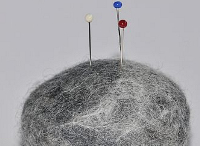
The entry about pin stones isn’t actually an instruction but a (wonderful!) inspiration.
I like them so much!
I suppose that she made the pin stones in the same way than felted beads, for which I found an instruction, too.
You can find gazillions of tutorials on how to felt beads (see links below).
Links:
Pin Stones (Nadelsteine) (German)
At knitty: Felted Beads
Google search result for ‘felting beads’
Google image search result for ‘felting beads’
Google search result for ‘perlen filzen’
Google image search result for ‘perlen filzen’
Once I found the instruction on how to preserve leaves with beeswax. This way you can make the leaves for float on water.
I really liked the idea, but it is winter now and I thought that you can do the same with paper, similar to the beeswax collage.
Then I thought further and found out, that paper floats without wax also (goes muuuuch swifter! ;-))).
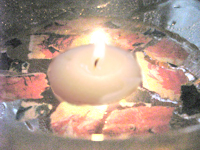
On the first photo you see a glass bowl with a simple tea light, the paper snippets are from some advertising junk mail.
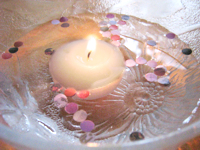 For this photo I thought even further (which wasn’t easy ;-)) and spread on some confetti from the hole puncher.
I like it!
The only problem was the disposal when I wanted to throw away the confetti. I couldn’t fish them out without problems. Therefore I put a piece of tissue paper onto the gutter of my kitchen sink so that no confetti could pass through, and poured slowly the bowl on the tissue paper (if you pour too fast the tissue paper can slip). The water went through and the confetti assembled onto the tissue paper, so that I simply had to throw away the tissue paper with the confetti.
Links:
Preserving Leaves with Beeswax for Floating on Water
Here at unikatissima: Beeswax Collage
When knitting or crocheting you have sometimes the problem that you have to attach some new yarn.
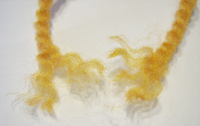
I found a great instruction on how to join (nature!) yarns.
Cold felting with spit ;-))
Links:
Joining Yarns (Spit Splice)
Once I saw the Worm Scarf and having read the instruction for the ‘worms’ I thought that you can knit great fringes this way.
I begun with wristwarmers and after having finished them they looked like the sea anemones called Actinia.
Then I was hooked and knitted an Actinia headband, an Actinia ring and an Actinia brooch (see pictures below).
It is soooo much fun ;-)
And for all this items I wrote a tutorial. You can find the link below at the links.
 This is the headband.
It is just possible that there are slightly too much fringes!?
;-)
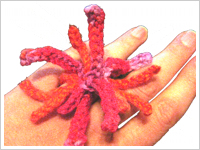 My Actinia ring – cute, isn’t it?
 That is the brooch. It looks great on my black overcoat.
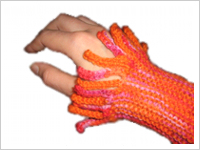
 The Actinia wristwarmers and ring can easily be worn over woollen gloves if it’s really cold.
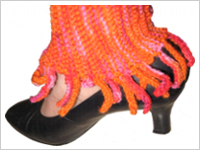 I haven’t done the Actinia anklewarmer yet, I made the picture with my not yet sewn wristwarmer.
Looks great, doesn’t it?
Links:
unikatissima’s Englisch tutorial for Actinia (PDF – ca. 400 KB)
(with explaining photos)
unikatissima’s German tutorial for Actinia (PDF – ca. 400 KB)
(with explaining photos)
There you find instructions on how to
 knit items with fringes,
add knitted fringes to finished items,
knit the wristwarmers,
knit the headband,
knit the ring,
knit the brooch and
knit an I-cord.
I also added ideas for more ways to befringe items.
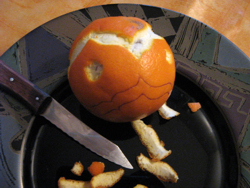
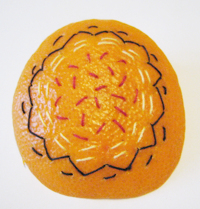
Long ago I found (German) instructions for ornaments made from citrus fruit. They seem to be fragrant.
Last time I checked the site they didn’t show the images, but it is very easy.
That’s what you have to do:
On the photo you see my first try. I tried to cut a too broad pattern, I doesn’t really like it.
Fortunately I can continue experimenting and when making faults, I can ‘nibble’ some delicious orange ;-))
Links:
Citrus-Schmuck
Here at unikatissima: Eraser Stamps