Machine Paper Embroidery

vicky myers creations Machine Paper Embroidery

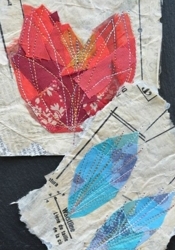
I love this machine paper embroidery!
Just as everything else concerning paper embroidery :)

Addendum of April 5, 2017: The author of the instruction couldn’t originally find the maker of the photo. After the owner of the picture has contacted her she credits and links to Isobel Moore and her beautiful work :)


Links:
Machine Paper Embroidery (Learn Something New – Machine Embroidery and Papier Mache)
via: Learn Something New – Machine Embroidery and Papier Mache

Picture from Facebook page of Isobel Moore

Here at unikatissima:
Entries with the tags ‘paper’ and ‘embroidery’

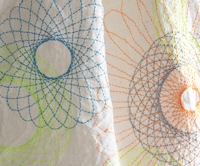
Spirograph Embroidery

flickr cresus-parpi Spirograph Embroidery

Doesn’t this look most beautiful?
I like the idea to embroider patterns of a Spirograph very much :))

What you can embellish!
And you can embroider by hand or machine, on fabric or paper, single or multi-coloured etc. etc.
Great!


Links:
Spirograph Embroidery (ecobag:spirograph 10) – there are more pictures of Spirograph embroidered items

Wikipedia entry: Spirograph (English)
Wikipedia entry: Spirograph (German)

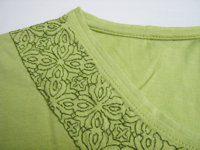
Start an Embroidery

unikatissima Start an Embroidery

I just wanted to try ‘real’ embroidery (viz. not on paper ;-)) and had to find out how actually to begin and to end (on paper I simply glue on the threads but I thought that this must be done differently on fabric ;-)).

I found great instructions that helped a lot.

After my first experience with the v-neck of my t-shirt I think that I will embroider more often on fabric ;-)


Links:
Starting and Ending Threads

Here at unikatissima: Entries with the tags ’embroidery’ and ‘paper’

Sashiko Embroidery


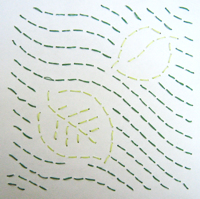
unikatissima Sashiko Embroidery

Actually I don’t want to talk only about Sashiko embroidery but about Sashiko embroidery on paper – I just prefer to embroider on paper ;-))

I discovered Sashiko embroidery one day when surfing the internet and found the results just beautiful!
The basic principle (as far as I understood) is that Sashiko embroidery is mostly a shape filling embroidery and the lines are worked as ‘dashed lines’ where the spaces between the dashes are about half as long as the dashes themselves (simply check the tutorials (for ‘real’ Sashiko embroidery) in the links, they explained it better).


unikatissima Sashiko Embroidery
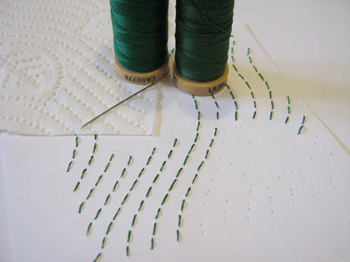
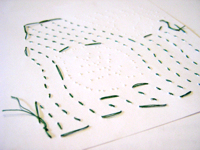
Then I saw one day that our toilet paper (top left on the picture) doesn’t only have a nice pattern but that I can use the pressure points for a Sashiko embroidery by using alternately the left and the right side of the points as needle entry points.
Therefore I trace-pricked the pattern on paper (bottom right on the picture) and embroidered it in two colours.
I find that you can’t see any more on the result that it is made by ‘cheating’ from toilet paper ;-))


unikatissima Sashiko Embroidery Here a look at the backside.
I will glue it on a card and send as a greeting card.
To people who use different toilet paper ;-))


Links:
Sashiko Tutorial
How to do Sashiko Stitching

Google image search result for ‘sashiko’

What Can You Do With Filet Crochet/Cross Stitch Embroidery Charts?

unikatissima Two-coloured Chart (click to enlarge)

Recently something took me and I thought that you can use those two-coloured charts which are usually associated with filet crochet or cross stitch for a loooot of other techniques, too.
I had this idea already before, in my entries about intarsia knitting, the cross stitch heart, the beaded square stitch heart and the polymer clay letter cane.

On the photo you see some letters worked in different techniques (I’m working on letter charts at the moment ;-)):
'u' - Knit-Purl Knitting, each X is a purl stitch
'n' - Fair Isle Knitting, each X is a white stitch
'i' - Sequins Embroidery, each X is a sequin
'k' - Tapestry Crochet, each X is a white stitch
'a' - Filet Crochet, each X is a filled filet crochet square
't' - Cross Stitch Embroidery on paper, each X is a black cross stitch
'i' - Loom Beading, each X is a black bead
's' - Stamping with square stamps, each X is a black square stamp
's' - Illusion Knitting, each X is a black stitch over two rows
'i' - Crochet Yoyo’s, each X is a white crochet circle from dc’s
'm' - Inverted Filet Crochet, each X is a empty filet crochet square
'a' - Macramée/Friendship Bracelet, each X is a white knot

But then I came up with more techniques and if you still have more ideas I’d be glad if you wrote a comment about.
I added for every technique what would be a square of the chart.
Please remember: Not all ‘units’ are square so that the result can look quite different from the chart!

Knitting

Crochet

  • Tapestry Crochet – 1 stitch
  • Filet Crochet – 1 filet square (cross = filled square)
  • Inverted Filet Crochet – 1 filet square (cross = empty square)
  • Crochet Yoyo’s – 1 Crochet Yoyo, viz. a crochet circle from dc’s

Beading

Embroidery

Knotting

Weaving

Sewing

  • Patchwork/Quilting – e.g. 1 patchwork square
  • Yoyo’s – 1 Yoyo
  • Fabric Origami – 1 fabric origami square

Other

By the way I found an blog entry of an embroiderer who thought about the same subject and has more ideas.


Links:
Double Knitting
Picture for sequin embroidery (scroll down to about the middle)
Description of French Knot
Heather’s Friendship Bracelets – Alphabet Patterns
Geometric stitching
Google image search result for ‘yoyo blanket’
Google image search result for ‘ministeck’

Here at unikatissima:
Celtic Cross Stitch Generator
Heart Template (at Beaded Square Stitch Heart)

Patchwork Knitting
Bead Knitting
Illusion knit

Tapestry Crochet
Beautiful Filet Crochet Patterns

Loom Woven Bead Bracelet
Beaded Square Stitch Heart
Bead Knitting
Freeform Bead Embroidery
Bead embroidered Paisleys

Friendship Bracelet
Crazy Daisies
Crazy Daisies II

Tablet or Card Weaving

YoYo Pin
Fabric Origami

Mosaic Table Light (Glass Paint)
Polymer Clay Letter Cane
Mosaic from Plaster
Eraser Stamps

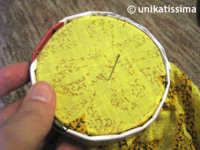
Magazine Embroidery Hoop

unikatissima Magazine Embroidery Hoop

Once I’ve seen somewhere (but I don’t remember, where ;-() how somebody made an embroidery hoop from magazine paper.
On the photo you see how it looks. I used quite stiff advertising paper and the hoop became very robust.
This way I can make fast and cheap embroidery hoops in different sizes :)

Material:

  • Paper, e.g. advertising paper
    It should be strong and may not stain(!) the fabric.
  • Log or dowel
    I used a 8mm knitting needle
  • Tape
  • Drinking glass or the like with the required diameter

That’s what you do:
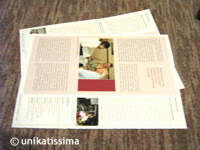
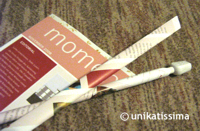
unikatissima Magazine Embroidery Hoop Select appropriate paper sheets.


unikatissima Magazine Embroidery Hoop Roll and fold the paper sheets to paper strips of equal width (see tutorial here).
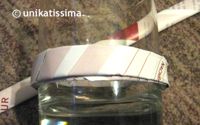
 

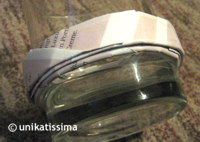
unikatissima Magazine Embroidery Hoop Coil one paper strip firm around the glass and fix with tape.
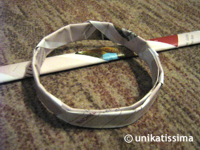
 

unikatissima Magazine Embroidery Hoop Tape the hoop very well.


unikatissima Magazine Embroidery Hoop Slip the hoop over the glass again and coil the second strip of paper very firmly around the first hoop, tape very well, too.
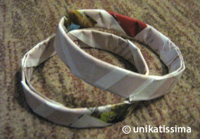
 

unikatissima Magazine Embroidery Hoop These are both hoops, one can be slipped exactly over the other.


unikatissima Magazine Embroidery Hoop Put the fabric into the embroidery hoop and embroider.
I didn’t iron the fabric, but it’s firmly tightened into the hoop.
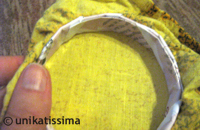
 

unikatissima Magazine Embroidery Hoop That’s the way everything looks from the backside.


Have fun with your embroidery :)


Links:
Here at unikatissima: Folded Paper Strips of Equal Width
Paper Crazy Quilt

Paper Crazy Quilt

I love Crazy Quilts, because it is a kind of Freeform work, but I don’t like sewing. So I began to make my quilts on and with paper.
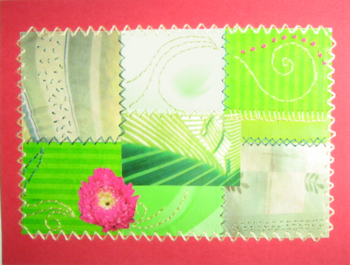
On the photo you see a card I made with this technique.
I didn’t only embroider the seams but I also used some fancy stitches like French Knots e.g. (the red dots on the photo) onto the surfaces.

To make your own Paper Crazy Quilt, find matching papers and cut them into pieces. On the photo I used rectangles, but the typical Crazy Quilt distribution is also beautiful (here you can find some lovely blocks here you can find some lovely blocks).
Glue the collage on thin paper and then begin embroidering (carefully!) as if it was a real Crazy Quilt (here is an online class for Crazy Quilts).
To finish you glue or embroider your Paper Crazy Quilt on cardboard.


Links:
Crazy Quilt blocks
Tutorial moved to: Crazy Quilt blocks

Online class for Crazy Quilts

English Embroidery Stitch Diagrams
Deutsche Stickstichbeschreibungen

French knots (Knötchenstiche) (English)
French knots (Knötchenstiche) (German)

Altered Books Simplified

unikatissima Altered Books Simplified

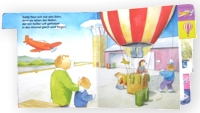
One method to simplify the work on an altered book is to use children’s cardboard books as base. They often have the advantage, too, to have interesting shapes.
Once I began such a book (on the picture you see the original book).


unikatissima Altered Books Simplified
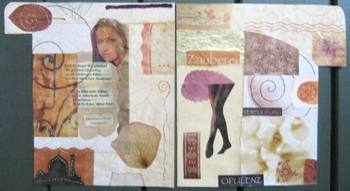
These are the first two pages. I used amongst others (just as for the artist book) self-dyed paper, packing tape transfers, embroidery on paper and dried flowers and leaves.

Because of the embroidery I don’t immediately glue the papers in but I finish the pages first.

The following pages aren’t finished yet – just another UFO (unfinished object) ;-)


Links:
Altered Books Simplified

Here at unikatissima:
Artist-Book
Packing Tape Transfers
Entries with the tags ‘paper’ and ’embroidery’
How to Press Flowers, Leaves and Herbs