Ages ago I found a tutorial on how to coil friendship bracelets and found it stunning.
Unfortenately this tutorial doesn’t exist any more and I haven’t found no similar, therefore I’m writing it myself.
That’s what to do:
 Cut three threads à 180 cm (ca. 2 yards).
 Braid a piece of appr. 3 cm (ca. 1,2 inches) on the half of the threads and lay as loop.
You have now six working threads hanging from the loop.
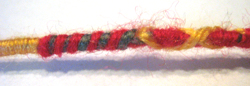
 Select a thread and coil around the other five.
Pay attention to lay the coils near each other to hide the underlying threads.
Select afterwards a thread of another colour and coil again.
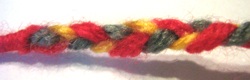
 This is how the coil could look like after having finished it.
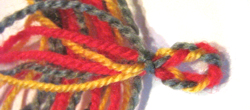
 You can create another beautiful pattern by coiling two different coloured threads around the remaining threads.
 Additionally you can lay two more threads of the same colour apart and after coiling you can lay them crosswise around the coil.
 This is how the double coil and the cross pattern could look like.
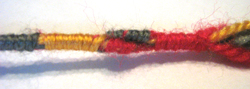
 Once I made a simple braid (at the end).
 At another part I didn’t do anything at all but simply let lie the six threads near each other.
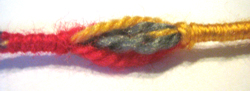
 Furthermore you can divide the threads and make two coils side by side in place of one coil (here in red and grey).
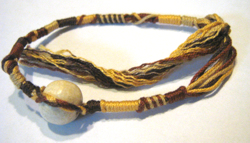
 This is the friendship bracelet I coiled for the tutorial
I even put a bead on the friendship bracelet on the first photo .
Needless to say that you can make other items in place of friendship bracelets, like necklaces, key chains and key rings and much more.
Have fun!
Thanks so much for your tutorial. I visited Italy a few years ago where I encountered a gypsy making and selling coiled bracelets like yours. I bought one to see how it was made, but I lost it shortly thereafter. I have been curious about the coiling technique ever since, and you have helped satisfy my curiosity. Your bracelet is awesome. Thanks for posting it!
I’m glad that you liked the tutorial!
Now that you can coil your own bracelets I hope that you will make lots for you and your friends ;-)