After I’ve made my paper beads roller that I presented yesterday I played around with paper beads a little more.
I prefer the tube beads anyway (marginally ;-)) and after having seen the paper bead designer I thought: ‘Yes, a little bit of colour is enough, you can’t see the rest anyway.’
So I quickly made me some doodle paper beads ;-)
And that’s what you do:
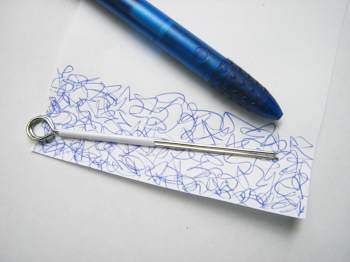
First I took two sheets of plain printer paper and simply doodled at one side with a blue ballpoint pen.
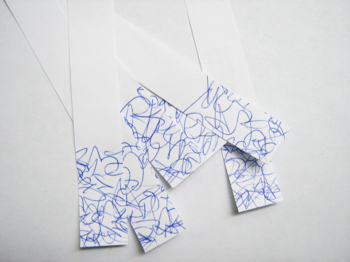
Then I cut the sheets in strips of the same width…

… and rolled my paper strips with my nifty paper bead roller in a wonderful short time.
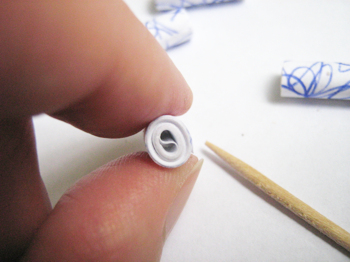
Of course the hole of the bead is split into two holes, too, because my bead roller consists of two halves.
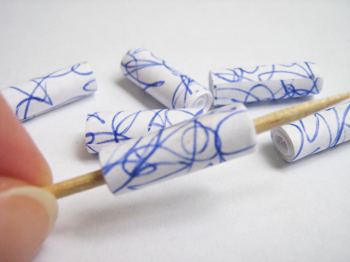
I ‘stirred’ the hole again with a toothpick so that only one big hole remained.

Somehow I didn’t want to use the glue excess as varnish for the beads, so I used a simple glue stick and covered the beads afterwards with medium gel. Here you can see them drying.
My potted palm got special leave on my balcony for it ;-)
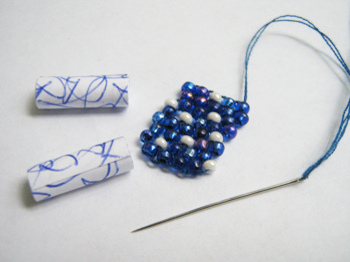
Although I find my doodled paper beads beautiful I thought that I would look boring if I string only them, therefore I made some additional easy Peyote beads.
Looks good, doesn’t it? ;-)
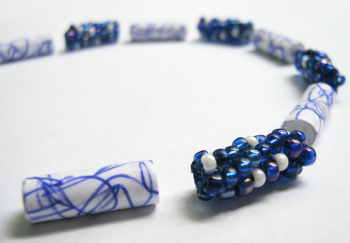
I wasn’t sure yet what I would do with my beads on this photo.

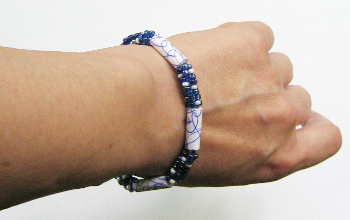
It became a bracelet in the end. I simply strung the beads on an elastic and hid the knot in a bead.
And here an ‘action shot’ ;-)
It’s not so easy to take a good photo of your own arm ;-))
After I had finished with my doodled paper beads I thought, that this was a great way to make a lot of matching paper beads from advertising flyers.
So I picked an ad with a photo of bed sheets where I liked the clour scheme.

Then I measured the circumference of my doodled paper beads with a string and cut strips from the ad a little broader than necessary.
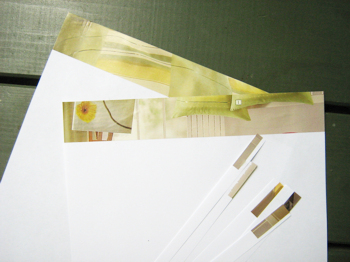
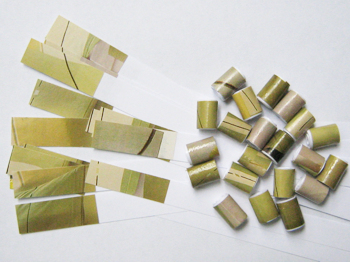
I glued the strips from the ad at one side of a plain printer paper sheet and cut the resulting papers in (in this case) 1 cm broad strips, because I wanted to have little beads.
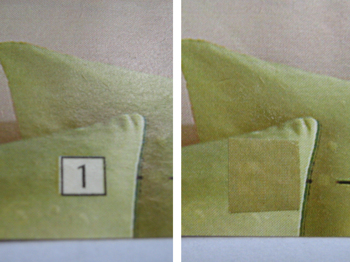
I glued some patches from the rest of my ad on details that I didn’t like, they won’t to be seen on the bead.

Here my beads are drying on a wire because I cut about 80 paper strips and I don’t have enough toothpicks or plants for the drying process ;-)
This time I used a water-based craft glue that glues fast but dries slowly.
This is great because I could varnish my beads easily with the excess of the glue which made them shine and when my fingers eventually got sticky I could wash the glue easily away with water.
I have not yet finished, but I find my paper beads beautiful, a little bit like made from Jade.
We will see what they will become :)
Links:
Paper Bead Designer
Here at unikatissima:
Paper Beads Roller
Entries containing the words ‘paper’ and ‘bead’
I’ve been following your tutorials for a while now and love the ideas you find and experiment with. These bead ideas are wonderful. I’m going to have to try them out.
Claire, thank you for your kind comment :)
Have much fun with the beads and all the rest ;-)
Your tutorial is very inspiring–I love the blue doodles pattern, and your insight that you only need to decorate the last couple of inches of paper when making tubular beads is wonderful–I made a blue-and-white flower and vine pattern on a 2 by 8 inch strip of drafting vellum using diuted acrylic in a large mm technical pen, then wrapped some beads made from plain printer paper with the hand decorated paper–I think they came out really nice–and I also love the peyote tubes, too–that’s next! :)
Lori, it’s wonderful to know that I inspired you :)
And after your description I’m sure that your beads look beautiful :)
Love your bracelet with your doodle work paper beads. Very pretty. Thanks for sharing your tutorial.
Mixed Kreations,
thank you very much!
And as I said: I think that my ‘jade’ paper beads would go well with your copper wire beads :))