I have a most ordinary and totally boring beige-gray computer screen – perhaps I should do something about?! ;-))
I don’t like the ‘stone look’ though, I’d prefer something baroque-y ;-))
Links:
Fantasy Computer Frame
…compilation of tutorials
I have a most ordinary and totally boring beige-gray computer screen – perhaps I should do something about?! ;-))
I don’t like the ‘stone look’ though, I’d prefer something baroque-y ;-))
Links:
Fantasy Computer Frame
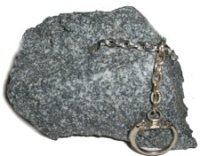
Must be quite heavy, such a rock key chain, mustn’t it?
It mustn’t! ;-))
It is fake stone and made from foam and spraypainted ;-)
I don’t quite understand how it works and why it isn’t dented, but at the moment I can’t make it because I still need my mattress at night ;-))
And by the way it should be possible to make them from paper maché, shouldn’t it?
And wearing it around your neck should look, great, too ;-)
Links:
Fake Rock Keychain
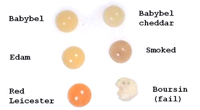
I presented the Galathite (milk stone) already, now i found something similar: cheese buttons.
This way you can skip the preparation of the milk.
In the instruction they compare several sorts of cheeses and try whether the buttons can really be used.
Perhaps I will buy some extra-Edam next time in the supermarket ;-)
Links:
Cheese Buttons (Buttons: an experiment with cheese)
Here at unikatissima: Galathite (milk stone)
I always wanted to make moulds from plaster but I never quite knew how to. At craftster I found now a tutorial on how to make positive plaster moulds.
I’d like to begin casting the stone, so that I eventually have something to wrap, paint or bead.
Or I try it first with half a cork, I think that could be a nice pendant.
Somewhen ;-)
Links:
At craftster:
Making Positive Plaster Moulds
Here at unikatissima: Wrap a Rock (with lace or poymer clay or paint, embroider, felt, crochet, bead)
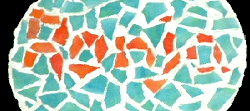
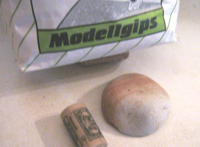
Once I wanted to play a little bit with mosaic for a door board (see photo) but without having to buy all those materials. I didn’t know if I would use them ever more.
Therefore I figured out how to make my own mosaic stones from plaster and wrote a German tutorial.
I’m giving here a translation, see some photos at the German tutorial.
How to make your own mosaic stones:
You need:
What to do:
Links:
Make your own mosaic stone (German)
Slow down drywall-plaster drying time with vinegar (English)
What to do to delay drying time of plaster? (German)
(Somebody here tried a drop of dish liquid in place of vinegar and said that it worked)