Recycled Yarns

Recycled Yarns

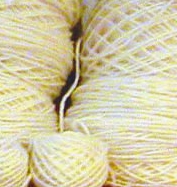
I really like to crochet (ok, to knit also, but not soo much ;-)).
Anyhow, the yarns are quite expensive.
Therefore I was thrilled when I found the article ‘Recycling yarn / Unravelling thrift store sweaters’. In addition I found a tutorial on how to unravel a sweater.
Equipped with this new know-how I am anxious for the next thrift store visit ;-))
And then I will see to it to get some Kool-Aid or other food colouring to dye my newly achieved yarns myself as taught (amongst others) by knitty.com.
And if it works well, I will give self-made self-striping yarn a try (found via ‘Watermelon Socks’).
This will be better than my previously mentioned coloured yarns. And I think as much fun as the other recycled yarn made from plastic bags.

I’m curious about when I will find the time (and the place! ;-)) to do all this, but it is fixed on my to-do and to-try lists ;-)


Links:
Recycling yarn / Unravelling thrift store sweaters
Tutorial on how to unravel a sweater

Dying wool with food colouring
(For other tutorials google for ‘dye kool-aid’)

Self-made self-striping yarn
(via ‘Watermelon Socks’)

unikatissima’s entries:
Coloured yarns
Recycled yarn made from plastic bags

Plaster Photo Holder

Plaster Photo Holder

I saw this Tealight Photo Holder. I found the idea stunning, but I didn’t like the look of it: for me it looks like a cut-open tealight ;-)
But then an idea stroke: How easy to make this from plaster!
On the photo you see my plaster photo holder in action ;-)


And here is how I did it:

Plaster Photo Holder
img 1: Take a toilet paper tube and cut in rings about 4-5 cm height (appr. 1.5 – 2 inches). I did this with the sharp knife on the photo.
 

Plaster Photo Holder
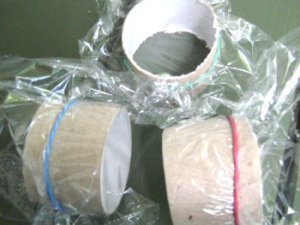
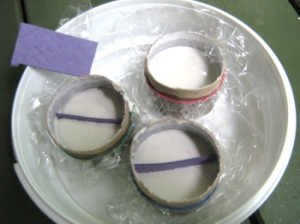
img 2: Wrap foil around, but let one side open. Fix the foil with elastic.
 

Plaster Photo Holder
img 3: Fill the forms with plaster to a height of about 2,5 cm (about 1 inch). When full, insert a previously cut piece of cardboard as separator.

Let harden (about an hour).


Plaster Photo Holder
img 4: When the plaster went hard, but everything is still wet, tear apart the cardboard tube and break the ‘plaster coin’ where the separator cardboard stuck.


Plaster Photo Holder Plaster Photo Holder
img 5: Rub the cardboard rests away.
If your photoholder piece is uneven, now is the moment to fix it: Simply scratch away what you don’t like with the back of an old knife.

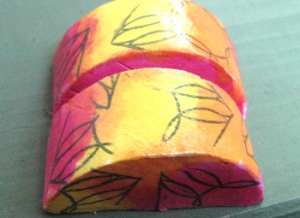
img 6: You can embellish them in so many ways.
I painted them immediately with watercolours, but you can also wait until thoroughly dry.
 

Plaster Photo Holder
img 7: When dried I stamped them and varnished them with medium gel.
Have fun!


Links:
Tealight Photo Holder
via Photojojo

Coin Ring

Coin Ring

Browsing craftster I found one day the thread about coin rings.
Somewhere in the thread is also a link to a tutorial on how to make your own coin ring (with many explaining pictures).
I can’t image that I will ever do this, but I find it interesting enough to present it here.

Perhaps someone wants to make their weddings rings this way? ;-))


Links:
craftster: ‘coin rings! i’m an addict!!!’

Tutorial on how to make a coin ring

Light Bulb Window Vase

Light Bulb Window Vase

I really liked the idea of making a little window vase out of a recycled light bulb (for tutorials see Links below).
And I had to try it myself ;-))
On the photo you see my first attempt. I wrapped it with paper maché and have not yet formed a wire to hold it. And as I made the photo, I had no flower either ;-)
So I took one of my crocheted flowers and – voilĂ  ;-)


Links:
Light Bulb Window Vase

instructables: Light Bulb Vase