Self-made Landscapes

Self-made Landscapes

While surfing I found wonderful, photo realistic landscapes (see images found by Google).
As a matter of course I wanted to create such landscapes myself ;-))
Searching further, I found Terradreams where eventually I came to know about Terragen, a free scenery generator.
I played around with the program and every time I created a ‘postcard’ I felt like being on holidays ;-)


Links:
Terragen: A free scenery generator

Terradreams: A website dedicated to Terragen with forums, tutorials, links to plug-ins and so on

Beaded Spiral Beads

Beaded Spiralbeads

I once found in internet photos from some spiral beads beaded from seed beads. Because I really liked them, I figured out how to bead spiralbeads.
The instruction is in German, but I drew explaining pictures that (I hope ;-)) say it all.
You begin in the middle. First you increase the circumference of the bead in the first 3 rows, then in rows 4 and 5 you work straight to create the sides of the bead and from row 6 on you decrease in the same way you increased before.
I then created the necklace *Summer, Sun and Spots* and the bracelet *Little Black Dress* with such spiral beads.
The beaded strings for the necklace where made in tubular peyote stitch (here an English instruction). After having finished them, I sewed them on.
The bracelet ‘strings’ where made in flat Herringbone weave (here an English instruction).


Links:
Beaded Spiral Beads (in German)

Spiral Beads Necklace *Summer, Sun and Spots* (in German)
Spiral Beads Bracelet *Little Black Dress* (in German)

More instructions on:
Tubular Peyote Stitch (English)
Tubular Peyote Stitch (German): click ‘Anleitungen’ in left navigation bar, select ‘Schlauch-Peyote’

Flat Herringbone/Ndebele Weave (English)
Flat Herringbone/Ndebele Weave (German): click ‘Anleitungen’ in left navigation bar, select ‘Flaches Ndebele’

The Crazy Stitch

The Crazy Stitch

I found the Crazy Stitch mentioned in several crochet instructions. Therefore I wanted to know how to crochet it ;-)
At about.com:Crochet I found a good tutorial on how to crochet the Crazy Stitch (with explaining photos which I find always a great help).
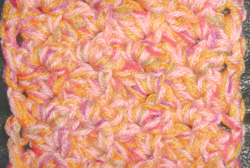
On the photo I used the stitch to crochet a short scarf with a thick crochet hook and several yarns put together. It become very thick and thus a little stiff. Next time I’d use a little less yarns.


Links:
about.com:Crochet A website with lots of information about crochet
Instructions on how to crochet the Crazy Stitch

Paper Beads

Paper Beads

I always loved paper beads, but never knew what to do with them. Then one day I created an artist book (more to follow in a later entry) and – eureka! – I found a use for those paper beads: I wanted to use them on the fibers embellishing the spine of my book (see photo). For those beads I used an advertisement flyer from a furniture dealer with lots of sofas in matching colours. They just had the right size for the beads ;-)
To make the beads I used those instructions on how to make paper and fabric beads.
It can also be used to make the fabric beads I mentioned before.
Later on I found an entry at craftster: A bowl made out of paper beads! I stood there in awe!
But I think that I never will make such a bowl – it’s all a question of having or not having patience ;-)


Links:
Instructions on how to make paper and fabric beads

craftster.org: A website with sooo many craft ideas, inspirations and tutorials
A bowl made out of paper beads

Here at unikatissima:
Making Fabric Beads

Crocheted buttons

Crocheted buttons

I find it often difficult to find the right buttons for my needlework. At Univers du crochet d’art I eventually found an instruction on how to crochet (and embroider) buttons. It is written in French, but the tutorial is illustrated so that I could easily understand what to do.
On the photo you see my self-made button, it is worked in crochet and then embellished with embroidery.

Addendum of June 23, 2010: The Univers du crochet d’art moved and I didn’t find the instruction there and nowhere else in internet.
But there are many instructions for crocheted buttons, you simply have to choose another one ;-)


Links:
Univers du crochet d’art: A french website on crochet
Page moved to: A french website on crochet

Crocheted buttons (French) (with explaining pictures)
The link doesn’t work anymore, try the Google search result for ‘crochet button’

Miniature Book

Miniature Book

The title of this entry isn’t fully correct: the instruction is named ‘How to Make a Miniature Book from a Sticky Note Pad’, but I felt it was too long ;-)
The tutorial itself is great!
Unfortunately I didn’t have time yet to try it out, but I will.
I really will ;-)


Links:
Studio 3D: A website with great instructions, I found it while looking for tutorials on how to make books
How to Make a Miniature Book from a Sticky Note Pad ;-)

Tapestry Crochet

Tapestry Crochet

Finding these instructions on how to crochet with two colours was immediately trying it out ;-))
And it worked!
On the photo you can see my UFO (unfinished object) on this technique (yes, it is still unfinished, I only said that I tried it ;-))).


Links:
Tapestry crochet for right-handers
Tapestry crochet for left-handers (a service I have never seen before!)
More crochet instructions (also on tapestry crochet)

Faux Leather Background

Faux Leather Background

I decorated the self-made candle holder on the photo with the Faux Leather Background technique and found it great. This technique can as well be used when making cards.
On the net I found different tutorials on how to make Faux Leather Backgrounds using the masking tape technique. One of them is the tutorial on the Faux Leather Masking Tape Background Technique by Trish Bayley.
A very good german tutorial can be found at artefaktotum at ‘Techniken’ – click ‘Faux leather’ there.


Links:
Trish Bayley: an Art Blog with among other things an interesting technique zone
Faux Leather Background Technique

artefaktotum: The website of an dedicated stamper, with great tutorials (in German)
artefaktotum’s techniques overview (see ‘Faux leather’ there)

Paper folded bracelet

Paper folded bracelet

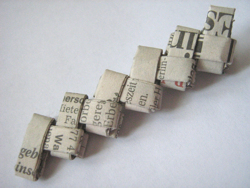
Of course you don’t see the bracelet on the photo, but my first and only attempt to make such a bracelet.
Better look at the photos in the tutorial on how to make a Starburst wrapper bracelet at craftster.org.
After I’ve finished the little piece on the photo I had enough – it’s such a fiddly work ;-)
If you like this technique, try the tutorial on how to make a wrapper purse!


Links:
craftster.org: A website with sooo many craft ideas, inspirations and tutorials
Starburst Wrapper Bracelet
Chip Wrapper Purse Instructions