I found an instruction that shows how to make very easy outstanding plaster reliefs.
It’s quite high on my Just-do-it-list!
Links:
Plaster Relief
…compilation of tutorials
I found an instruction that shows how to make very easy outstanding plaster reliefs.
It’s quite high on my Just-do-it-list!
Links:
Plaster Relief
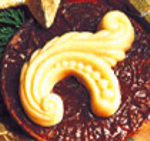
Yesterday I presented boxes, today I have something you can put into: edible stucco.
To make it you buy molds for making stucco from plaster and fill them with sweet stuff.
On the photo they present a marzipan stucco element, but I’m sure that it works as well with chocolate.
As a matter of course the mold has to be unused and therefore neat and clean.
Links:
Edible Stucco (German)
Here at unikatissima: Boxes not only for the advent calendar
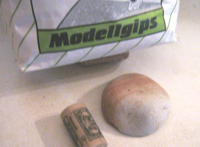
I always wanted to make moulds from plaster but I never quite knew how to. At craftster I found now a tutorial on how to make positive plaster moulds.
I’d like to begin casting the stone, so that I eventually have something to wrap, paint or bead.
Or I try it first with half a cork, I think that could be a nice pendant.
Somewhen ;-)
Links:
At craftster:
Making Positive Plaster Moulds
Here at unikatissima: Wrap a Rock (with lace or poymer clay or paint, embroider, felt, crochet, bead)
I found a tutorial on easy plaster casting.
The point is mainly to create the mold of a star or the like from aluminium foil and to cast it with plaster.
Even if it is filed under ‘kids crafts’, I find the idea interesting.
I did it once, but I can’t find back my item ;-(
At that time I made a mold with a rounded bottom.
To fix it thoroughly (to prevent the plaster to ‘run away’) I put the aluminium foil mold into a layer of flour.
Sand would be as well.
Links:
Special Shape Castings
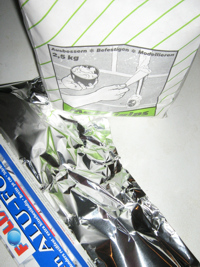
From time to time I’m working with plaster and so I thought that I could search for low-priced alternatives for making moulds.
This way I found at instructables.com a tutorial on how to make moulds from jello.
That’s something I really have to try!
Links:
Mold Making with Jello

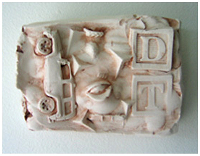
A certain time I worked with plaster and I once even made a Freeform Sculpture. Unfortunately I didn’t take a photo from it, but gave it away immediately.
I found the work on the block of plaster very satisfying and want to do it once more.
Links:
Plaster Free-Form Sculpture
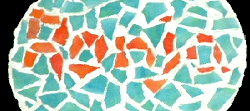
Once I wanted to play a little bit with mosaic for a door board (see photo) but without having to buy all those materials. I didn’t know if I would use them ever more.
Therefore I figured out how to make my own mosaic stones from plaster and wrote a German tutorial.
I’m giving here a translation, see some photos at the German tutorial.
How to make your own mosaic stones:
You need:
What to do:
Links:
Make your own mosaic stone (German)
Slow down drywall-plaster drying time with vinegar (English)
What to do to delay drying time of plaster? (German)
(Somebody here tried a drop of dish liquid in place of vinegar and said that it worked)

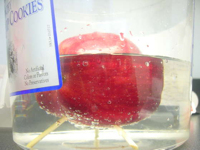
I saw this Tealight Photo Holder. I found the idea stunning, but I didn’t like the look of it: for me it looks like a cut-open tealight ;-)
But then an idea stroke: How easy to make this from plaster!
On the photo you see my plaster photo holder in action ;-)

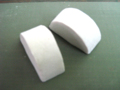
img 1: Take a toilet paper tube and cut in rings about 4-5 cm height (appr. 1.5 – 2 inches). I did this with the sharp knife on the photo.
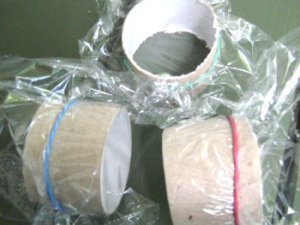
img 2: Wrap foil around, but let one side open. Fix the foil with elastic.
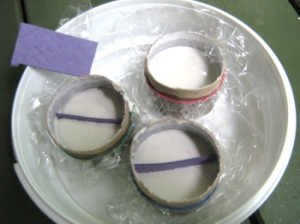
img 3: Fill the forms with plaster to a height of about 2,5 cm (about 1 inch). When full, insert a previously cut piece of cardboard as separator.
Let harden (about an hour).

img 4: When the plaster went hard, but everything is still wet, tear apart the cardboard tube and break the ‘plaster coin’ where the separator cardboard stuck.
img 5: Rub the cardboard rests away.
If your photoholder piece is uneven, now is the moment to fix it: Simply scratch away what you don’t like with the back of an old knife.
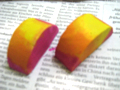
img 6: You can embellish them in so many ways.
I painted them immediately with watercolours, but you can also wait until thoroughly dry.
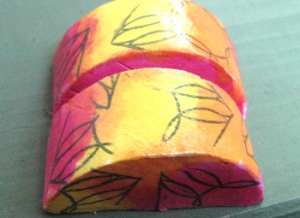
img 7: When dried I stamped them and varnished them with medium gel.
Have fun!
Links:
Tealight Photo Holder
via Photojojo
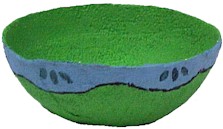
Because I like to make bowls this tutorial on how to make a plaster bowl is high on my what-I-really-want-to-do-list.
I worked with plaster already, but never with those plaster bandages and I hope that I will have the opportunity soon.
Once I have read (but I can’t remember where) that you can cut some old fabric (e.g. old bedsheets) in strips, pull them through the plaster and put them on to emulate the rigid wrap from the tutorial.
Has anybody tried this?
Links:
MakingFriends.com: A website with lots of crafts for children
Plaster Bowl
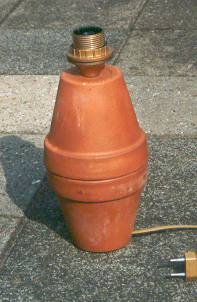
This isn’t a real instruction but more of an inspiration. At Atelier Verena you can follow a class about recycling. At her website, Atelier Verena describes how to make your own recycled lamp (last item on page): glue two terracotta pots together, wrap them with fabric, use some fabric stiffener and paint it with acrylic colour.
I haven’t done it yet, but I think that you also can wrap the glued pots with paper mache or plaster of paris and do some kind of collage or decoupage or glueing interesting tissues an it and so forth.