
I presented some pincushions before, some time-consuming, some quicker, but this cork pincushion somehow beats them all ;-))
Links:
Tool Holder / Pin Cushion
Here at unikatissima:
Entries with the tag ‘pincushion’
…compilation of tutorials
I presented some pincushions before, some time-consuming, some quicker, but this cork pincushion somehow beats them all ;-))
Links:
Tool Holder / Pin Cushion
Here at unikatissima:
Entries with the tag ‘pincushion’

I always like the simple yet striking ideas and this cork vase is for me one of them: simply take a ready-made glass vase and decorate with self-adhesive cork :)
Links:
Cork Vase (Think Outside the Bottle 1: Flower Vase)
Here at unikatissima: Entries with the tag ‘vase’
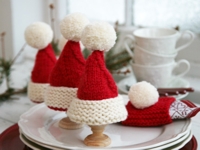
Actually they are egg warmers, not an Advent calendar, but if you put in little gifts instead of eggs you’ll get a Christmas egg warmer Advent calendar ;-)
They made me think of the knitted ‘cork warmers’ ;-)
Links:
Christmas Egg Warmer Advent Calendar (DROPS Extra 0-569) (English UK/cm)
Christmas Egg Warmer Advent Calendar (DROPS Extra 0-569) (English US/in)
German:
DROPS Extra 0-569
Here at unikatissima:
Knitted Cork Christmas Trees
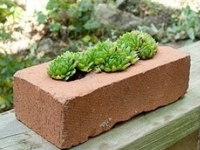
I’ve presented already succulent book planters and succulent cork planters, so why no succulent brick planters? ;-)
Links:
Succulent Brick Planters (DIY Succulent Planters Of Used Bricks)
=> unfortunately I haven’t found the original instruction
Here at unikatissima:
Succulent Book Planters
Succulent Cork Planters
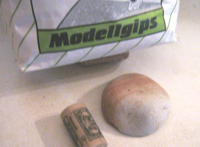
I always wanted to make moulds from plaster but I never quite knew how to. At craftster I found now a tutorial on how to make positive plaster moulds.
I’d like to begin casting the stone, so that I eventually have something to wrap, paint or bead.
Or I try it first with half a cork, I think that could be a nice pendant.
Somewhen ;-)
Links:
At craftster:
Making Positive Plaster Moulds
Here at unikatissima: Wrap a Rock (with lace or poymer clay or paint, embroider, felt, crochet, bead)
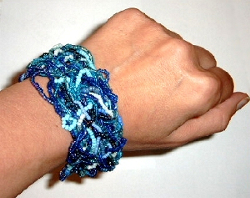
During my ‘beading time’ I wrote a (German) tutorial for bead intertwists as on the photo.
Here is the English translation:
Material:
for the bracelet:
additional items:
What to do:

First make a selection of beads and place them at your disposal.
Tip: Uniform colouring connects visually; different forms, sizes and transparency makes it more vibrant.
In this example I used eleven different sorts of blue seed beads, some transparent, some with silver lining and some opaque.
More variety in sizes brings more vitality. The border between vitality and disquietness is to your liking.

Thread beads and make a frame of approximately the right size.
Connect the bead strings from time to time to the borders of the frame.

Weave more bead strings into the frame, connect them from time to time to other strings.
Tip: On the photo the inner bead strings are sometimes multi coloured.
During the work I found out, that this isn’t necessary and that one coloured strings mostly look better.

Continue to weave in bead strings: long strings, short strings, lengthwise, crosswise, over and under.
Tip: When the ‘fabric’ gets tighter it’s easier to work in the bead strings in sections.
On the photo I append about half a dozen white beads to a white string.
Pay attention to make a ‘fabric’ of consistent denseness.

When everything is finished attach any closure, e.g. a bead loop and a colour matching button.
I didn’t make any closure, because the item on the photo wasn’t meant to be a bracelet.
Notes:
Have fun!

Inspired by this tutorial on how to make fabric beads I created the mezuza case on the photo.
It was so much fun!
I took a glass tube, wrapped it in fabric and embellished it with bead strings. I had a little cork for the tube which I embellished with some beads too.
Links:
Making Fabric Beads