Cardboard Weave II

Cardboard Weave II

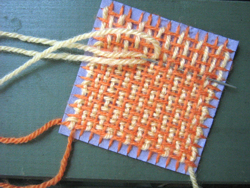
While surfing I found mini or hand-held looms (see links below), which I find very interesting, because 1st I don’t have much place at home and 2nd I know that I don’t weave, I just try it once in a while ;-))
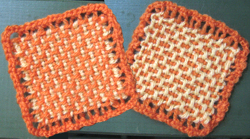
On the photo you see the front and back side of my little woven patch.
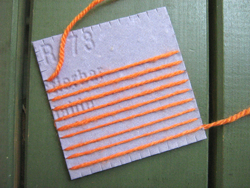
 

Cardboard Weave II I would never actually buy a loom, therefore I made me one from – guess… – yes: cardboard! ;-)
On the photo you see me threading the loom in one direction.


Cardboard Weave II
Then I thread my cardboard loom in the other direction.
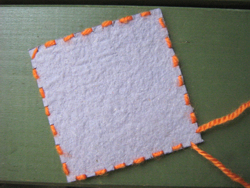
 

Cardboard Weave II That’s the way my cardboard loom looks at the back side.
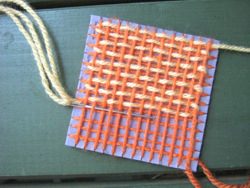
 

Cardboard Weave II Now I’m weaving in one direction.


Cardboard Weave II And here I’m weaving in the other direction.
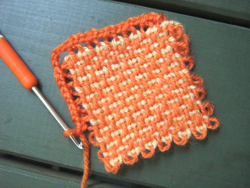
 

Cardboard Weave II After having finished with weaving I crochet an edging to neaten the edge.

The first photo shows back and front side of the finished little piece.


Links:
At Weavettes:
How to weave on a mini loom (English) (via knitting-and.com)

The original site doesn’t exist any more and is now available through webarchive:
At Weavettes:
How to weave on a mini loom (English) (via knitting-and.com)

At eLoomaNation: Big Ideas from Little Looms:
Get ideas what to do with your patches

Get basic woman measurement charts for clothing patterns at the website of Jessica Tromp just as for the Clothes From Crocheted Medaillons
Crazy Daisies II

Crazy Daisies Scarf

I continued to play around with the Crazy Daisies. It is so much fun and I’m working on a Crazy Daisy Scarf. On the photo you see my scarf.


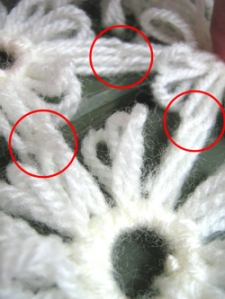
Crazy Daisies II One thing I found out is that I love the little flowers much more without any edging. Therefore I’m joining them while working.
I’m measuring the yarn and wind the daisy. In doing so I’m pulling the thread immediately through the loops of the previous daisies using a blunt tapestry needle.
It takes a little longer, but this way I don’t have to assemble later and avoid the problem of hiding the ends.


Crazy Daisies II The other thing I played around with is another cardboard loom. In my first Crazy Daisy entry I used a cardboard version of the ice-cream-lid-loom.
Later I found other daisy looms and created my cardboard version of it. It works very well.


Crazy Daisies II
My cardboard loom consists of 2 cardboard disks. I taped them together and put 12 pins between both disks. I can then wind a daisy and when finished I pull the pins out. For the next daisy I put the pins back in my cardboard loom.
Note: I found out, that the disks must be very tightly taped, otherwise the pins fall out.
I always use the same pin holes and this way the tape won’t be damaged. I used my well taped cardboard loom over and over and don’t have any problems with the pins.
This way I can make my loom on the spur of the moment in the shape and size I need at the moment. I also tried a square one and the square daisies looked also nice.


Links:
unikatissima’s Crazy Daisies

Tetrapak Coin Purse

Tetrapak Coin Purse

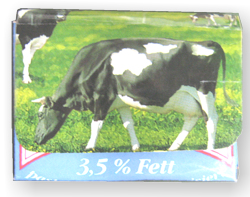
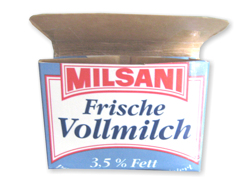
We’re drinking much apple juice and milk – and they come in tetrapaks. We must have ‘produced’ tons of it!
Therefore I love the idea of recycling at least on of them into an coin purse.


Tetrapak Coin Purse On the photo you see my first attempt (still without button): it’s such a nice idea :)


Links:
Tetrapak Coin Purse


Pocket Graffiti Pen

Pocket Graffiti Pen

I found an ingenious way to make my own Airbrush tool.
I haven’t tried it yet, but I think of using it with the cut-out letters from my letter stencils.
(The picture is a mock-up, made digitally to show what I am aiming for.)


Links:
Pocket Graffiti Pen (with explaining photos)

Here at unikatissima:
Letter stencils

Folded Spirals

Folded Spirals

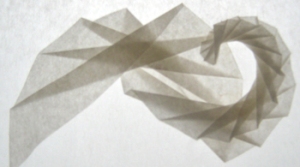
As I saw this tutorial on how to make vellum spirals I was amazed: such beautiful paper spirals and so easy to make!
On the photo you see my spiral with changing directions.
It looks so frail against the light.

The tutorial is in German, but there are explaining pictures (you must look at the PDF file!).
What you have to do is basically:

  • Take a piece of vellum paper (I used some sandwich paper).
  • Cut a triangle from the vellum paper.
  • Cut a narrow, right-angled triangle from cardboard (best look at the explaining pictures).
  • Lay the cardboard triangle on the vellum paper triangle as described by the explaining pictures and fold the paper along the cardboard triangle. Then turn the vellum paper triangle and fold the paper again.
  • Continue as long as you like/as possible.

They suggest that you begin to experiment then:

  • try broader or narrower triangles for the paper
  • try broader or narrower triangles for the cardboard
  • use a narrow cardboard triangle for left folds and a broad for right folds
  • divide in halves every second fold after having finished etc.

I had a lot of fun and I hope so will you :-)

I intend to use those spirals in the future on cards, tags, in altered books and so forth.
I’d love to know about your experiments with folded spirals.


Links:
Tutorial on how to fold paper spirals:
(Download the PDF file)

Plaster Photo Holder

Plaster Photo Holder

I saw this Tealight Photo Holder. I found the idea stunning, but I didn’t like the look of it: for me it looks like a cut-open tealight ;-)
But then an idea stroke: How easy to make this from plaster!
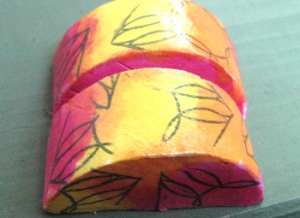
On the photo you see my plaster photo holder in action ;-)


And here is how I did it:

Plaster Photo Holder
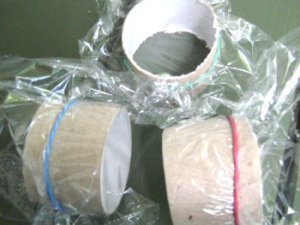
img 1: Take a toilet paper tube and cut in rings about 4-5 cm height (appr. 1.5 – 2 inches). I did this with the sharp knife on the photo.


Plaster Photo Holder
img 2: Wrap foil around, but let one side open. Fix the foil with elastic.


Plaster Photo Holder
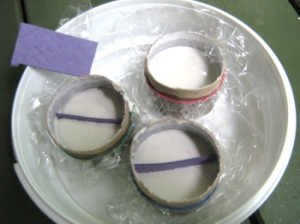
img 3: Fill the forms with plaster to a height of about 2,5 cm (about 1 inch). When full, insert a previously cut piece of cardboard as separator.

Let harden (about an hour).


Plaster Photo Holder
img 4: When the plaster went hard, but everything is still wet, tear apart the cardboard tube and break the ‘plaster coin’ where the separator cardboard stuck.


Plaster Photo Holder Plaster Photo Holder
img 5: Rub the cardboard rests away.
If your photoholder piece is uneven, now is the moment to fix it: Simply scratch away what you don’t like with the back of an old knife.

img 6: You can embellish them in so many ways.
I painted them immediately with watercolours, but you can also wait until thoroughly dry.


Plaster Photo Holder
img 7: When dried I stamped them and varnished them with medium gel.
Have fun!


Links:
Tealight Photo Holder
via Photojojo

Pendant-to-be-embellished

Pendant to be embellished
One day I wanted to have a pendant-to-be-embellished and decided to create it myself.
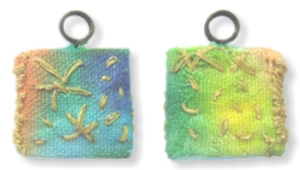
On the photo you see both sides of a charm of about 1,5 cm (appr. 0.6 inches) which I embellished with self-dyed fabric and some metallic yarn embroidery.
The embellishment isn’t quite what I dreamed of, but the core pendant worked well.

This is how I did it:
You need:

  • some cardboard (the thickness of the middle piece must be about the same as the wire)
  • some wire
  • glue

Pendant to be embellished img 1: Cut 3 equal pieces of your cardboard.


Pendant to be embellished img 2: Wrap the wire round a dowel to form the eye. Then turn a couple of times to form the peg and then form a bigger eye which will be hidden in the pendant.
Note: I prefer the hidden part of the wire to be an eye because then the wire can’t be dragged out by accident.


Pendant to be embellished img 3: Take the cardboard piece which will sit in the middle and trace your hanger.


Pendant to be embellished img 4: Cut out the place you will need for the hanger.


Pendant to be embellished img 5: Glue the hanger and the middle cardboard pieces onto one outer cardboard piece.
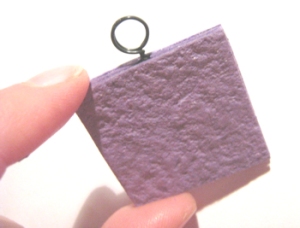
Note: I glue on also the cardboard piece in the eye to prevent having a hollow.


Pendant to be embellished img 6: Glue the other outer cardboard piece onto. Your pendant-to-be-embellished is finished and you may begin with the embellishments.


Pendant to be embellished Pendant to be embellished
img 7 & 8: This is a solution for a 2-eyed pendant.


There are so many ways to embellish your self-made pendant (mini collages, painted, beaded, stamped etc), I’d love to see them.
Please feel free to comment here to show your trinkets.

Have fun!

Fractal Pop Up

Fractal Pop Up

I already cut different pop ups, and I find this one quite elegant.
I haven’t done it yet, but I surely will one day.

(If you like the fractal repeats, take a look at the previous mentioned Fractal Art.)


Links:
Fractal Cut

Wikipedia: English entry for ‘fractal’Deutscher Eintrag für ‘Fraktal’

Here at unikatissima:
Fractal Art

Cardboard Weaving Frame

Cardboard Weaving Frame

Once I wanted to create a picture frame with a woven border. I simply made a cardboard loom with an opening where I wanted to put the picture.
Cardboard Loom It worked out well, but I didn’t really like it when finished ;-)
I wanted to share anyway.
The sketch shows how to wrap the yarn.
If you want to see it better, enlarge the picture by clicking on it.
If you want to know how to weave on a cardboard loom, see the Links below.


Links:
Tutorial on how to weave with a cardboard loom

Paper Crazy Quilt

Paper Crazy Quilt

I love Crazy Quilts, because it is a kind of Freeform work, but I don’t like sewing. So I began to make my quilts on and with paper.
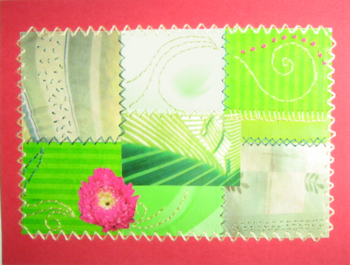
On the photo you see a card I made with this technique.
I didn’t only embroider the seams but I also used some fancy stitches like French Knots e.g. (the red dots on the photo) onto the surfaces.

To make your own Paper Crazy Quilt, find matching papers and cut them into pieces. On the photo I used rectangles, but the typical Crazy Quilt distribution is also beautiful (here you can find some lovely blocks here you can find some lovely blocks).
Glue the collage on thin paper and then begin embroidering (carefully!) as if it was a real Crazy Quilt (here is an online class for Crazy Quilts).
To finish you glue or embroider your Paper Crazy Quilt on cardboard.


Links:
Crazy Quilt blocks
Tutorial moved to: Crazy Quilt blocks

Online class for Crazy Quilts

English Embroidery Stitch Diagrams
Deutsche Stickstichbeschreibungen

French knots (Knötchenstiche) (English)
French knots (Knötchenstiche) (German)