Cardboard Roll Star

flickriver pxu_fi Cardboard Roll Star

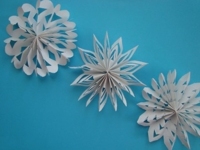
I find the cardboard roll star beautiful – as beautiful as the other cardboard tube ideas :)


Links:
Cardboard Roll Star (snowflake made of toilet paper rolls)
via: snowflake made of toilet paper rolls by pxu.fi
via: snowflake

Here at unikatissima:
Entries with the tag ‘Cardboard tube’

Paper Snowflakes

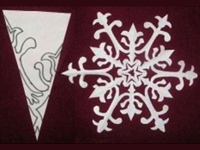
Here I want to present three most beautiful paper snowflakes – I simply couldn’t decide for just one ;-)


zhidi gongyizhiyi 3D Paper Snowflakes
These paper snowflakes are really 3D.

Links:
3D Paper Snowflakes (Simple three-dimensional paper-cut snowflakes tutorial) (Chinese)
English Google translation of entry


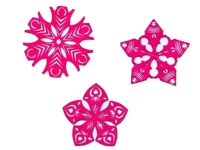
Joybx Paper Snowflakes
Here are given a lot of wonderful patterns for paper snowflakes.

Links:
Paper snowflakes
via: gasp!


pinterest DIY Paper Star
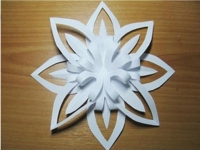
This paper snowflake is actually a paper flower, but I love it as also snowflake ;-)

Links:
Paper Snowflakes (DIY paper flower)


Here at unikatissima:
Entries with the tag ‘snowflake’

Paper Shopping Bag

unikatissima Paper Shopping Bag


At craftster started the ‘Craft Challenge #47 – Reusable Shopping Bag Challenge 2’ and I had the idea of making a shopping bag from paper (see also the other entries).
In principle I really like it, but some things didn’t work the way I wanted them to (see also below) so that I didn’t finish the handle but only show how it can be made.
 

unikatissima Paper Shopping Bag
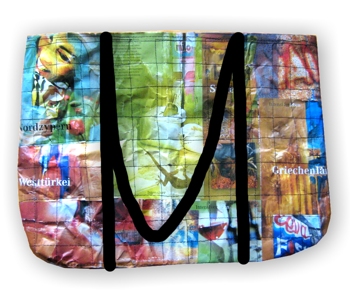
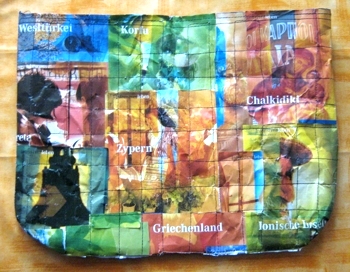
That’s how my shopping bag looks from one side…
 

unikatissima Paper Shopping Bag
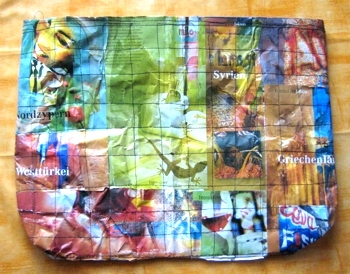
… and so from the other.
I used clippings from a travel brochure, so my bag is not only multicoloured but gives me even wanderlust ;-)


That’s what you do:
 

unikatissima Paper Shopping Bag
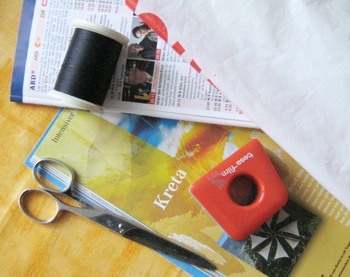
That’s what you need:

  • paper to strengthen (here an old TV guide)
  • paper for the outside (here clippings from a travel brochure)
  • plastic bag to strengthen the inside and make it possible to wipe it with a damp cloth (right top in picture)
  • some tape and a glue stick (which I forgot to take a photo from ;-))
  • scissors
  • sewing thread and best a sewing machine
  • possibly transparent plastic foil or plastic bag (non-adhesive or you can get bad problems with your sewing machine!)
 

unikatissima Paper Shopping Bag
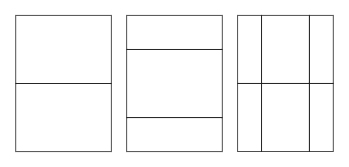
First I layered three layers of my TV guide pages.
I used them askew as shown in the graphic so that they don’t always touch in the same place (every large rectangle is a page from the TV guide, the smaller ones are pages cut into halves in one or the other direction).
I taped them rarely so that the whole doesn’t fall apart.

On the future outside I laid on the clippings from the travel brochure and glued them on rarely to fix them slightly.

Note: Don’t use too much tape or glue because you can get bad problems with your sewing machine.

I laid the cut white plastic bag on the backside of my large paper rectangle with meanwhile four layers and begun to sew.

Note: It pays to fix the plastic bag somehow, too ;-)
 

unikatissima Paper Shopping Bag
Then I just started sewing (did I mention that I’m completely unexperienced in sewing? ;-))).

I wanted to sew (and have somehow sewn ;-)) lines but it was much more difficult than I thought.
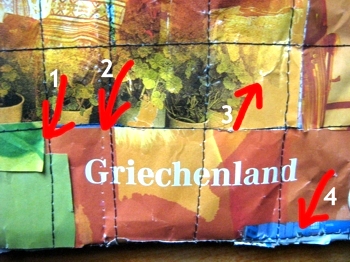
Therefore I made a mental note of some points for the next bag:

  1. The paper for the outside should be better joined.
    I think it even best to lay and sew on a layer of transparent (non-adhesive!) foil or plastic bag, then it is also possible to wipe it on the outside with a damp cloth.
  2. Practise sewing before, so that 1st my thread doesn’t tear and I’ll be 2nd hopefully able to sew straight lines ;-)
  3. The crinkling happened when I rolled up my large paper rectangle several times this way and the other to be able to sew it.
    Paper that is crinkled often get fabric-liker, so I didn’t find it bad.
  4. I laid the clippings from the travel brochure so that they all meet on the underside of the bag – with the effect that it looks scruffy.
    Next time I’d put a broad stripe of coloured paper over the folding line of the bag.
  • I’ve sewn the side seams on the wrong side because I wanted to turn it after just like a fabric bag.
    Next time I will sew them from the right side because the turning was incredibly difficult and I simply couldn’t turn the corners completely.
    That’s why it has these chic rounded corners ;-))
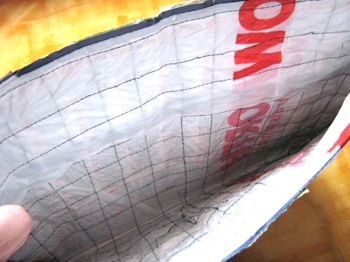
 

unikatissima Paper Shopping Bag
That’s how my bag looks at the inside.
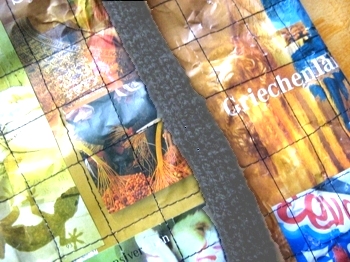
 

unikatissima Paper Shopping Bag
Actually I wanted to make a shoulder-long black with plastic bags filled I-cord as handle (I post-worked the photo to show you the knitting, originally it’s been completely black just as in the next photo ;-)) …
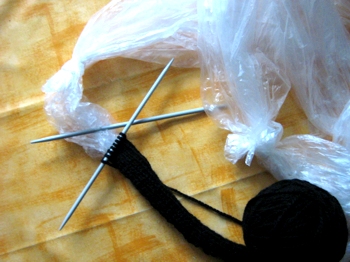
 

unikatissima Paper Shopping Bag
…but I don’t want to make it for a bag with lots of defects.
You can see here anyhow how I knotted the plastic bags together and knitted a little bit already.
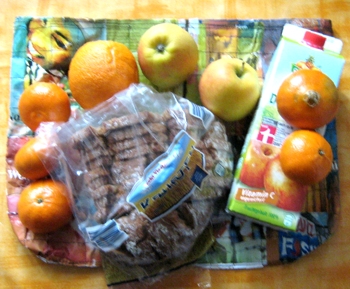
 

unikatissima Paper Shopping Bag
The bag seems to be quite robust and I wanted to try out what it can carry.
Therefore I stuffed 1 l juice, half a kilo of bread, 2 appels, an orange and 5 tangerines in – in short a little shopping ;-)
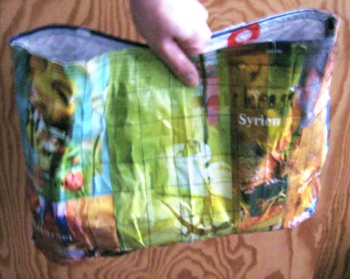
 

unikatissima Paper Shopping Bag
Here I’m holding the bag with the content of the previous picture – no problems at all ;-)


Links:
Craft Challenge #47 – Reusable Shopping Bag Challenge 2
Entries for the Craft Challenge #47

Here at unikatissima:
Clothesline Knitting or Filled I-cord
Start an Embroidery

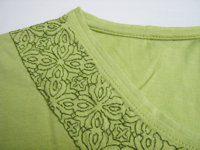
unikatissima Start an Embroidery

I just wanted to try ‘real’ embroidery (viz. not on paper ;-)) and had to find out how actually to begin and to end (on paper I simply glue on the threads but I thought that this must be done differently on fabric ;-)).

I found great instructions that helped a lot.

After my first experience with the v-neck of my t-shirt I think that I will embroider more often on fabric ;-)


Links:
Starting and Ending Threads

Here at unikatissima: Entries with the tags ’embroidery’ and ‘paper’

Seed Starters

Frugal Seed Starters

I’m a city kid with a brown thumb (all my plants have a very short life) and I don’t have the slightest idea whether I’m too late but I wanted to present it anyhow:

If you seed plants and need seed starters you can buy them.
But you can make them easily yourself: from newspaper, egg shells or egg carton.
Great, isn’t?


Links:
Newspaper Seedling Packs
Eggshell Seed Starters
Egg Carton Seed Starters

Google search result for ‘frugal seed starter’
Google image search result for ‘frugal seed starter’

Paperless Origami

unikatissima Paperless Origami

If you’re folding origami figures they often come undone, are collapsing or sagging.
That’s especially vexing if they were meant to be a holiday decoration.
But now I found a very good solution to avoid sagging origami figures: fold the origami figures from fusible interfacing.
I must say that I find the photos of the tutorial persuasive.
Something more to try one day ;-))
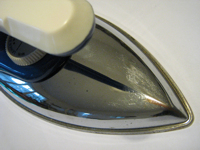
(P.S.: On the photo you can see my iron for a start, I still have to purchase fusible interfacing ;-))


Links:
Paperless Origami

Paper folded bracelet

Paper folded bracelet

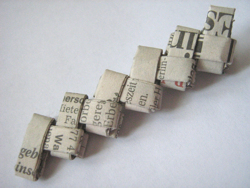
Of course you don’t see the bracelet on the photo, but my first and only attempt to make such a bracelet.
Better look at the photos in the tutorial on how to make a Starburst wrapper bracelet at craftster.org.
After I’ve finished the little piece on the photo I had enough – it’s such a fiddly work ;-)
If you like this technique, try the tutorial on how to make a wrapper purse!


Links:
craftster.org: A website with sooo many craft ideas, inspirations and tutorials
Starburst Wrapper Bracelet
Chip Wrapper Purse Instructions

String Art for Cards

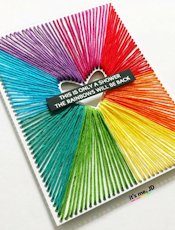
Its Me JD String Art for Cards

I have already presented stuff about string art and card and even with both, e.g. the string art card and the
Starburst card.
Nevertheless I’d like to present the string art for cards, too, because I find it also great :)


Links:
String Art for Cards (DIY String Art Tutorial for Cards and Paper Crafts)

Here at unikatissima:
Entries with the tag ‘string art’
Entries with the tag ‘card’
String Art Card
Starburst Card

Heaps of Christmas Trees

This year I looked just for fun for Christmas trees in the broader sense and found so many that it feels as if I’d have had to start already in August presenting them ;-)
That’s why I present here several instructions and inspirations in the three categories Christmas trees, Christmas tree table decorations and Christmas tree shaped ornaments:


Christmas Trees

OhGizmo Bookshelf Christmas Tree
Great idea: simply fill a book shelve in the right way and get your bookshelf Christmas tree immediately ;-)

Links:
Bookshelf Christmas Tree (OGCC Day 15 – DIY Bookshelf Christmas Tree)


Better Homes and Gardens Quick and Easy Christmas Wall Decor
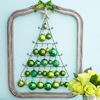
Also a beautiful idea: simply fill a large beautiful picture frame with globe ornaments to get a picture frame Christmas tree.
Most suitable for people with too little room ;-)

Links:
Picture Frame Christmas Tree (Quick & Easy Christmas Wall Decor)
via: Wire Tree Display
via: 24 christmas tree projects


not martha Christmas Tree Ornament Mobile
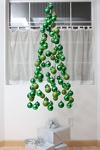
I found this idea also extraordinary beautiful: a hanging Christmas globe ornament Christmas tree.

Links:
Christmas Globe Ornament Christmas Tree (Christmas tree ornament mobile, how-to)
via: DIY FYI: Hanging Christmas Tree Mobile.


DIY Christmas ideas: String Art Christmas Tree
It doesn’t stop there: you can also do something with a white board and a lot of thread, viz. a string art Christmas tree.

Links:
String Art Christmas Tree (DIY Christmas ideas: String Art Christmas Tree)


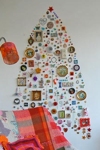
apartment therapy Wall Collection Christmas Tree
I really like the wall collection Christmas tree, too, it should suit people with little room and an enthusiasm for collecting ;-)

Links:
Jane’s Wall Collection Christmas Tree
via: Best of DIY Holiday Gifts & Decor (Liste unter ‘show more’)


Christmas Tree Table Decorations

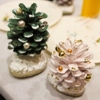
Spoon and Tamago Miniature Pinecone
Also cute, aren’t they? Little pinecone Christmas trees for the table ;-)

Links:
Pinecone Christmas Trees (DIY: Miniature Pinecone Christmas Tree)


Half Baked - The Cake Blog Sparkling Christmas Trees
Or what about sparkly white ice cone Christmas trees for once?

Links:
Ice Cone Christmas Trees (DIY: Sparkling Christmas Trees)


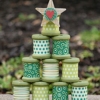
sei lifestyle Spool Christmas Tree
Very easy: wrap yarn spools in beautiful gift paper and you get a yarn spool Christmas tree ;-)

Links:
Yarn Spool Christmas Tree (On the 7th & 8th Days…)
via: Spool Tree
via: 24 christmas tree projects


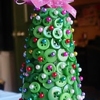
Cup Of Delight Button Christmas Tree
Some people have lots of green buttons, you can easily make a button Christmas Tree then ;-)

Links:
Button Christmas Tree
via: Button Christmas Tree


Wonder Forest Printed Paper Pine Tree
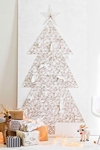
I really like this idea, too: simply stack lots of paper and make a paper Christmas tree ;-)

Links:
Paper Christmas Tree (DIY Printed Paper Pine Tree – Anthropologie Inspired)
via: Anthro Inspired Sheet Music or Book Page Christmas Tree {Wonder Forest}


Christmas Tree Shaped Ornaments

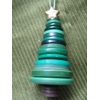
Modern Minerals Button Tree Ornament
Should you still have a couple of green buttons then you also can make this – as I find really cute – Christmas tree shaped ornament ;-)

Links:
Christmas Tree Shaped Ornament (Button Tree Ornament)
via: Button Christmas tree.


Here at unikatissima:
Entries containing the word ‘Christmas Tree’