Library Pocket Book

unikatissima Library Pockets

I found a tutorial on how to make a wonderful library pocket book.
Though our library doesn’t have such library pockets and I don’t feel like buying them in internet.
That is why I designed some pockets myself. If you like you can download my library pocket template (link see below).
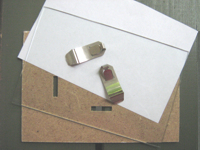
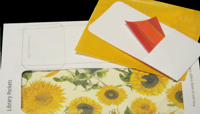
I’m planning to make a book where the pockets are made from patterned paper, the flower paper on the photo e.g.
For that purpose I will print the template, glue the paper so, that it is patterned on both sides and then cut the pockets from the template.
And then I will begin to embellish ;-))


Links:
Library Pocket Book

Here at unikatissima: unikatissima’s Library Pocket Template (PDF – ca. 80 KB)

Crazy Daisies II

Crazy Daisies Scarf

I continued to play around with the Crazy Daisies. It is so much fun and I’m working on a Crazy Daisy Scarf. On the photo you see my scarf.
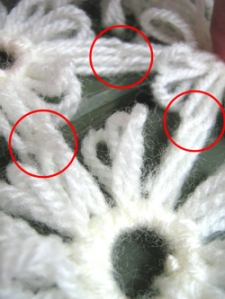
 

Crazy Daisies II One thing I found out is that I love the little flowers much more without any edging. Therefore I’m joining them while working.
I’m measuring the yarn and wind the daisy. In doing so I’m pulling the thread immediately through the loops of the previous daisies using a blunt tapestry needle.
It takes a little longer, but this way I don’t have to assemble later and avoid the problem of hiding the ends.


Crazy Daisies II The other thing I played around with is another cardboard loom. In my first Crazy Daisy entry I used a cardboard version of the ice-cream-lid-loom.
Later I found other daisy looms and created my cardboard version of it. It works very well.


Crazy Daisies II
My cardboard loom consists of 2 cardboard disks. I taped them together and put 12 pins between both disks. I can then wind a daisy and when finished I pull the pins out. For the next daisy I put the pins back in my cardboard loom.
Note: I found out, that the disks must be very tightly taped, otherwise the pins fall out.
I always use the same pin holes and this way the tape won’t be damaged. I used my well taped cardboard loom over and over and don’t have any problems with the pins.
This way I can make my loom on the spur of the moment in the shape and size I need at the moment. I also tried a square one and the square daisies looked also nice.


Links:
unikatissima’s Crazy Daisies
Ganutell

Ganutell

Via craftster.org I found another craft, I’ve never heard about: Ganutell.
It makes me think of my Starburst card ;-)
Originally they made flowers with this technique, but it looks great as earrings as seen at this craftster discussion thread.
I have to face it: it is another technique on my (long, long) what-I-really-have-to-try-list ;-))


Links:
Ganutell

Discussion thread at craftster.org: How to make these ‘woven’ earrings?

Here at unikatissima:
Starburst Card

Transparent Polymer Clay

Transparent Polymer Clay

Transparent polymer clay gives you wonderful possibilities as you can see on the photo: this is an egg I covered in polymer clay.
First I took several polymer clay colours (greens, blues and yellows) and rolled them together in a snake. Then I passed it through my pasta machine and wrapped the egg with, decorating it with some red spots.
Transparent Polymer Clay Afterwards I took my translucent flower cane translucent flower cane and covered the polmer clay-ed egg with it. I smoothed out the surface and then baked the polymer clay covered egg.
In the end I sanded and polished thoroughly so that it got a beautiful matte shine.


Links:
Translucent Flower Cane

Tutorial moved to: Translucent Flower Cane

Faux Silk

Faux Silk

I love to imitate things, so I had to check immediately the tutorial on how to make faux silk for cards.
On the photo you see my results: I took one of my self carved eraser stamps, coloured it with a marker and stamped on tissue paper (the left flower). Then, just to see what happens, I stamped two more times. The photo isn’t so good, but the pale stamps look elegant. On the third I didn’t smooth the paper to allow for more crinkles.

I will use this technique more often.


Links:
Faux Silk

unikatissima’s Eraser Stamps how-to
unikatissima’s Stamping With Markers how-to

YoYo Pin

YoYo Pin

I like yoyo’s, but only recently I tried to make one. And I find it cute.
It is made from shiny polyester fabric and embellished with a little crocheted flower and some embroidered beads (I hate to have polyester on my skin, but I like it for pins and the like, because it is so shiny).


Links:
Yoyo Projects (with explaining pictures)
How to make a Yoyo (with explaining pictures)

The links don’t work anymore, you can find the information here now:
Yoyo Projects (with explaining pictures)
How to make a Yoyo (with explaining pictures)

Crazy Daisies

Crazy Daisies - Wickelblumen

While searching for something else I found a lot of instructions and tips about Crazy Daisies and had to try them immediately ;-)

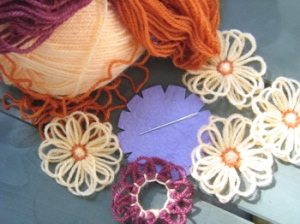
As you can see on the photo, my attempt on winding daisies on my own daisy loom worked out very well.
I cut the loom (the purple item on the photo) from thick cardboard. I think that the ice cream lid loom is better, because plastic won’t loose its shape so easily, but for just a couple flowers cardboard is fine.
At my first flowers I just made a very simple backstich center, but even so I find those little flowers stunning ;-)
The dark red flower is a daisy with an open center, but I made it in a different way: I didn’t wind the thread to the other side of my selfmade cardboard loom but to another notch (always the fourth notch in place of the sixth, I think. I didn’t write it down, because I don’t like it so much).
I’m planning to make something like the shrug with a lot of flowers and a simple crochet edging.
Eventually. ;-)


Links:
(all in English, but with explaining pictures and photos)
Instructions and tips about Crazy Daisies

For example:
Round ice cream lid daisy loom
Instructions on how to wind daisies
How to make a backstich center daisy
How to make a open center daisy
Simple crochet edging

Stole, Shrug, Handbag and Three Different Shapes on the Crazy Daisy Winder (from 1945)

Watercolor Button Garden

Watercolor Button Garden

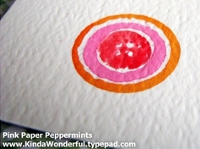
Pink Paper Peppermints has a beautiful project: 31 Crafty Flowers.
I checked them all and I wanted to present one of them, although I haven’t tried it yet, because I dont’ have the right markers: the Watercolor Button Garden.
Aren’t they beautiful?
And be sure to check the other flowers too :)


Links:
Watercolor Button Garden

Crazy Quilt Photo Frame

Crazy Quilt Photo Frame

Once I wanted to make a photo frame for a friend. There are so many ways to do this, but then I got an idea I still find great ;-))


Crazy Quilt Photo Frame I used a simple glass frame as seen on the second photo that I already had at home and glued a kind of Paper Crazy Quilt with two windows for the photos onto the glass.
I used flower photos from an ad as paper and the only embroidery stitches I used where the zigzag stitches, because I wanted it to be simple.


Links:
Here at unikatissima:
Paper Crazy Quilt