Nature Paper

Nature Paper

Once I found a tutorial on how to make paper from vegetables, but I don’t find back the tutorial (it was at ARD-Buffet, but it seems to be too long ago).
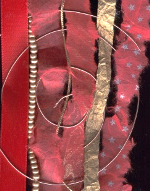
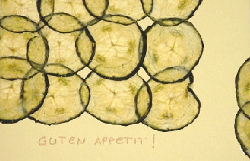
On the photo you see a card made with cucumber paper for a friend for the end of fast.

How to make cucumber paper:

  1. Cut the cucumber in slices of about 0,5 cm / 0,2 inches.
  2. Put the slices between two layers of tissue paper.
    They must overlap to form a sheet of paper!
  3. Put everything into the microwave and put several plates as weight onto your paper-to-be.
  4. Heat at a high temperature for about 1 minute.
    (Note: Please be careful when using the microwave!)
  5. After 1 minute the tissue paper is wet, you have to change it. Also air the cucumber paper a little bit.

Repeat steps 2 – 5 until the tissue paper stays nearly dry.
Lay between new sheets of tissue paper and between several layers of old newspapers and put some weight on it.
About once a day you must replace the moist tissue paper and newspapers by dry ones.
After 2 – 3 days your cucumber paper is ready for use.

Cucumber seems to be one of the easiest vegetables to be used for paper. You can also use other vegetables, but I haven’t tried them and can’t say, how thick the slices must be and how long it takes.
The paper is real paper: You can write on it, you can cut it and so forth.

Folded Paper Strips of Equal Width

Folded Paper Strips of Equal Width

Sometimes you need folded paper strips of the same width, when weaving paper baskets e.g., making a magazine purse or perhaps when making accordion folds.
Making those strips can be a time-consuming and frustrating experience – but it can be very fast and easy as well: Once I read somewhere (unfortunately I don’t remember where exactly) that you only have to roll your paper sheet over a dowel and then flat the paper roll.
Easy peasy, isn’t it? ;-)


Folded Paper Strips of Equal Width 
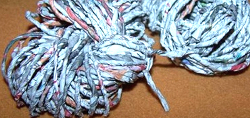
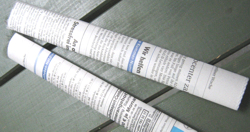
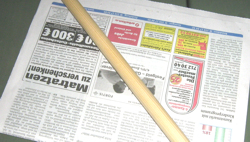
You need your sheet of paper and a dowel.
I used here one of my giant knitting needles.


Folded Paper Strips of Equal Width 
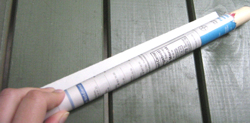
Roll your sheet of paper on the dowel.


Folded Paper Strips of Equal Width 
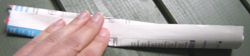
Pull the dowel out of the roll and flatten the paper roll.


Folded Paper Strips of Equal Width 
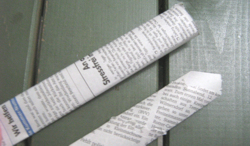
This way you get paper strips which are of the same width over the whole length.
Once I made a bowl like these magazine bowls. I preferred the ends of my paper strips to be thinner then the center, so that everything is about the same width everywhere.


Folded Paper Strips of Equal Width 
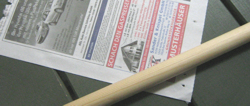
Roll your sheet of paper diagonally on the dowel.


Folded Paper Strips of Equal Width 
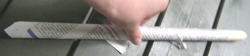
The paper roll gets longer, but the ends are thinner than the center.
You can now overlap the strips and create a strong bowl.


Links:
Paper woven basket

At craftster.org:
Magazine purse
Magazine bowls

Google image search result for ‘magazine bowl’

Paperweaving Plus

Paperweaving Plus

Although I like it, I always considered paper weaving a bit dull. Then I saw Paperweaving Plus (scroll down until ‘Paperweaving Plus’) and found the results fascinating.
I liked especially the not-only-paper-weave which I have to try as soon as possible.


Links:
Paperweaving Plus (scroll down until ‘Paperweaving Plus’)

Weave paper stripes into a sheet of paper (English) (With explaining pictuers)

If you also think, that paper weaving is a little dull, take a look at the flickr results for ‘paper weaving’

Moldable Stamps

Moldable Stamps

I knew about those moldable foam stamps, but I never realized how versatile they are and what great stamps you can make from them. You can even combine them into stunning collages.
I’m speechless again ;-))

On the photo you see my attempt at stamping a clothespins pattern. Because I don’t have no moldable stamp, I used my kneaded eraser. I think this is a great background for a card.


Links:
Moldable Foam Stamps
Foam Stamping: The Follow-Up

unikatissima’s Eraser Stamps

Rough Your Papers Up

Rough Your Papers Up

I like the so-called ‘Shabby Chic’ and tried some of the ‘Rough Your Papers Up’-Techniques. They make great backgrounds.
For the piece on the photo I took a gift wrap and sanded it very lightly (although it looks as if I worked hard on it ;-)). The scratches where spotless white, which was much to much contrast, but after I rubbed some ochre coloured chalk in, I like it much better.

Links:
scrapjazz techniques: Rough Your Papers Up

Beeswax Collage

Beeswax Collage - Bienenwachs Collage

I find making collages fascinating.
One interesting technique to glue your items to the base is the so-called beeswax collage (for links to tutorials see Links below). It gives a warm colour to the collage and if polished a nice shine too.
On the photo you can see my first (and up until now last) attempt to do this. I collaged pieces of different newspapers (Chinese, Arabic, Corean) and self-made papers and than embroidered the spiral by hand.

Links:
At ARTchix Studio: Beeswax Collage: the link isn’t available no more.

At art-e-zine: Beeswax Collage

Google search results for ‘beeswax collage’
Google image search results for ‘beeswax collage’

Faux Silk

Faux Silk

I love to imitate things, so I had to check immediately the tutorial on how to make faux silk for cards.
On the photo you see my results: I took one of my self carved eraser stamps, coloured it with a marker and stamped on tissue paper (the left flower). Then, just to see what happens, I stamped two more times. The photo isn’t so good, but the pale stamps look elegant. On the third I didn’t smooth the paper to allow for more crinkles.

I will use this technique more often.


Links:
Faux Silk

unikatissima’s Eraser Stamps how-to
unikatissima’s Stamping With Markers how-to