Cardboard Weave II

Cardboard Weave II

While surfing I found mini or hand-held looms (see links below), which I find very interesting, because 1st I don’t have much place at home and 2nd I know that I don’t weave, I just try it once in a while ;-))
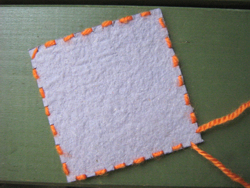
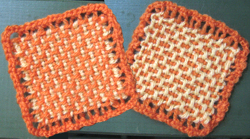
On the photo you see the front and back side of my little woven patch.


Cardboard Weave II I would never actually buy a loom, therefore I made me one from – guess… – yes: cardboard! ;-)
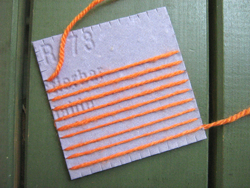
On the photo you see me threading the loom in one direction.


Cardboard Weave II
Then I thread my cardboard loom in the other direction.


Cardboard Weave II That’s the way my cardboard loom looks at the back side.


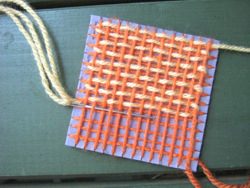
Cardboard Weave II Now I’m weaving in one direction.


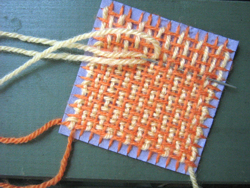
Cardboard Weave II And here I’m weaving in the other direction.


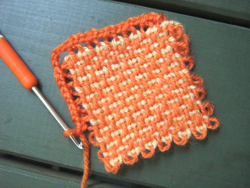
Cardboard Weave II After having finished with weaving I crochet an edging to neaten the edge.

The first photo shows back and front side of the finished little piece.


Links:
At Weavettes:
How to weave on a mini loom (English) (via knitting-and.com)

The original site doesn’t exist any more and is now available through webarchive:
At Weavettes:
How to weave on a mini loom (English) (via knitting-and.com)

At eLoomaNation: Big Ideas from Little Looms:
Get ideas what to do with your patches

Get basic woman measurement charts for clothing patterns at the website of Jessica Tromp just as for the Clothes From Crocheted Medaillons

Folded Paper Strips of Equal Width

Folded Paper Strips of Equal Width

Sometimes you need folded paper strips of the same width, when weaving paper baskets e.g., making a magazine purse or perhaps when making accordion folds.
Making those strips can be a time-consuming and frustrating experience – but it can be very fast and easy as well: Once I read somewhere (unfortunately I don’t remember where exactly) that you only have to roll your paper sheet over a dowel and then flat the paper roll.
Easy peasy, isn’t it? ;-)


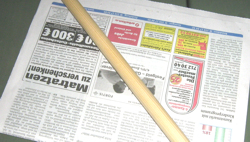
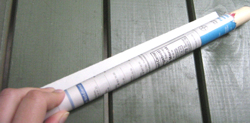
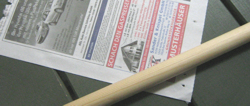
Folded Paper Strips of Equal Width You need your sheet of paper and a dowel.
I used here one of my giant knitting needles.


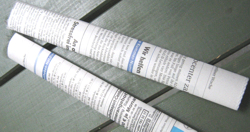
Folded Paper Strips of Equal Width Roll your sheet of paper on the dowel.


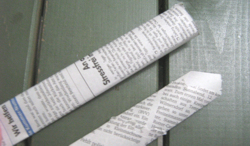
Folded Paper Strips of Equal Width Pull the dowel out of the roll and flatten the paper roll.


Folded Paper Strips of Equal Width This way you get paper strips which are of the same width over the whole length.
Once I made a bowl like these magazine bowls. I preferred the ends of my paper strips to be thinner then the center, so that everything is about the same width everywhere.


Folded Paper Strips of Equal Width Roll your sheet of paper diagonally on the dowel.


Folded Paper Strips of Equal Width The paper roll gets longer, but the ends are thinner than the center.
You can now overlap the strips and create a strong bowl.


Links:
Paper woven basket

At craftster.org:
Magazine purse
Magazine bowls

Google image search result for ‘magazine bowl’

Crazy Daisies II

Crazy Daisies Scarf

I continued to play around with the Crazy Daisies. It is so much fun and I’m working on a Crazy Daisy Scarf. On the photo you see my scarf.


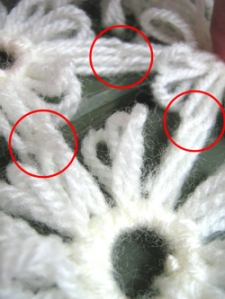
Crazy Daisies II One thing I found out is that I love the little flowers much more without any edging. Therefore I’m joining them while working.
I’m measuring the yarn and wind the daisy. In doing so I’m pulling the thread immediately through the loops of the previous daisies using a blunt tapestry needle.
It takes a little longer, but this way I don’t have to assemble later and avoid the problem of hiding the ends.


Crazy Daisies II The other thing I played around with is another cardboard loom. In my first Crazy Daisy entry I used a cardboard version of the ice-cream-lid-loom.
Later I found other daisy looms and created my cardboard version of it. It works very well.


Crazy Daisies II
My cardboard loom consists of 2 cardboard disks. I taped them together and put 12 pins between both disks. I can then wind a daisy and when finished I pull the pins out. For the next daisy I put the pins back in my cardboard loom.
Note: I found out, that the disks must be very tightly taped, otherwise the pins fall out.
I always use the same pin holes and this way the tape won’t be damaged. I used my well taped cardboard loom over and over and don’t have any problems with the pins.
This way I can make my loom on the spur of the moment in the shape and size I need at the moment. I also tried a square one and the square daisies looked also nice.


Links:
unikatissima’s Crazy Daisies

Transparent Polymer Clay

Transparent Polymer Clay

Transparent polymer clay gives you wonderful possibilities as you can see on the photo: this is an egg I covered in polymer clay.
First I took several polymer clay colours (greens, blues and yellows) and rolled them together in a snake. Then I passed it through my pasta machine and wrapped the egg with, decorating it with some red spots.
Transparent Polymer Clay Afterwards I took my translucent flower cane translucent flower cane and covered the polmer clay-ed egg with it. I smoothed out the surface and then baked the polymer clay covered egg.
In the end I sanded and polished thoroughly so that it got a beautiful matte shine.


Links:
Translucent Flower Cane

Tutorial moved to: Translucent Flower Cane

Pain From Crafting

Pain From Crafting - Schmerzen vom Basteln

Many crafters, crocheters, knitters and so forth know this: We’re working happily for hours, but when we (have to? ;-)) finish, we feel pain: in the neck, in the shoulders, in the elbow, in the wrists and perhaps in the hips.
Once I read an article from a crocheter, where she said, that she had to work the whole day long (about 10 hours a day if I remember right). She then discussed different ointments that she had tried over the time.
I must say that I was shocked: Such pain is a real drawback on life quality, but there must be a way without drugs and pharmaceuticals.
Later I got those pains myself and I had to figure out, what I want to do against.
After a certain research about RSI (see also links below) I found a way which sounds way too easy and trivial, but which works for me.
And which is one of the most difficult things to do for me, too ;-))

I just take my kitchen timer and set the clock to 15 minutes.
Every 15 minutes, when the alarm goes, I go up from my chair, stretch thoroughly, sit back again and continue (this takes me less than 10 seconds!).
That is the easy part.
The difficult part is for me to really do it!
And not to say: ‘Just this little row and then…’
Often I forget to set the timer to the next 15 minutes as well.
And it is always a disruption. If I’m crocheting, I have to put he hook and the yarn besides. If I’m sitting at my computer, I have to take my hands from the keyboard (although not my thoughts from the subject!).
I don’t like to be disrupted!
But if I follow my line, I can crochet for hours without any pain at all (I tried it).

Just give it a try if you have problems and tell me then, how it works for you.

I consider making a 30-days-trial from it.
This is a way to approach changes in your behaviour. Sometimes one wants to change something, but it doesn’t work. With the 30-days-trial you give yourself a time to test your new behaviour and then to decide: ‘Yes, that’s it.’ or ‘No, I made a mistake by thinking, that I want this.’
I did another 30-days-trial which helped me to change a habit, but it took me three 30-days-trials until I was sure ;-)


Links:
30 Days To Success

About RSI:
I found the website RSIRescue.com- Repetitive Strain Injury. They have lots of material, hints and tips and help for those who suffer from pain from repetitive strain, not only from the computer keyboard.
First check ‘Our Theory in a Nutshell’ in the left navigational bar. Although they’re talking about ‘How Computer Users Get RSI’ I know from my own experience that the problems of crocheters are similar.
Check also ‘Resources’ in the left navigational bar and then ‘Educational RSI Brochure’, where everything is explained very shortly.
Best, if you check all pages ;-))
It helped me a lot to understand where my problems come from and gave me an idea how to prevent further pain.

Bicycle Bottle Holder

Bicycle Bottle Holder

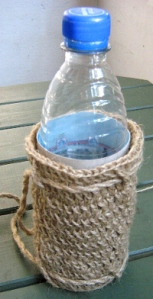
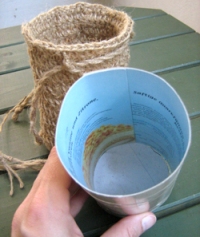
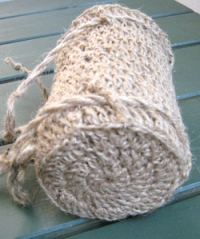
One day my friend asked me, if I have an idea how best to attach his water bottle to his bicycle. I promised him to make him a bottle holder and that’s it: It consists of a cardboard cylinder with bottom and a wrap crocheted from simple package string. I made two cords from the same package string to tie it somewhere to the bicycle.

And that’s how to do it:

  1. Cut a rectangle from cardboard.
    One side must be long enough to go around the bottle plus allowance, the other must be high enough, so that it holds the bottle safely.
  2. If you want the cardboard container to be (quite) waterproof, tape the inside with tape.
    Note: I used clear package tape.
  3. Wrap the cardboard around the bottle and wrap with long strips of tape.
    Hint: If it has to be waterproof, tape the whole cylinder.
    Hint: To make sure, that the cardboard container is not to tight around the bottle, I wrapped the bottle in several layers of old newspapers and wrapped the cardboard around the ‘thickened’ bottle.
  4. Cut a circle from cardboard, optionally tape the to-be inside with tape, too.
  5. Attach the circle with amply applied package tape to the bottom of your cardboard cylinder.
  6. Then you can create the outer container.
    Note: I crocheted it from package string by first crocheting a circle and then simply working straight up. ‘On the way’ I worked some thread eyes for the cords. The cords themselves were made from the same material.
    Hint: It should be easy enough to sew the outer container from a fabric matching your bicycle colours.
  7. The inner cardboard container and the outer crocheted container.
    Bicycle Bottle Holder Bicycle Bottle Holder


    Links:
    If a bicycle bottle holder isn’t enough for you, try the Bicycle Handlebar Bag.

    Making Any Sized Crochet Circles (English)
    Häkeln lernen: Runden und Spiralen (German)

    How to make Twisted Cord (English)
    Kordel drehen (German)

Lacy Crochet Scarves From Edgings

Lacy Crochet Scarves From Edgings

I love to crochet lacy scarves, but I don’t like to always work the same pattern.
Therefore I was looking for some patterns for such lacy crochet scarves and didn’t find what I was searching for.
Then an idea stroke: What is a lacy crochet scarf but two edgings back-to-back?


Lacy Crochet Scarves From Edgings
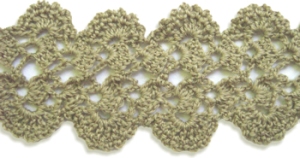
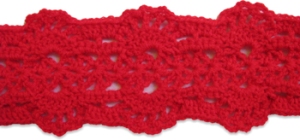
On the first photo you see one of my scarves made from a handkerchief edging from a magazine I bought. I used acrylic yarn. The second one is from a towel edging from another book. And for the third I first crocheted a middle strip which I surrounded afterwards by a self designed edging.


Lacy Crochet Scarves From Edgings
Addendum: By the way, I found this idea so clever, that I entered this post to the This Thursday is all about… challenge 3 Clearly Clever ;-))
Therefore Tracey’s comment ;-)


Links:
Crocheted Edging Links
Crochet Pattern Central: Free Edging Crochet Pattern Links
crochet.about.comSearch results for ‘edging’

Crazy Quilt Photo Frame

Crazy Quilt Photo Frame

Once I wanted to make a photo frame for a friend. There are so many ways to do this, but then I got an idea I still find great ;-))


Crazy Quilt Photo Frame I used a simple glass frame as seen on the second photo that I already had at home and glued a kind of Paper Crazy Quilt with two windows for the photos onto the glass.
I used flower photos from an ad as paper and the only embroidery stitches I used where the zigzag stitches, because I wanted it to be simple.


Links:
Here at unikatissima:
Paper Crazy Quilt

Letter stencils

Letter stencils

Rosie showed her beautiful carved stamps and mentioned that she wants to carve letters too.
I prefer to use letter stencils, because I can use them in such a flexible way.
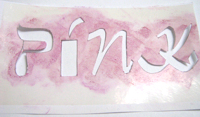
On the first photo you see a page from an artist book of mine yet to be finished. It has the theme ‘Colour’ and I stenciled the word ‘Pink’. On the other photo beneath you can see the stencil.

This is how I did it:
You’ll need:

  • Plain paper
  • Different fonts on your computer
  • Clear tape
  • Sharp knife, like an Xacto knife

What to do:

  1. Print the word you’re interested in in the requested size on paper.
    Note: You can use just one font, but I found different fonts for every letter more appealing.
    Note: Best are big fonts because they are easier to cut out.
  2. Put some clear tape on the print.
  3. Cut the letters carefully.
    Note: The tape makes the paper sturdier, so that the cutting is a little easier.
  4. Stencil your word wherever you want (paper, cardboard, fabric, glass, wood etc.).
    Note: I painted with a marker on the clear tape round the letters and smeared them with my fingers onto the paper.

Letter stencils The tape makes the paper not only sturdy, but also quite waterproof, so that you can use it several times with nearly every kind of colours. If necessary you can put tape on both sides of the paper prior to the cutting.

You can find a similar tutorial on instructables.com for making your own freezer paper and your own freezer paper stencil. I guess it is better for making bigger stencils, but I haven’t tried it.


Links:
Rosie’s carved stamps

Eraser Stamps Tutorials
Photo Stamps Tutorial

My Artist Book

Freezer paper and stencil tutorial

Kumihimo

Kumihimo

Once I took a class for Kumihimo braiding – that is a japanese technique for braiding cords.
I really enjoyed the class and the work with the marudai, but I can’t afford to buy one. And although I found a tutorial on how to make your own marudai I prefer now to work with a cardboard disk. I braided for hours during train journeys. I can’t do this with a marudai ;-)

I didn’t find many instructions on how to make kumihimo cords in internet (see those I found below), so I will present my own.

On the photo you see my cardboard marudai and a braid I’m working on. I changed the pattern several times to get a more interesting appearance.

What you need:

  • 4 threads of yarn in 2 different colours (e.g. 2 red and 2 yellow) (test it e.g. with 100 cm/39 inches)
    Note: in the beginning both threads should be of the same gauge.
  • cardboard marudai disk (not too thin cardboard)
    Note: This is a cardboard disk with a hole in the middle and cuts around.
    For the beginning, 36 12-16 cuts are sufficient, later you may need more depending on the number of threads and the pattern.
    You can use the marudai picture as template to be cut from cardboard.
  • a little weight
    Note: I use mostly some coins in a little plastic bag.
  • quite a lot of patience ;-))

(click or scroll to go to the instructions below)


What you do:
(Click on pictures to enlarge)

Fold the threads in half and knot all together at the fold.
You have now 8 threads, connected to each other at one side.


Kumihimo Wedge the threads into the cuts as seen in pic. 1.
The knot is in the middle.


Cling your little weight to the knot of the threads. It provides a certain tension on the threads.


Kumihimo


Kumihimo Braid: Move the threads as seen in the pics 2 and 3 to the desired length.


After four moves you must have a ‘real’ cross again, otherwise you made a mistake.
But don’t worry, after a little practise you will see which thread should be moved next.

With 100 cm/39 inches you’re using quite short threads, but they tend to entangle anyhow. Therefore you must pull them free at every round. When the treads become longer, see to it to use some (self-made) bobbins.

The finished braid is a lot shorter than the threads, but I don’t know no factor.

Have fun
(and check the links to find more patterns)

Here are some of my kumihimo cords, made with thin cotton to thick acrylic yarn:

Kumihimo

Kumihimo


Kumihimo I worked a lot of cords with different yarns in matching colours, included funky yarns and strands of beads and simply braided them together to get a big necklace:


Kumihimo And then I worked several braids with sewing yarn in matching colours, included metallic threads. Every braid has another braiding pattern. They are supposed to be a necklace, but up until know I haven’t finished it yet.
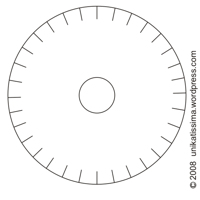


Kumihimo Marudai Cardboard marudai template (click picture to enlarge)


Links:
Wikipedia: English entry for ‘Marudai’

Wikipedia: English entry for ‘Kumihimo’German entry for ‘Kumihimo’


Self-made Marudai and bobbins:
Tutorial on how to make your own marudai

At Gabriela Marková’s Kumihimo blog:
Check the entries labelled with ‘Equipment’
Kumihimo braids:
Check Gabriela Marková’s Kumihimo blog

An instruction for a Kumihimo braid with 12 threads (with diagrams)

An instruction for a Kumihimo braid with 8 threads (German) (PDF-file) (with diagrams)
An instruction for a Kumihimo braid with 16 threads (German) (PDF-file) (with diagrams)

Diagrams for Kumihimo software, can be used as pattern (with diagrams)

See also how different your braid looks when changing the order of the threads or of moves (with diagrams)
An interesting pattern (with diagrams)

A pattern with 16 threads (with diagrams)

An instruction similar to mine (English) (PDF-file) (with diagrams)

An instruction for a Kumihimo braid with 12 threads (English) (with diagrams)

An instruction for a Kumihimo braid with 16 threads (English) (with diagrams)

An instruction for a Kumihimo braid with 8 threads (English) (with diagrams)

Linklists about Kumihimo:
Squidoo
Shelly Gillmann’s Kumihimo Links