Once I took a class for Kumihimo braiding – that is a japanese technique for braiding cords.
I really enjoyed the class and the work with the marudai, but I can’t afford to buy one. And although I found a tutorial on how to make your own marudai I prefer now to work with a cardboard disk. I braided for hours during train journeys. I can’t do this with a marudai ;-)
I didn’t find many instructions on how to make kumihimo cords in internet (see those I found below), so I will present my own.
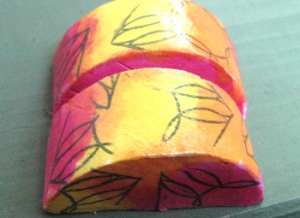
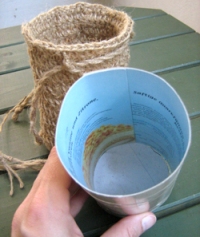
On the photo you see my cardboard marudai and a braid I’m working on. I changed the pattern several times to get a more interesting appearance.
What you need:
- 4 threads of yarn in 2 different colours (e.g. 2 red and 2 yellow) (test it e.g. with 100 cm/39 inches)
Note: in the beginning both threads should be of the same gauge.
- cardboard marudai disk (not too thin cardboard)
Note: This is a cardboard disk with a hole in the middle and cuts around.
For the beginning, 36 12-16 cuts are sufficient, later you may need more depending on the number of threads and the pattern.
You can use the marudai picture as template to be cut from cardboard.
- a little weight
Note: I use mostly some coins in a little plastic bag.
- quite a lot of patience ;-))
(click or scroll to go to the instructions below)
What you do:
(Click on pictures to enlarge)
Fold the threads in half and knot all together at the fold.
You have now 8 threads, connected to each other at one side.
 Wedge the threads into the cuts as seen in pic. 1.
The knot is in the middle.
Cling your little weight to the knot of the threads. It provides a certain tension on the threads.

 Braid: Move the threads as seen in the pics 2 and 3 to the desired length.
After four moves you must have a ‘real’ cross again, otherwise you made a mistake.
But don’t worry, after a little practise you will see which thread should be moved next.
With 100 cm/39 inches you’re using quite short threads, but they tend to entangle anyhow. Therefore you must pull them free at every round. When the treads become longer, see to it to use some (self-made) bobbins.
The finished braid is a lot shorter than the threads, but I don’t know no factor.
Have fun
(and check the links to find more patterns)
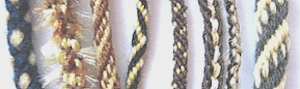
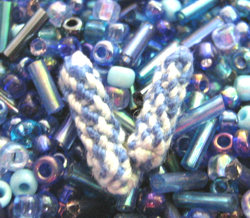
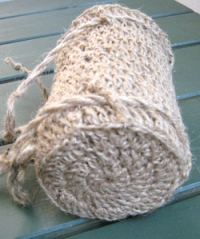
Here are some of my kumihimo cords, made with thin cotton to thick acrylic yarn:

 I worked a lot of cords with different yarns in matching colours, included funky yarns and strands of beads and simply braided them together to get a big necklace:
 And then I worked several braids with sewing yarn in matching colours, included metallic threads. Every braid has another braiding pattern. They are supposed to be a necklace, but up until know I haven’t finished it yet.
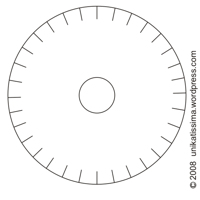 Cardboard marudai template (click picture to enlarge)
Links:
Wikipedia: English entry for ‘Marudai’
Wikipedia: English entry for ‘Kumihimo’ – German entry for ‘Kumihimo’
Self-made Marudai and bobbins:
Tutorial on how to make your own marudai
At Gabriela Marková’s Kumihimo blog:
Check the entries labelled with ‘Equipment’
Kumihimo braids:
Check Gabriela Marková’s Kumihimo blog
An instruction for a Kumihimo braid with 12 threads (with diagrams)
An instruction for a Kumihimo braid with 8 threads (German) (PDF-file) (with diagrams)
An instruction for a Kumihimo braid with 16 threads (German) (PDF-file) (with diagrams)
Diagrams for Kumihimo software, can be used as pattern (with diagrams)
See also how different your braid looks when changing the order of the threads or of moves (with diagrams)
An interesting pattern (with diagrams)
A pattern with 16 threads (with diagrams)
An instruction similar to mine (English) (PDF-file) (with diagrams)
An instruction for a Kumihimo braid with 12 threads (English) (with diagrams)
An instruction for a Kumihimo braid with 16 threads (English) (with diagrams)
An instruction for a Kumihimo braid with 8 threads (English) (with diagrams)
Linklists about Kumihimo:
Squidoo
Shelly Gillmann’s Kumihimo Links

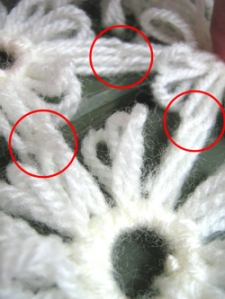 One thing I found out is that I love the little flowers much more without any edging. Therefore I’m joining them while working.
 The other thing I played around with is another cardboard loom. In my first Crazy Daisy entry I used a cardboard version of the ice-cream-lid-loom.

 Afterwards I took my
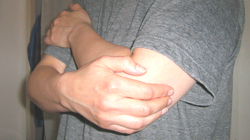
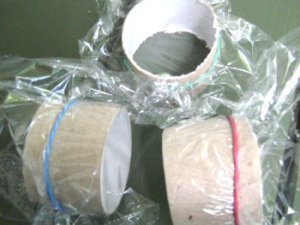
 Therefore I figured out how to make my own Kumihimo beads.
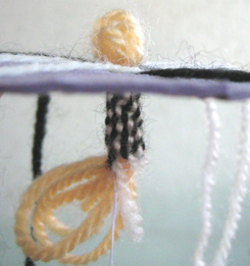 What to do:
 The Kumihimo beads are from fabric and can be stitched however you want. On this photo I surrounded my Kumihimo bead by seed beads and made a kind of


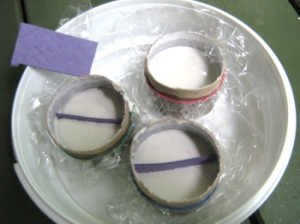
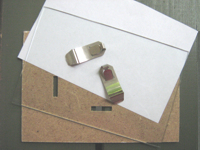 I used a simple glass frame as seen on the second photo that I already had at home and glued a kind of
 The tape makes the paper not only sturdy, but also quite waterproof, so that you can use it several times with nearly every kind of colours. If necessary you can put tape on both sides of the paper prior to the cutting.