Knotted Fabric Buttons and Beads

Knotted Fabric Buttons and Beads

I mentioned previously crocheted buttons, beaded beads, paper beads and fabric beads.
Another way to make your own buttons and/or beads is knotting fabric.

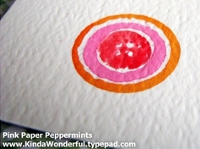
On the photo you see my first attempt on this technique: I admit that I still have to work on it ;-))
It is tiny (about 0,5 cm / 0.2 inches) and was made from a very light fabric that frayed heavily. I thought that this could look interesting, instead it looks unfinished.
Back to the drawing board ;-)


Links:
Knotted Fabric Buttons and Beads

At unikatissima’s:
Crocheted buttons
Beaded beads
Paper beads
Fabric beads

Embossing Yoghurt Lids

Embossing Yoghurt Lids

Once I found the suggestion to use the metallic lids of yoghurt cups for embossing (but I don’t know where). Some people use tomato paste tubes ;-)
The metal lid of the yoghurt cups is much softer and can easily be distorted, but they had a solution for this (unfortunately I don’t know anymore, who ‘they’ were): they filled the backside of the embossed metallic foil with PVA glue.

I tried it once and I like what happened.
On the photo you see my results: I put the foil on the mouse pad, embossed it, cut it with scissors, filled the back with PVA glue and waited (!) for the glue to dry. I coloured both roses with nail polish.
The items are lightweight and less bulky than the tomato paste tube embossed. They can easily be used for cardmaking.


Links:
Tomato paste tubes revealed

Leftover Needlework

Leftover Needlework

I have a lot of yarn and thread rests, some of them quite short and I had no idea, what to do with them (except Freeform needlework as a matter of course ;-)).
And then one day I found an article about the ‘Magic ball’ an article about the ‘Magic ball’ and decided that this is it ;-)
In the bottom line it’s nothing else then taking your short threads and knotting them together (with a weaver’s knot e.g.) to get a long enough thread to knit or crochet or what ever you want to do.
On the photo you see three tests I did: On the item above I simply knotted different strings into a long thread and crocheted. It were quite short strings.
For the item below left I took two skeins of yarn, one green and one rose. I knitted with two threads and knotted them so, that I began working with 2 greens, then a green and a rose, then 2 rose, a green and a rose again and back to 2 greens. That way I got a kind of blend between the two colours.
The item below right is made in the same way, but with one light green and one dark green.

I’m sure that I will get back to this technique again.


Links:
Make your own magic using knotted yarn leftovers: the link isn’t available no more.

At unikatissima’s:
Freeform Needlework
Weaver’s Knot

Acryl Coloured Fabric

Acryl Coloured Fabric

As I found the tutorial on how to dye fabric with acryl colours I was thrilled, because I think that this way I can colour my fabric just the way I want.
I tried it immediately, but I have to work on it some more (and I will! ;-))
In a second entry Debra showed what she did with the paper towels she used to clean her workspace: isn’t it stunning?


Links:
Hand-dyed Fabric Trims
Dyed Paper Towels for Paper and Fabric Arts

Beeswax Collage

Beeswax Collage - Bienenwachs Collage

I find making collages fascinating.
One interesting technique to glue your items to the base is the so-called beeswax collage (for links to tutorials see Links below). It gives a warm colour to the collage and if polished a nice shine too.
On the photo you can see my first (and up until now last) attempt to do this. I collaged pieces of different newspapers (Chinese, Arabic, Corean) and self-made papers and than embroidered the spiral by hand.

Links:
At ARTchix Studio: Beeswax Collage: the link isn’t available no more.

At art-e-zine: Beeswax Collage

Google search results for ‘beeswax collage’
Google image search results for ‘beeswax collage’

YoYo Pin

YoYo Pin

I like yoyo’s, but only recently I tried to make one. And I find it cute.
It is made from shiny polyester fabric and embellished with a little crocheted flower and some embroidered beads (I hate to have polyester on my skin, but I like it for pins and the like, because it is so shiny).


Links:
Yoyo Projects (with explaining pictures)
How to make a Yoyo (with explaining pictures)

The links don’t work anymore, you can find the information here now:
Yoyo Projects (with explaining pictures)
How to make a Yoyo (with explaining pictures)

Bra Purse

Bra Purse

Once I found the Lah-Di-Dah Bra purse at craftster.org – what a funky idea!

Since then I always wanted to make a bra purse, but I don’t use no purses, because I always need backpacks. Imagine the bra! ;-))

But I collected links (see below) on how to make a bra purse anyhow – perhaps I’ll make a bra purse eventually ;-)


Links:
At craftster.org: Lah-Di-Dah Bra purse
For more entries search for “bra purse” at craftster.org

wrights.com: Bra Purse
Craftbits: Bra Purse
Bra Purse with zipper

Image results of Google search for ‘bra purse’

Nail File Envelope

Nail File Envelope

Once I found instructions on how to make a nail file envelope, which I embraced, because me too, I never have such a file when I need it and I don’t like to search ‘free’ nail files in the depths of my bag.

I’m not much of a stamper (although I would like to be ;-)), so I made them with my own with markers and a little moist coloured tissue papers, I collaged them from magazines and I made them from doodled coffee-dyed newspaper (see second photo).

Nail File Envelope Because I own 5 cm wide clear packaging tape (a little less than 2 inches), I made the envelopes slender enough to cover them completely with the tape. This way they are sturdier and more robust in the depths of my bag ;-)
The nail file envelopes are a lot of fun to make and a very good giveaway at nearly everybody. Even men took them voluntarily! ;-)
Most fun for everybody is, when I present the whole range of my nail file envelopes and everybody can select their own.


Links:
Nail File Envelope

Watercolor Button Garden

Watercolor Button Garden

Pink Paper Peppermints has a beautiful project: 31 Crafty Flowers.
I checked them all and I wanted to present one of them, although I haven’t tried it yet, because I dont’ have the right markers: the Watercolor Button Garden.
Aren’t they beautiful?
And be sure to check the other flowers too :)


Links:
Watercolor Button Garden

Chopsticks into Hairsticks

Chopsticks into Hairsticks

When I saw the tutorial on how to make hairsticks from chopsticks I loved it!
What a great idea. And a beautiful project to practise the Peyote stitch ;-) (for links to learn Peyote see below).
I haven’t done it yet, because hairsticks never keep my hair (it’s too thin ;-( ).
But who knows? ;-)


Links:
Chopsticks into Hairsticks

About.com: Beadwork: A website with lots of tutorials about beadwork
Basic Beading Stitch Tutorials (English)

Perlenhobby.de: A website with lots of (german) tutorials about beadwork: click on
‘Anleitungen’ in the sidebar left and there select one of the Peyote tutorials