Bra Purse

Bra Purse

Once I found the Lah-Di-Dah Bra purse at craftster.org – what a funky idea!

Since then I always wanted to make a bra purse, but I don’t use no purses, because I always need backpacks. Imagine the bra! ;-))

But I collected links (see below) on how to make a bra purse anyhow – perhaps I’ll make a bra purse eventually ;-)


Links:
At craftster.org: Lah-Di-Dah Bra purse
For more entries search for “bra purse” at craftster.org

wrights.com: Bra Purse
Craftbits: Bra Purse
Bra Purse with zipper

Image results of Google search for ‘bra purse’

Nail File Envelope

Nail File Envelope

Once I found instructions on how to make a nail file envelope, which I embraced, because me too, I never have such a file when I need it and I don’t like to search ‘free’ nail files in the depths of my bag.

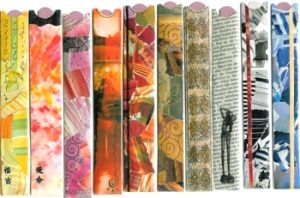
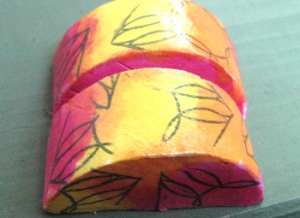
I’m not much of a stamper (although I would like to be ;-)), so I made them with my own with markers and a little moist coloured tissue papers, I collaged them from magazines and I made them from doodled coffee-dyed newspaper (see second photo).

Nail File Envelope Because I own 5 cm wide clear packaging tape (a little less than 2 inches), I made the envelopes slender enough to cover them completely with the tape. This way they are sturdier and more robust in the depths of my bag ;-)
The nail file envelopes are a lot of fun to make and a very good giveaway at nearly everybody. Even men took them voluntarily! ;-)
Most fun for everybody is, when I present the whole range of my nail file envelopes and everybody can select their own.


Links:
Nail File Envelope

Watercolor Button Garden

Watercolor Button Garden

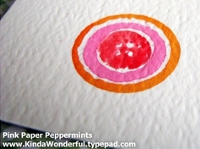
Pink Paper Peppermints has a beautiful project: 31 Crafty Flowers.
I checked them all and I wanted to present one of them, although I haven’t tried it yet, because I dont’ have the right markers: the Watercolor Button Garden.
Aren’t they beautiful?
And be sure to check the other flowers too :)


Links:
Watercolor Button Garden

Chopsticks into Hairsticks

Chopsticks into Hairsticks

When I saw the tutorial on how to make hairsticks from chopsticks I loved it!
What a great idea. And a beautiful project to practise the Peyote stitch ;-) (for links to learn Peyote see below).
I haven’t done it yet, because hairsticks never keep my hair (it’s too thin ;-( ).
But who knows? ;-)


Links:
Chopsticks into Hairsticks

About.com: Beadwork: A website with lots of tutorials about beadwork
Basic Beading Stitch Tutorials (English)

Perlenhobby.de: A website with lots of (german) tutorials about beadwork: click on
‘Anleitungen’ in the sidebar left and there select one of the Peyote tutorials

Recycled Yarns

Recycled Yarns

I really like to crochet (ok, to knit also, but not soo much ;-)).
Anyhow, the yarns are quite expensive.
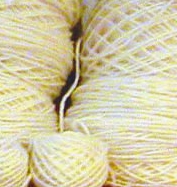
Therefore I was thrilled when I found the article ‘Recycling yarn / Unravelling thrift store sweaters’. In addition I found a tutorial on how to unravel a sweater.
Equipped with this new know-how I am anxious for the next thrift store visit ;-))
And then I will see to it to get some Kool-Aid or other food colouring to dye my newly achieved yarns myself as taught (amongst others) by knitty.com.
And if it works well, I will give self-made self-striping yarn a try (found via ‘Watermelon Socks’).
This will be better than my previously mentioned coloured yarns. And I think as much fun as the other recycled yarn made from plastic bags.

I’m curious about when I will find the time (and the place! ;-)) to do all this, but it is fixed on my to-do and to-try lists ;-)


Links:
Recycling yarn / Unravelling thrift store sweaters
Tutorial on how to unravel a sweater

Dying wool with food colouring
(For other tutorials google for ‘dye kool-aid’)

Self-made self-striping yarn
(via ‘Watermelon Socks’)

unikatissima’s entries:
Coloured yarns
Recycled yarn made from plastic bags

Plaster Photo Holder

Plaster Photo Holder

I saw this Tealight Photo Holder. I found the idea stunning, but I didn’t like the look of it: for me it looks like a cut-open tealight ;-)
But then an idea stroke: How easy to make this from plaster!
On the photo you see my plaster photo holder in action ;-)


And here is how I did it:

Plaster Photo Holder
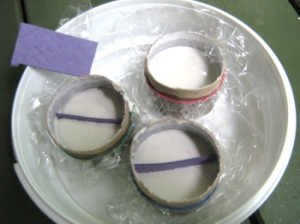
img 1: Take a toilet paper tube and cut in rings about 4-5 cm height (appr. 1.5 – 2 inches). I did this with the sharp knife on the photo.


Plaster Photo Holder
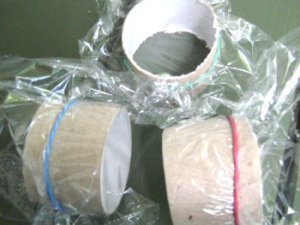
img 2: Wrap foil around, but let one side open. Fix the foil with elastic.


Plaster Photo Holder
img 3: Fill the forms with plaster to a height of about 2,5 cm (about 1 inch). When full, insert a previously cut piece of cardboard as separator.

Let harden (about an hour).


Plaster Photo Holder
img 4: When the plaster went hard, but everything is still wet, tear apart the cardboard tube and break the ‘plaster coin’ where the separator cardboard stuck.


Plaster Photo Holder Plaster Photo Holder
img 5: Rub the cardboard rests away.
If your photoholder piece is uneven, now is the moment to fix it: Simply scratch away what you don’t like with the back of an old knife.

img 6: You can embellish them in so many ways.
I painted them immediately with watercolours, but you can also wait until thoroughly dry.


Plaster Photo Holder
img 7: When dried I stamped them and varnished them with medium gel.
Have fun!


Links:
Tealight Photo Holder
via Photojojo

Coin Ring

Coin Ring

Browsing craftster I found one day the thread about coin rings.
Somewhere in the thread is also a link to a tutorial on how to make your own coin ring (with many explaining pictures).
I can’t image that I will ever do this, but I find it interesting enough to present it here.

Perhaps someone wants to make their weddings rings this way? ;-))


Links:
craftster: ‘coin rings! i’m an addict!!!’

Tutorial on how to make a coin ring

Light Bulb Window Vase

Light Bulb Window Vase

I really liked the idea of making a little window vase out of a recycled light bulb (for tutorials see Links below).
And I had to try it myself ;-))
On the photo you see my first attempt. I wrapped it with paper maché and have not yet formed a wire to hold it. And as I made the photo, I had no flower either ;-)
So I took one of my crocheted flowers and – voilĂ  ;-)


Links:
Light Bulb Window Vase

instructables: Light Bulb Vase

Artist Book

Artist-Book

As mentioned before in the entry about paper beads, I once created an artist book.

Step Outside Your Box Saturdays posted this week a challenge about books and I thought it an opportunity to show my artist book ‘blickkontakt’ (which means ‘eye contact’).

I wanted ‘blickkontakt’ to give the viewer many surprises to discover and created therefore several windows and fold-outs.
The pages were created from cardboard and covered in hand-stained papers. Then I stamped, embroidered, tape transfered, sketched, scribbled and glued.


Enjoy the pictures
(Click thumbnails to see photos)

Artist-Book The cover with the round medaillon in its ‘pocket’. Along the spine I let hang the threads with the paper beads.


Artist-Book Still the cover, but this time showing the backside of the round medaillon.


Artist-Book Pages 1 & 2: You see the eye through a round window, the spirals are hand-embroidered, the little altered slide can be put into the lace pocket.


Artist-Book Pages 3 & 4: The images are tape transfered, the flourishes are hand-embroidered.


Artist-Book Pages 5 & 6: I stamped, wove paper, embroidered, crocheted. The dark circle is a free swinging altered bottle cap, the semicircle on the left upper side is a fold-out, where I glued a hand-beaded star.
(Unfortunately the tape transfers gleam so, that you can’t see their motif.)


Artist-Book Pages 7 & 8: I cut two little round windows into the right page.
The raffia forms a little pocket, where I put a transparent tape transfer tag.


Artist-Book Pages 9 & 10: Stamping, tape transfers, embroidered spirals, fold-outs, hand-stained crochet flower and hand-made bead fringe.


Artist-Book The verso with tape transfers, stamps and a ringlet from a fake hairpiece.


I created more artist books, if you like to see them, take a look at Art.


Links:
If you want to create your own (Altered or Artist) Book, you may want to take a look at the following links (the list is far from complete!):

About Altered Books:
What is an altered book?
Definitions

At art-e-zine: Altered Book Workshop

Get Inspirations:
Gallery of Altered Book Artists
Google results of search for ‘Altered Book’
Google image results of search for ‘Altered Book’

Some of the used techniques:
Paper staining
Tea Staining Your Art Journal Pages
Tea Stain Paper

Image Transfer Techniques:
Easy Photo Transfers (different techniques)
Image Transfer
Packing Tape Image Transfers

Here at unikatissima:
Paper Beads