Photo Stamps

Photo Stamps

I already presented links on eraser carving, but perhaps you want to go a step further and make stamps from your own photos?
I found a tutorial on how to prepare your photos for carving stamps.
The preparation of the photos is similar to the tutorial on making your own digital stamps (and while we’re at it why not making stencils from your own photos? ;-))
On the picture you see a stamp template I made from a photo from a magazine.
Not yet cut, first I must find a big eraser ;-)


Links:
Prepping Photos for Carving
Carving 101

art-e-zine: a cornucopia for artists
Make your own digital stamps
Stencil Art

Here at unikatissima:
Eraser Stamps

Arm Knitting

Arm Knitting

I prefer crochet to knitting, mostly because I’m faster crocheting than knitting.
But then I found a tutorial on how to knit with your arms tutorial on how to knit with your arms – the speed of arm knitting arm knitting can’t be beaten ;-))
On the photo you see a scarf I made this way in no time. And you can see in the detail, that it is really knit – no cheating. Just chasing ;-))


Links:
Arm Knitting
The original site doesn’t exist any more and is now available through webarchive:
Arm Knitting

Beaded Bottle

Beaded Bottle Beaded Bottle

For some time I worked a lot with beads and the peyote stitch. Then I found a tutorial on how to bead a bottle and was thrilled – not only about the tutorial, but about my own results as well ;-))
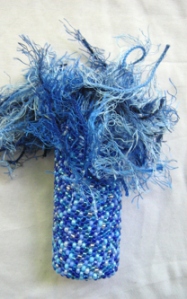
On the photos you can see two of my beaded bottles. I embellished the bottleneck of the blue one with funky fibers, the beading was made with a kind of bead soup* (I only used beads of the same size). The brown-golden one was made with just two sorts of beads, but I added some peyote ruffles at the bottleneck and a wire to use the little bottle as mini vase.


Beaded Bottle The third photo shows the bottom of the blue bottle.
* ‘Bead soup’ is on the whole an assortment of different beads, often with beads of different sizes and shapes. Many beaders use it for Freeform Peyote, but it can be used for many beading purposes. If you want to string the beads, use a bead spinner.


Links:
Tutorial on a Beaded Bottle
Peyote Ruffles

Google search result for ‘bead soup’
Peyote stitch:
About.com: Beadwork: A website with lots of tutorials about beadwork
Basic Beading Stitch Tutorials

Perlenhobby.de: A website with lots of (german) tutorials about beadwork: click on ‘Anleitungen’ in the sidebar left and there select one of the Peyote tutorials

Here at unikatissima:
Freeform Peyote
Making a Bead Spinner

Rose Bag

Rose Bag

One day I found this tutorial on how to make a Rose bag – stunning!
I’d love to crochet it one day, but up until now I didn’t get further than the Irish rose on the photo ;-)
(I know that the Rose bag isn’t done as Irish Rose, but it looks like ;-))


Links:
Tutorial on how to make a Rose bag

Irish Rose:
Two-Layer Irish Crochet Rose Free Pattern

Translations of Crochet Terms

Folded Spirals

Folded Spirals

As I saw this tutorial on how to make vellum spirals I was amazed: such beautiful paper spirals and so easy to make!
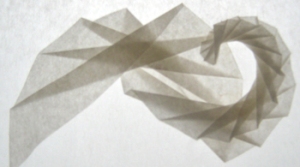
On the photo you see my spiral with changing directions.
It looks so frail against the light.

The tutorial is in German, but there are explaining pictures (you must look at the PDF file!).
What you have to do is basically:

  • Take a piece of vellum paper (I used some sandwich paper).
  • Cut a triangle from the vellum paper.
  • Cut a narrow, right-angled triangle from cardboard (best look at the explaining pictures).
  • Lay the cardboard triangle on the vellum paper triangle as described by the explaining pictures and fold the paper along the cardboard triangle. Then turn the vellum paper triangle and fold the paper again.
  • Continue as long as you like/as possible.

They suggest that you begin to experiment then:

  • try broader or narrower triangles for the paper
  • try broader or narrower triangles for the cardboard
  • use a narrow cardboard triangle for left folds and a broad for right folds
  • divide in halves every second fold after having finished etc.

I had a lot of fun and I hope so will you :-)

I intend to use those spirals in the future on cards, tags, in altered books and so forth.
I’d love to know about your experiments with folded spirals.


Links:
Tutorial on how to fold paper spirals:
(Download the PDF file)

Reducing Polymer Clay Canes

Reducing Polymer Clay Canes

When working with polymer clay you often work with canes. On the photo you see some of mine.
You can create them quite big (and therefore easier to deal with then small ones), but then you must reduce them.
If you simply roll your canes, all those beautiful patterns will be distorted.
At Polymer Clay Central you find answers for nearly all questions about polymer clay ;-) and gazillions of projects, tutorials and ideas.
One is the tutorial on how to reduce canes.
If you want to see other tutorials on canes, take a look at the table of contents of the Cyclopedia and search on the site for ‘cane’.
You will be amazed! :-))
(And if you ask yourself what to do with those canes, take e.g. a look at the bowl embellished with the TrueLEIGH Rose Cane (last photo). This convinced me that it was worth a try ;-))


Links:
Polymer Clay Central – Better look yourself ;-))
Definition of ‘cane’
Table of contents of the Cyclopedia

Tutorial on how to reduce canes

Recycled Yarns

Recycled Yarns

I really like to crochet (ok, to knit also, but not soo much ;-)).
Anyhow, the yarns are quite expensive.
Therefore I was thrilled when I found the article ‘Recycling yarn / Unravelling thrift store sweaters’. In addition I found a tutorial on how to unravel a sweater.
Equipped with this new know-how I am anxious for the next thrift store visit ;-))
And then I will see to it to get some Kool-Aid or other food colouring to dye my newly achieved yarns myself as taught (amongst others) by knitty.com.
And if it works well, I will give self-made self-striping yarn a try (found via ‘Watermelon Socks’).
This will be better than my previously mentioned coloured yarns. And I think as much fun as the other recycled yarn made from plastic bags.

I’m curious about when I will find the time (and the place! ;-)) to do all this, but it is fixed on my to-do and to-try lists ;-)


Links:
Recycling yarn / Unravelling thrift store sweaters
Tutorial on how to unravel a sweater

Dying wool with food colouring
(For other tutorials google for ‘dye kool-aid’)

Self-made self-striping yarn
(via ‘Watermelon Socks’)

unikatissima’s entries:
Coloured yarns
Recycled yarn made from plastic bags

Plaster Photo Holder

Plaster Photo Holder

I saw this Tealight Photo Holder. I found the idea stunning, but I didn’t like the look of it: for me it looks like a cut-open tealight ;-)
But then an idea stroke: How easy to make this from plaster!
On the photo you see my plaster photo holder in action ;-)


And here is how I did it:

Plaster Photo Holder
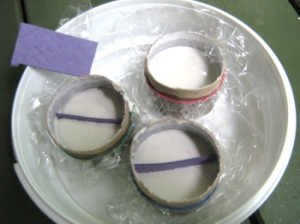
img 1: Take a toilet paper tube and cut in rings about 4-5 cm height (appr. 1.5 – 2 inches). I did this with the sharp knife on the photo.


Plaster Photo Holder
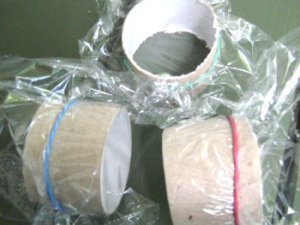
img 2: Wrap foil around, but let one side open. Fix the foil with elastic.


Plaster Photo Holder
img 3: Fill the forms with plaster to a height of about 2,5 cm (about 1 inch). When full, insert a previously cut piece of cardboard as separator.

Let harden (about an hour).


Plaster Photo Holder
img 4: When the plaster went hard, but everything is still wet, tear apart the cardboard tube and break the ‘plaster coin’ where the separator cardboard stuck.


Plaster Photo Holder Plaster Photo Holder
img 5: Rub the cardboard rests away.
If your photoholder piece is uneven, now is the moment to fix it: Simply scratch away what you don’t like with the back of an old knife.

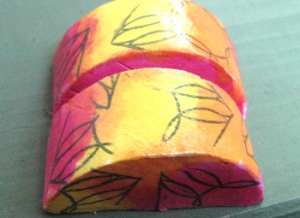
img 6: You can embellish them in so many ways.
I painted them immediately with watercolours, but you can also wait until thoroughly dry.


Plaster Photo Holder
img 7: When dried I stamped them and varnished them with medium gel.
Have fun!


Links:
Tealight Photo Holder
via Photojojo

Pendant-to-be-embellished

Pendant to be embellished
One day I wanted to have a pendant-to-be-embellished and decided to create it myself.
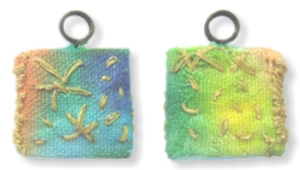
On the photo you see both sides of a charm of about 1,5 cm (appr. 0.6 inches) which I embellished with self-dyed fabric and some metallic yarn embroidery.
The embellishment isn’t quite what I dreamed of, but the core pendant worked well.

This is how I did it:
You need:

  • some cardboard (the thickness of the middle piece must be about the same as the wire)
  • some wire
  • glue

Pendant to be embellished img 1: Cut 3 equal pieces of your cardboard.


Pendant to be embellished img 2: Wrap the wire round a dowel to form the eye. Then turn a couple of times to form the peg and then form a bigger eye which will be hidden in the pendant.
Note: I prefer the hidden part of the wire to be an eye because then the wire can’t be dragged out by accident.


Pendant to be embellished img 3: Take the cardboard piece which will sit in the middle and trace your hanger.


Pendant to be embellished img 4: Cut out the place you will need for the hanger.


Pendant to be embellished img 5: Glue the hanger and the middle cardboard pieces onto one outer cardboard piece.
Note: I glue on also the cardboard piece in the eye to prevent having a hollow.
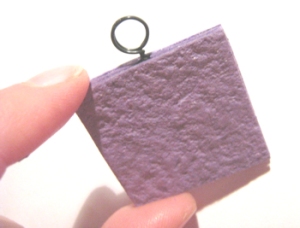
 

Pendant to be embellished img 6: Glue the other outer cardboard piece onto. Your pendant-to-be-embellished is finished and you may begin with the embellishments.


Pendant to be embellished Pendant to be embellished
img 7 & 8: This is a solution for a 2-eyed pendant.


There are so many ways to embellish your self-made pendant (mini collages, painted, beaded, stamped etc), I’d love to see them.
Please feel free to comment here to show your trinkets.

Have fun!

Crochet Spiral

Crochet Spiral

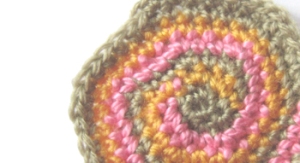
Sometimes you want to crochet not only a spiral, but a multicoloured spiral (beautiful in Freeform Needlework!).
I once found even two tutorials for crochet spirals, but the links don’t work anymore (I put them to the Links below in case you like to try them).
But because I didn’t found no more instructions I wrote a tutorial myself based on the previously found tutorials:

You will need 3 skeins of yarn in matching gauges.

Work in spirals, though NEVER JOIN!

st = stitch
sc = single crochet

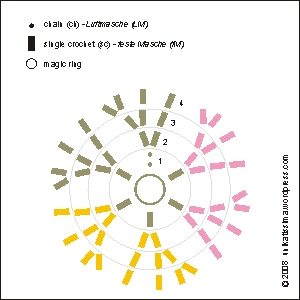
1st row: work 6 sc on magic ring
2nd row: work 2 sc in each st = double each st = 12 st
work the 1st 4 st in colour A, the 2nd 4 st in colour B and the 3rd 4 st in colour C
3rd row: work * 1 sc, 2 sc in next st *, repeat from * to * = double each 2nd st = 18 st
work the 1st 6 st in colour A, the 2nd 6 st in colour B and the 3rd 6 st in colour C
4th row: work * 1 sc, 1 sc, 2 sc in next st *, repeat from * to * = double each 3rd st = 24 st
work the 1st 8 st in colour A, the 2nd 8 st in colour B and the 3rd 8 st in colour C
cont.


(Click picture to enlarge)
Crochet Spiral Hints:

  • At the colour change pull the loop of the ‘old’ colour into a large loop that you lay aside until you pick it up for the next round (see detail photo with loops).
  • The spiral gets hexagonal when worked this way. If you want to avoid this, move the place where you work two stitches in one stitch a little around (see photo above).


(Click picture to enlarge)
Crochet Spiral


Links:
Both links didn’t work when I tried them:
Crochet Spiral
Crochet Spiral


Magic ring
(Google results)
The Magic Adjustable Ring: A Better Way to Begin Crochet in the Round: very good illustrated instruction
Häkeln lernen: Der Fadenring (German)

Here at unikatissima:
Freeform Needlework