Fractal Pop Up

Fractal Pop Up

I already cut different pop ups, and I find this one quite elegant.
I haven’t done it yet, but I surely will one day.

(If you like the fractal repeats, take a look at the previous mentioned Fractal Art.)


Links:
Fractal Cut

Wikipedia: English entry for ‘fractal’Deutscher Eintrag für ‘Fraktal’

Here at unikatissima:
Fractal Art

Organic Stripes

Organic Stripes

Note: the Random Stripe Generator doesn’t exist any more, but you can find two new links in my entry Random Stripes Generator.

While knitting or crocheting you sometimes want to stripe your workpiece. I find it difficult to design organic looking stripes.
Math can help here (although I’m not a very mathematical woman ;-)): At Fuzzy Galore you can find an article about the Fibonacci sequence which sounds perhaps difficult, but is quite easy.

And those who don’t want to figure out their stripes themselves can use the Random Stripe Generator. (I just tried the generator, but it didn’t work properly. Hopefully it will ‘recover’.)
(It did work properly, but I didn’t know how to use it ;-)
My problem was, that I entered a stripe width and thought, that this was the max. width.
But for the stripe width selection, it requires that you specify exactly which widths you want. So if you want widths of 1, 2, 3, 4, or 5 rows, you need to select all five of those check boxes, rather than just the box next to ‘5’.
Try it and you will get wonderfully striped patterns. :)))


Links:
Article about the Fibonacci sequence
Random Stripe Generator

Here at unikatissima:
Random Stripes Generator

Light Bulb Window Vase

Light Bulb Window Vase

I really liked the idea of making a little window vase out of a recycled light bulb (for tutorials see Links below).
And I had to try it myself ;-))
On the photo you see my first attempt. I wrapped it with paper maché and have not yet formed a wire to hold it. And as I made the photo, I had no flower either ;-)
So I took one of my crocheted flowers and – voilà ;-)


Links:
Light Bulb Window Vase

instructables: Light Bulb Vase

Jacob’s Ladder

Jacobs Ladder

Once a friend gave me a couple of photos of her grandchild to make something special with them.
I thought about it and then remembered the Jacob’s Ladder (the children’s toy).
A little research in internet showed me, that there are tutorials but they all refer to the wood-and-ribbon version (for links see below the Links).
So I figured myself out how to do it with photos.
On the animated picture you can see that it worked.
I wrote a tutorial to download (PDF, appr. 230 KB).
You may used it as you wish, but if you do, please give credit.

Addendum: Later I found several paper Jacob’s ladders, I added the links below.


Links:
Make a Jacob’s Ladder from your photos (PDF, ~230 KB)

Tutorials on how to make a Jacob’s Ladder from wood and ribbons:

instructables: A Traditional Jacob’s Ladder

Jacob’s Ladder (English)
Jacob’s Ladder (German)

Tutorials for Paper Jacob’s ladders:
Invisible Jacob’s Ladder Technique Class (English)
Jacob’s Ladder Christmas Card & Gift Card Holder (English)
Mini-Scrapbook – Jacob’s Ladder (English)
Jacob’s Ladder Tutorial (English)

Inkjet Transfer Stamping

Inkjet Transfer Stamping

As I mentioned before, I don’t often stamp. Therefore I found the tutorial on how to make stamps with an inkjet printer very interesting.

I haven’t tried it yet and possibly I never will, because printer ink is also expensive, but who knows? Because I really want to ‘stamp’ the image on the photo and I’m sure that I wont carve it from an eraser ;-)


Links:
Craft Chi: Inkjet Transfer Stamping

Here at unikatissima:
Eraser Stamps

Zentangles

Zentangles

While surfing I found Zentangles, which is nothing else than doodling.
But when I browsed the galleries I really, really wanted to try it, although I normally don’t feel at my ease with doodling.
My first attempt was ugly, because I tried to ‘create’ something. Then I took a little sheet of paper and started doodling without thinking about.
I was surprised at how beautiful it turned out ;-)


Links:
Zentangles

Freeform Embroidery

Freeform Embroidery - Freeform Sticken

On the photo you see my idea of Freeform Embroidery which was highly inspired by ‘Rock Pool’ and ‘Laying It On The Line’.

I used a piece of old (but clean! ;-)) bedsheet as base. First I laid some worsted and funky yarns on it which I fixed with couching stitches (at the top of the photo). Then I stitched some french knots (light yellow on the photo). Below is my first attempt at ply-split braiding which I fixed with some couching stitches too.

It is one of my many UFOs (‘unfinished objects’), but one day I will come back to it ;-)


Links:
Inspirations: ‘Rock Pool’ / ‘Laying It On The Line’

English Embroidery Stitch Diagrams
Deutsche Stickstichbeschreibungen

Couching stitches (English)
Couching stitches (German)

French knots (English)
French knots (German)

Ply-split Braiding: a (very) short description and resources
PDF Ply-split tutorials by Peter Collingwood (scroll down)

Friendship Bracelet

Friendship Bracelet

I once braid a Friendship Bracelet, but in just one colour. The ones at Heather’s Friendship Bracelets are so beautiful because of the different colour patterns she presents.

I haven’t done them yet, but they are on my to-do list (together with a gazillion of other things to try ;-))


Links:
Heather’s Friendship Bracelets
Note: even though there’s written something about a move I could stilll reach the links
Friendship Bracelet – first pattern of first set

Artist Book

Artist-Book

As mentioned before in the entry about paper beads, I once created an artist book.

Step Outside Your Box Saturdays posted this week a challenge about books and I thought it an opportunity to show my artist book ‘blickkontakt’ (which means ‘eye contact’).

I wanted ‘blickkontakt’ to give the viewer many surprises to discover and created therefore several windows and fold-outs.
The pages were created from cardboard and covered in hand-stained papers. Then I stamped, embroidered, tape transfered, sketched, scribbled and glued.


Enjoy the pictures
(Click thumbnails to see photos)

Artist-Book The cover with the round medaillon in its ‘pocket’. Along the spine I let hang the threads with the paper beads.


Artist-Book Still the cover, but this time showing the backside of the round medaillon.


Artist-Book Pages 1 & 2: You see the eye through a round window, the spirals are hand-embroidered, the little altered slide can be put into the lace pocket.


Artist-Book Pages 3 & 4: The images are tape transfered, the flourishes are hand-embroidered.


Artist-Book 
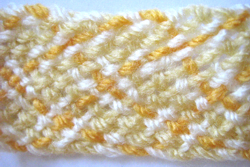
Pages 5 & 6: I stamped, wove paper, embroidered, crocheted. The dark circle is a free swinging altered bottle cap, the semicircle on the left upper side is a fold-out, where I glued a hand-beaded star.
(Unfortunately the tape transfers gleam so, that you can’t see their motif.)


Artist-Book Pages 7 & 8: I cut two little round windows into the right page.
The raffia forms a little pocket, where I put a transparent tape transfer tag.


Artist-Book 
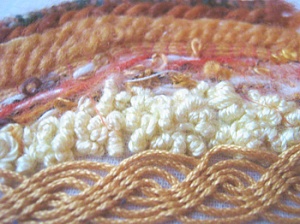
Pages 9 & 10: Stamping, tape transfers, embroidered spirals, fold-outs, hand-stained crochet flower and hand-made bead fringe.


Artist-Book The verso with tape transfers, stamps and a ringlet from a fake hairpiece.


I created more artist books, if you like to see them, take a look at Art.


Links:
If you want to create your own (Altered or Artist) Book, you may want to take a look at the following links (the list is far from complete!):

About Altered Books:
What is an altered book?
Definitions

At art-e-zine: Altered Book Workshop

Get Inspirations:
Gallery of Altered Book Artists
Google results of search for ‘Altered Book’
Google image results of search for ‘Altered Book’

Some of the used techniques:
Paper staining
Tea Staining Your Art Journal Pages
Tea Stain Paper

Image Transfer Techniques:
Easy Photo Transfers (different techniques)
Image Transfer
Packing Tape Image Transfers

Here at unikatissima:
Paper Beads